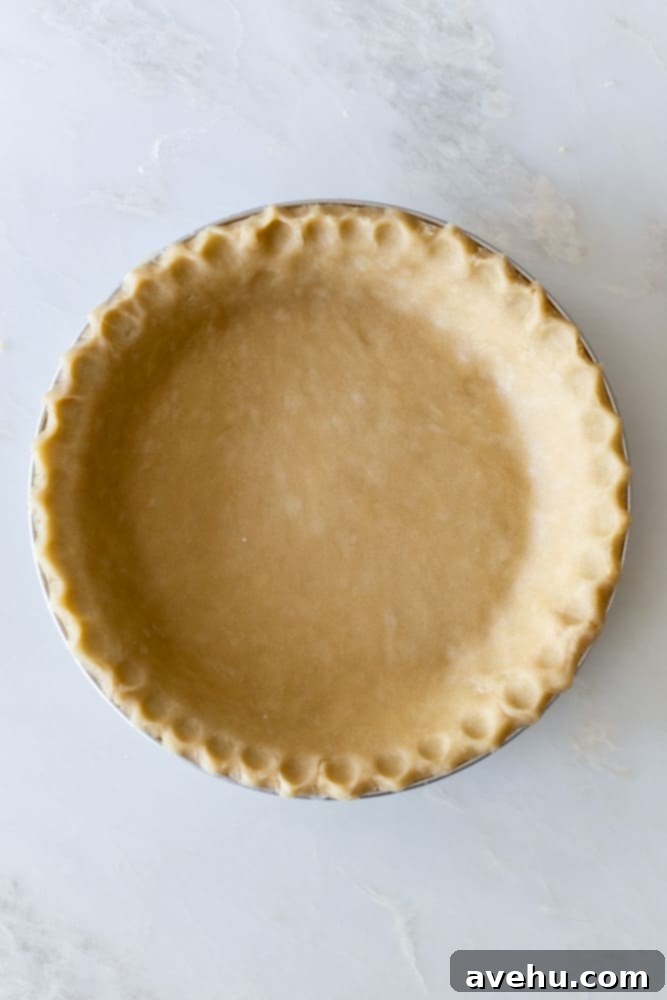
Mastering the Flaky Pie Crust: An Easy Recipe for Perfect Homemade Pies
Creating a perfectly flaky pie crust might seem daunting, but it’s actually a straightforward process with just a few simple rules and techniques. Forget the intimidation; you absolutely can achieve a beautifully tender and flaky crust at home!
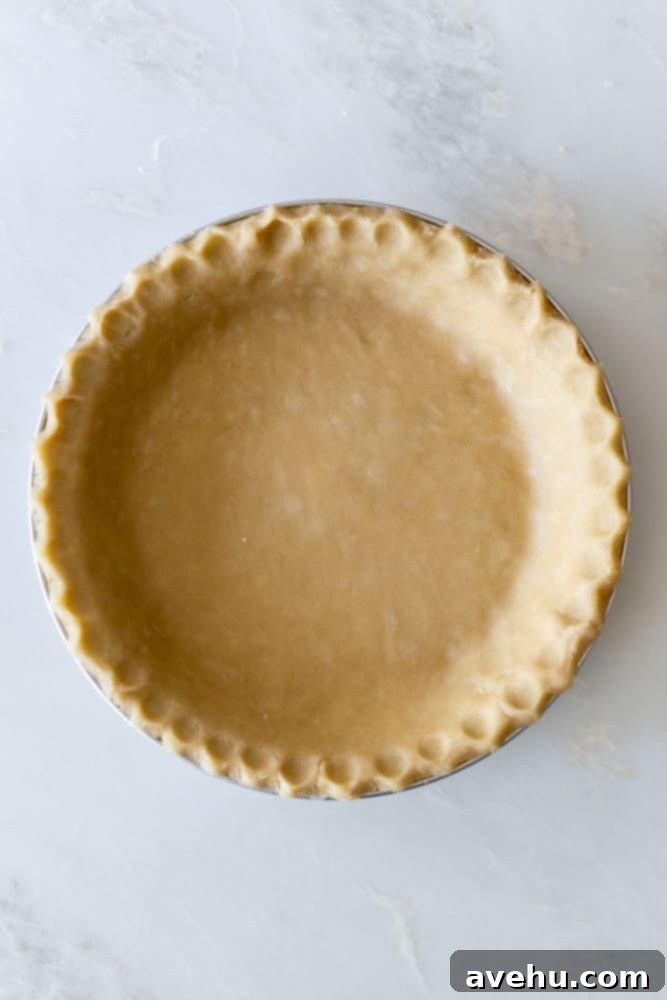
What makes this recipe even more appealing is its incredible simplicity. You don’t need a food processor or endless hand-mixing; your trusty stand mixer can do all the heavy lifting! I’ve personally found that using a stand mixer yields results identical to those from a food processor or traditional hand method. This recipe is designed to make two pie crusts, providing both a bottom and a top crust, or two single-crust pies for your favorite fillings.
Let’s dive into the essential ingredients you’ll need to create this amazing pastry.
Key Ingredients for a Flaky Pie Crust
While these are common pantry staples, each ingredient plays a crucial role in achieving the desired flavor and texture of a truly exceptional pie crust. This recipe strategically combines butter and shortening to deliver maximum flavor while ensuring that coveted flakiness.
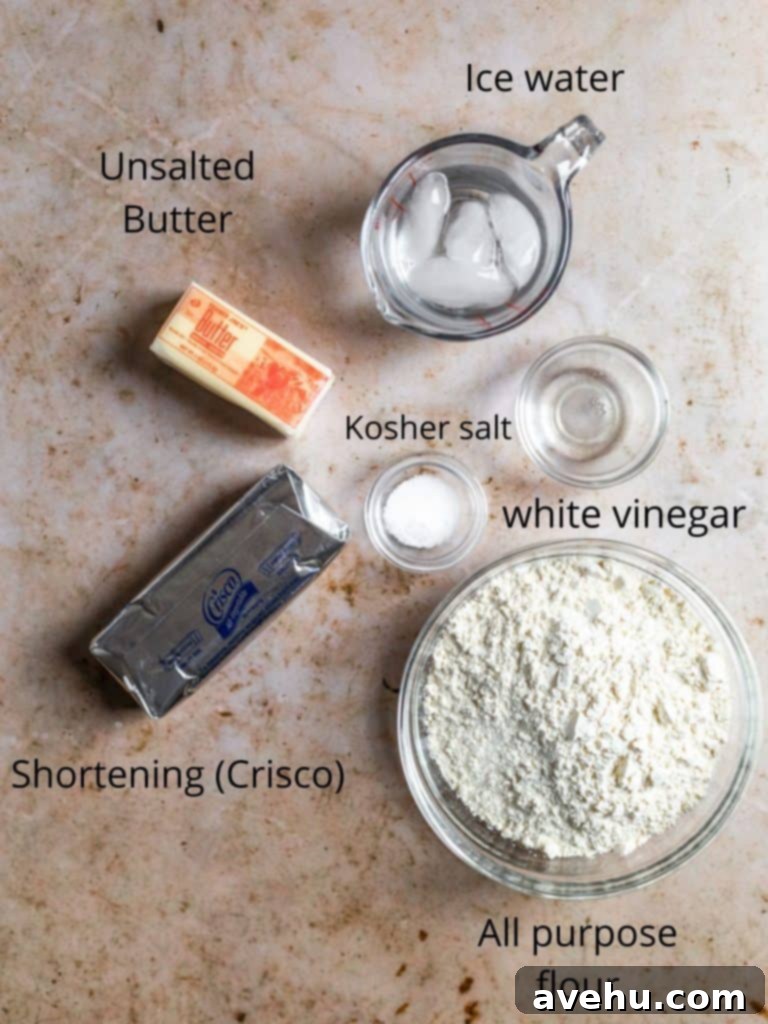
- Butter: This is where your pie crust gets its rich, irresistible buttery flavor that everyone loves. Beyond taste, butter’s water content turns to steam in the oven, helping to create those wonderful flaky layers.
- Shortening: While I typically reserve shortening for specific applications, it is absolutely indispensable for achieving an extra-flaky pie crust. Unlike some misconceptions, it won’t leave a waxy feeling on your tongue; instead, it provides a tender, melt-in-your-mouth texture that butter alone can’t quite replicate. Shortening has a higher melting point than butter, which contributes significantly to the separation of layers during baking.
- All-purpose flour: The foundation of our crust. For the best results, opt for a high-quality all-purpose flour. Brands like Bob’s Red Mill are known for their consistency and performance in baking, ensuring a reliable structure for your dough.
- Salt: A critical ingredient that balances the sweetness of your pie filling and enhances the overall flavor of the crust. Always use kosher salt over table salt, as its larger flakes and purer flavor provide a better outcome.
- Ice water: This component is crucial for bringing the dough together without raising its temperature. Keeping the ingredients, especially the fats, as cold as possible is key to a flaky crust. The cold water also helps to control gluten development, preventing a tough crust.
- White Vinegar: “Vinegar in pie crust?” you might ask! Yes, it’s a secret ingredient that works wonders. The small amount of acid in white vinegar helps to inhibit gluten development, preventing the dough from becoming tough or overmixed. It also prevents the crust from developing a dull, grayish color, ensuring a beautifully golden finish. A splash of lemon juice can be used as an alternative if you don’t have vinegar on hand.
Butter Vs. Shortening: The Great Debate
The culinary world often debates the merits of butter versus shortening in pie crusts. Both have their advocates, but for aspiring pie bakers, the combination often proves to be the easiest path to success.
Many experienced bakers swear by an all-butter crust for its unparalleled flavor. However, butter has a lower melting point, making it more challenging to handle, especially for beginners. The risk of the butter melting prematurely before hitting the oven is higher, which can lead to a less flaky, more greasy crust.
This is where shortening comes in as a fantastic ally. Shortening, such as Crisco, has a higher melting point than butter. When combined with butter, it acts as a stabilizing agent, making the dough more forgiving to work with. It significantly reduces the risk of the fats melting too soon, ensuring that those crucial pockets of fat remain intact, ready to create beautiful flaky layers during baking. For those new to pie making, using both shortening and butter provides the best of both worlds: the rich flavor of butter and the superior flakiness and ease of handling provided by shortening.
Pro Tip: Keep Your Fats Cold for Ultimate Flakiness
If there’s one golden rule to remember when making pie crusts, it’s this: keep your butter and shortening as cold as possible. This is arguably the most critical factor for achieving a truly flaky result.
But why is this so important? The magic of a flaky crust lies in the cold fat. When butter and shortening are kept cold and then cut into the flour, they create small, distinct lumps of fat distributed throughout the dough. As the pie bakes in a hot oven, these tiny lumps of cold fat begin to melt and release steam. This steam then pushes apart the layers of dough, creating those desirable air pockets and the distinct, delicate flakiness we all crave in a perfect pie crust.
Cold fat is precisely what creates the glorious, airy layers in your pie dough.
However, if your butter and shortening melt and become fully incorporated into the flour before the dough even enters the oven, those individual fat pockets won’t form. Instead of releasing steam and creating layers, the melted fat will simply coat the flour, resulting in a dense, greasy, and heavy crust rather than a light, flaky one. You’ll miss out on the “little lumps” that are essential for that magical transformation.
To ensure the best results, I recommend taking extra steps to maintain coldness: store your shortening in the freezer and use butter straight from the refrigerator. For an even colder environment, place your mixing bowl and the paddle attachment of your stand mixer in the freezer for about 20 minutes before you begin mixing. If you’re working by hand, cold hands and working quickly are equally beneficial.
Now that we’ve covered the crucial cold fat principle, let’s get into the step-by-step process of making your amazing pie crust!
How to Make the Perfect Flaky Pie Crust
This recipe is incredibly easy to make using your stand mixer. You won’t need to pull out your food processor, saving you a step and some cleanup!
Ingredients:
- 2 1/2 cups all-purpose flour
- 1 teaspoon kosher salt
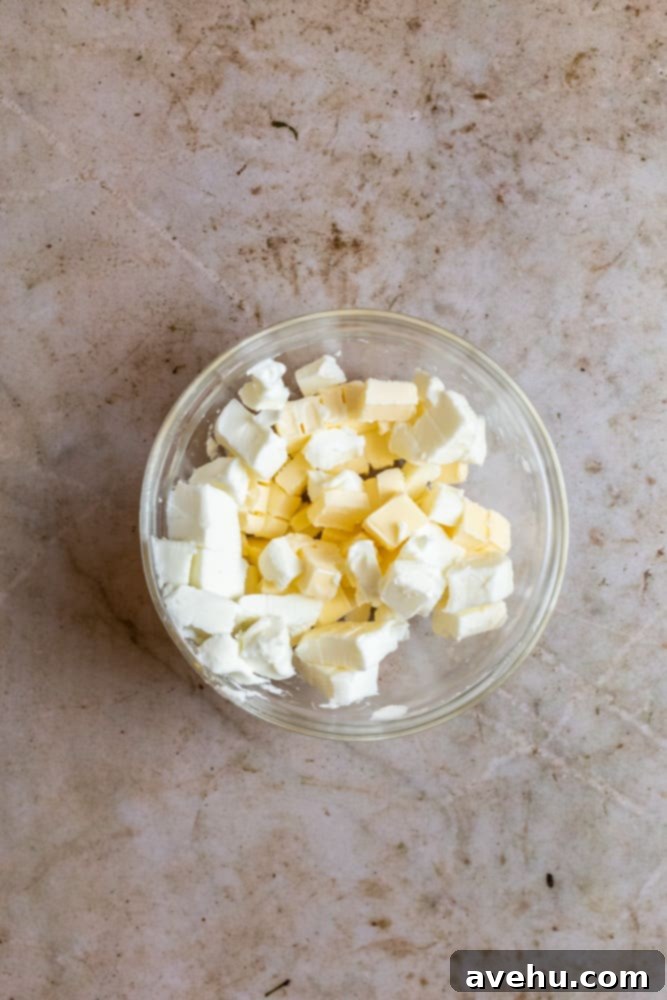
- 1/2 cup (1 stick) unsalted butter, cold and cubed into small pieces
- 1/2 cup vegetable shortening, cold and cubed into small pieces
- 1 tablespoon white vinegar
- 1/3 cup ice water (you may not use all of it)
Instructions:
-
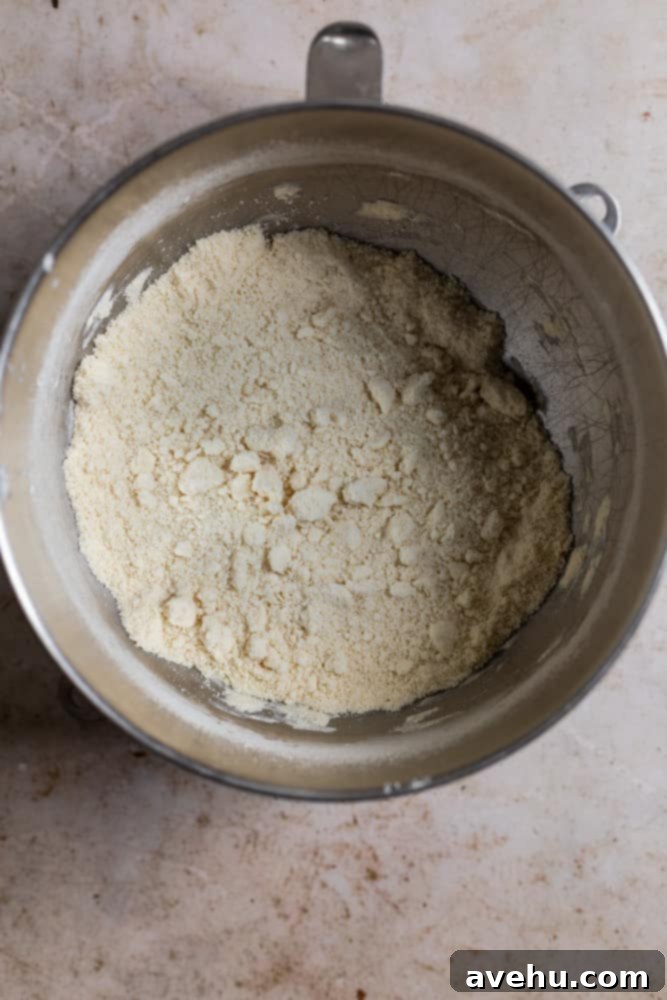
In the bowl of your stand mixer (preferably chilled), combine the 2 1/2 cups of all-purpose flour and 1 teaspoon of kosher salt. Add the 1/2 cup of cold, cubed unsalted butter and 1/2 cup of cold, cubed vegetable shortening to the flour mixture.
-
Attach the paddle attachment to your stand mixer. Mix on low-medium speed for about 2 minutes, or until the fat is “cut in.” This means the butter and shortening pieces should be coated in flour and resemble small crumbs, ranging in size from peas to tiny pebbles. The flour acts as a barrier, preventing the fat from melting too quickly.
-
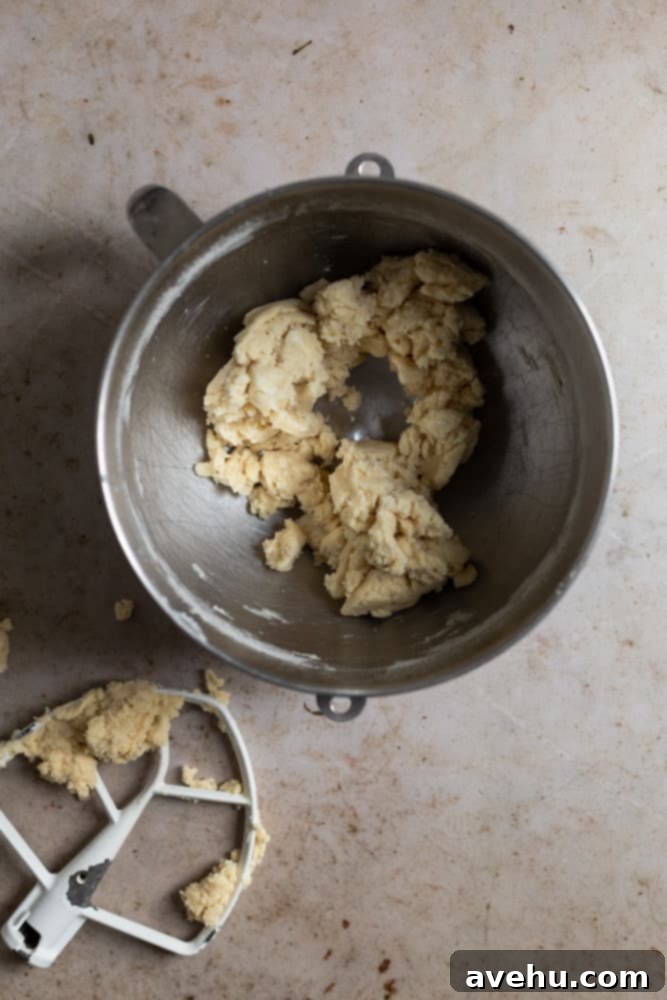
In a separate measuring cup, combine 1/3 cup of ice water with 2-3 ice cubes. Allow it to sit for a minute to ensure the water is truly ice-cold. Add the 1 tablespoon of white vinegar to the ice water. Gradually add the ice water, 1 tablespoon at a time, to the flour mixture while the mixer runs on low speed. Continue mixing until the dough starts to form large, shaggy clumps but doesn’t fully come together into a single ball. For me, this usually takes about 4 tablespoons of water, but it can vary slightly depending on your flour and humidity. Avoid adding too much water, as this can make the crust tough.
-
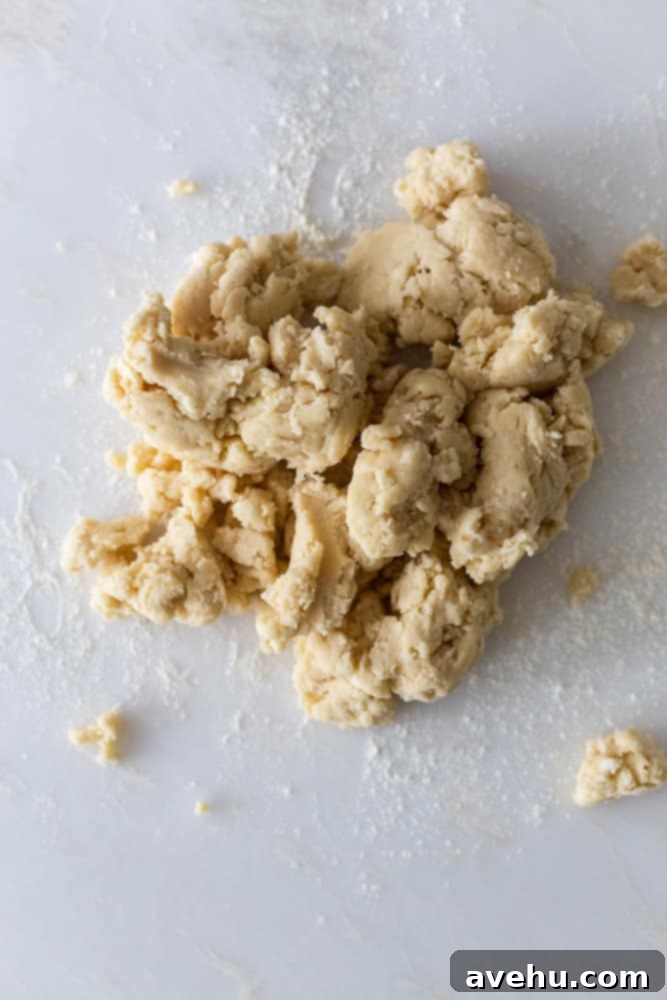
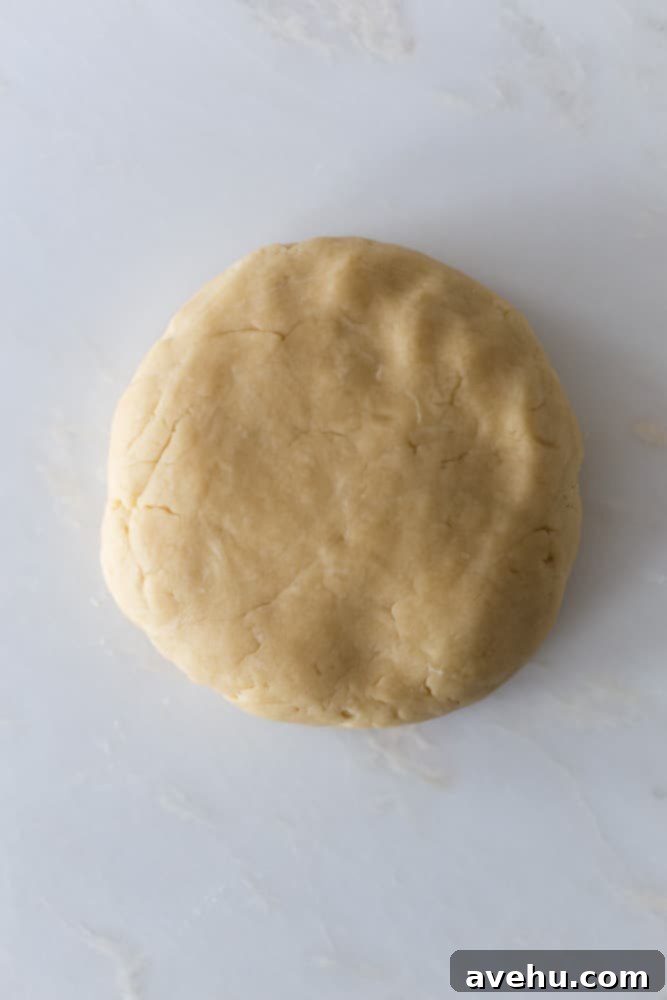
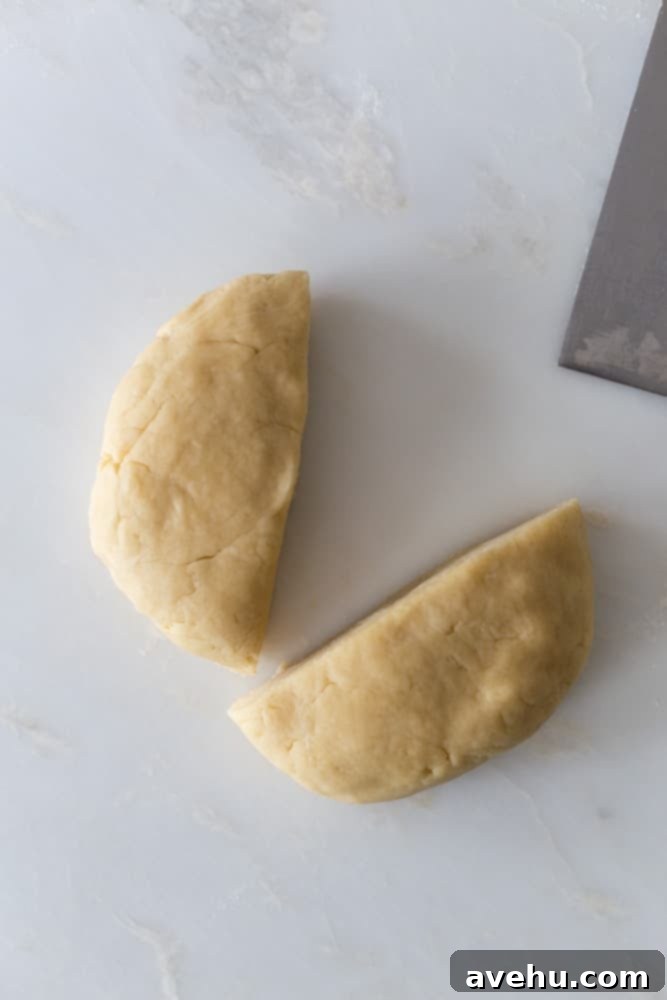
Turn the dough out onto a lightly floured surface. Gently knead the dough just enough to bring it together into a cohesive ball. Over-kneading will develop the gluten too much, resulting in a tough crust. Using a bench scraper or a large knife, cut the dough ball in half. Shape each half into a flat disc.
-
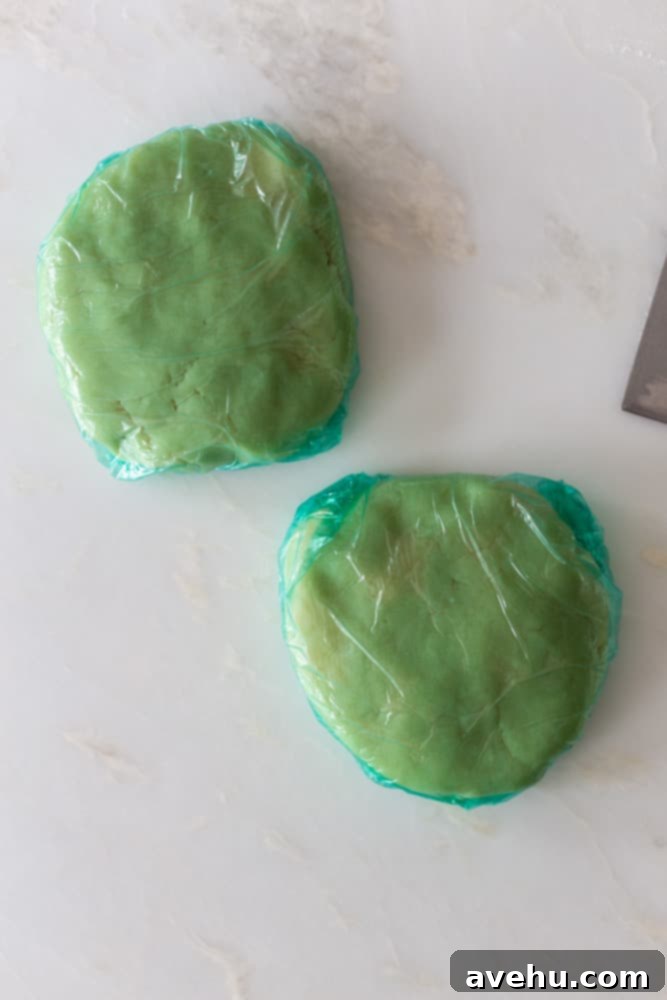
Wrap each dough disc tightly in plastic wrap. Chill the dough in the refrigerator for a minimum of two hours, or up to three days. For longer storage, you can freeze the wrapped dough for up to three months. Thaw frozen dough in the refrigerator overnight before use.
The Importance of Chilling Your Pie Dough
Do not be tempted to skip this vital step! Chilling the dough is paramount for several reasons:
Firstly, the chilling period allows the gluten, which was developed minimally during mixing, to relax. When gluten is relaxed, the dough becomes much easier to roll out and prevents it from springing back. This results in a tender, not tough, crust.
Secondly, and just as importantly, chilling ensures that the butter and shortening specks within the dough firm up again. As discussed, these cold, firm fat pockets are what create the steam that separates the layers and gives your pie crust its characteristic flakiness. If the fat isn’t sufficiently cold, it will melt too quickly in the oven, leading to a flat, greasy crust.
Finally, cold dough is simply easier to handle. It’s less sticky and more manageable, making the rolling process much smoother and less stressful.
Rolling Out Your Pie Dough
When you’re ready to bake, take only one piece of dough out of the fridge at a time. This helps keep the other disc cold. Unwrap it onto a lightly floured surface.
If the dough feels too hard and difficult to roll, let it sit at room temperature for about 5-10 minutes to soften slightly. Conversely, if it starts to stick excessively to your work surface or rolling pin, it’s a sign that the butter is warming up. In this case, pop it back into the fridge for 10-15 minutes to firm up again.
To roll, start from the center of the dough disc and roll outwards, applying even pressure. Rotate the dough by a quarter turn after every few rolls. This technique helps ensure a uniform thickness and prevents the dough from sticking to your counter. If your rolling pin starts to stick, dust it lightly with flour as well.
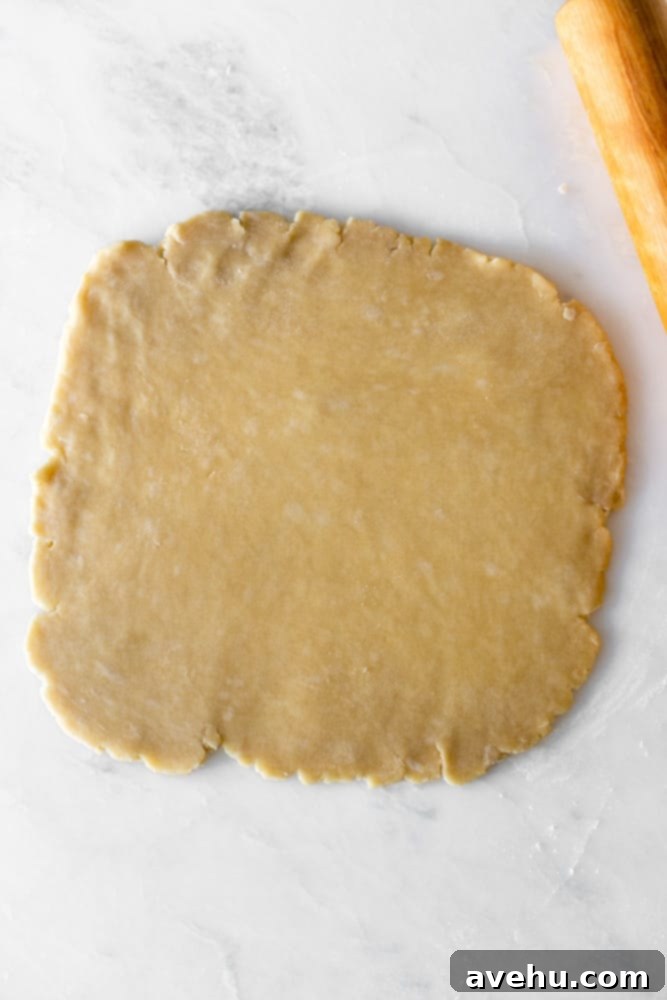
Aim to roll the crust to about 1/4-inch thick and into a 10-inch circle. The dough should lift easily from your work surface; if it resists, add a little more flour underneath. Remember, gentle but firm pressure is key. If you get a small tear, simply pinch it back together or patch it with a small piece of excess dough.
Getting the Pie Crust into the Pan
Don’t let this step cause you any stress! Many new bakers worry about tearing the crust, but rest assured, if the pie crust cracks, it’s easily fixable – you can simply press the edges back together. Luckily, this particular pie crust recipe is very forgiving and should allow for easy transfer into your pie pan.
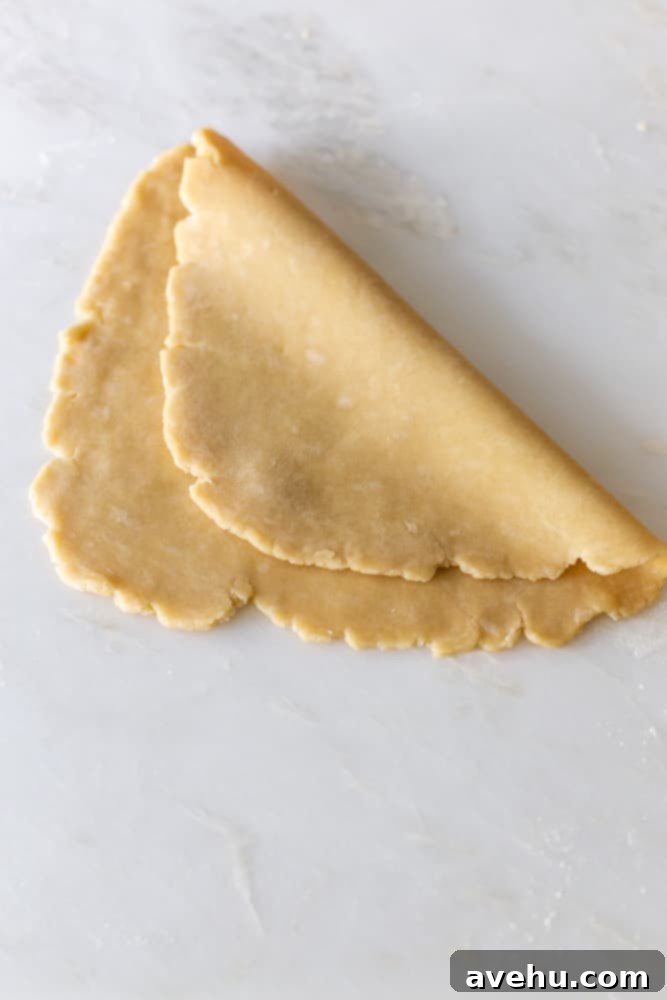
A simple and effective method for transferring the rolled-out dough is to lightly fold the pie crust in half, then in half again (into quarters). Carefully lift the folded dough and center it over your pie pan. Unfold it gently into the pan, easing it into the corners without stretching. Remember, it doesn’t have to be absolutely perfect – homemade charm is part of the appeal!
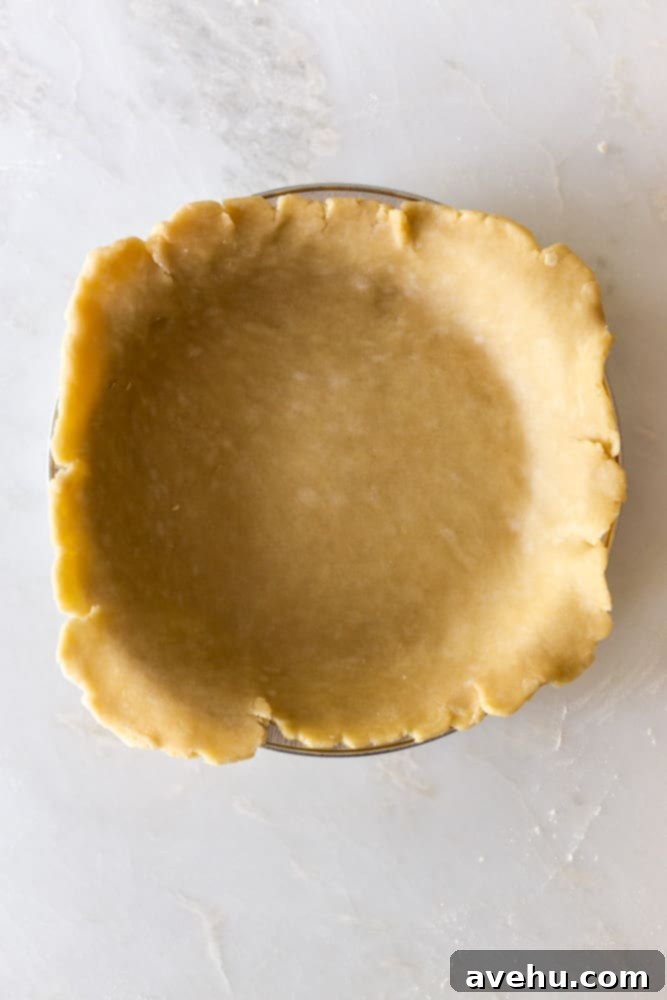
Choosing the Best Pie Pan
The type of pie pan you use can significantly impact your baking experience and the final crust. I’ve consistently found that a metal or aluminum pie plate with gently sloped sides is the optimal choice. These materials conduct heat efficiently, promoting a beautifully browned and crisp bottom crust.
I always find it much more challenging to fit and drape pie crusts into pans that have straighter, more vertical sides. The dough resists settling and often tears or bunches up, making the process frustrating.
Observe the difference between these two common pie plate styles:
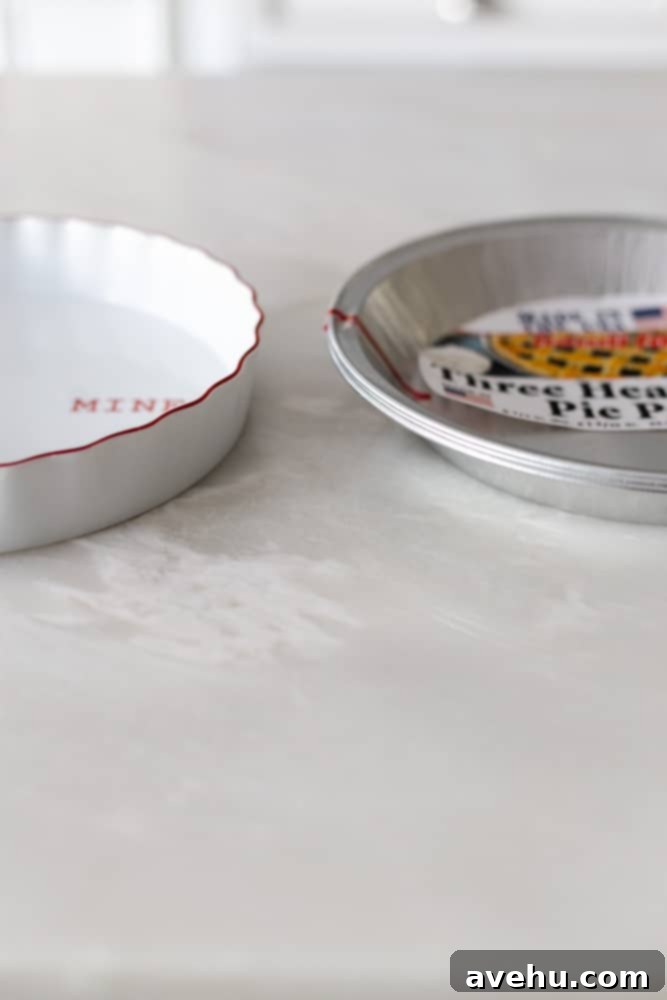
Because the metal pan features sloped sides, it provides a natural curve for the dough to follow, making it significantly easier to drape the crust smoothly and evenly without stretching or tearing. This simple detail can make a big difference in your pie-making process.
Trimming and Crimping the Edges
Once your pie crust is nestled in the pan, it’s time to refine its edges. To achieve a clean trim, all you need is a sharp paring knife. Position the knife on a slight diagonal against the outer rim of the pie plate and press down to neatly trim off any excess crust. Work your way around the entire circumference of the pie, ensuring an even overhang.
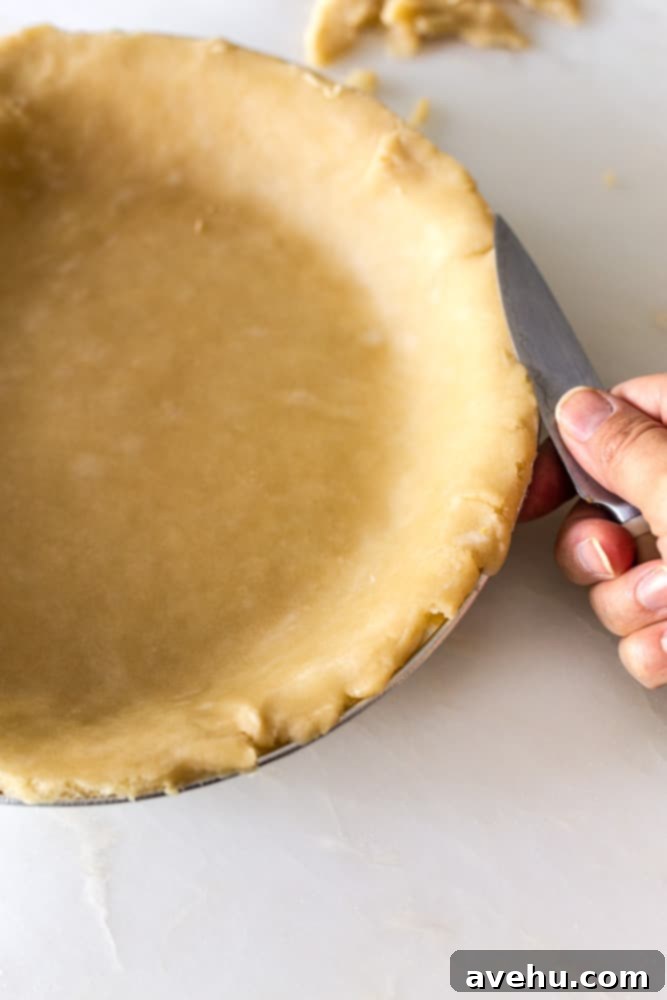
After trimming, you have a couple of options for creating a decorative edge. You can use the tines of a fork to press a simple, rustic pattern around the perimeter. Alternatively, for a classic look, you can crimp the edges using your fingers.
To finger-crimp the edges of the dough: place the pointer finger of one hand down onto the very edge of the crust, typically on the inside of the rim. With your other hand, use your pointer finger and thumb to gently pinch the dough from the outer side towards your stationary finger. This creates a pleasing wave or scalloped pattern. Repeat this motion all the way around the pie. It’s an intuitive process, and even a child can master it – if my 5-year-old can do it, so can you!
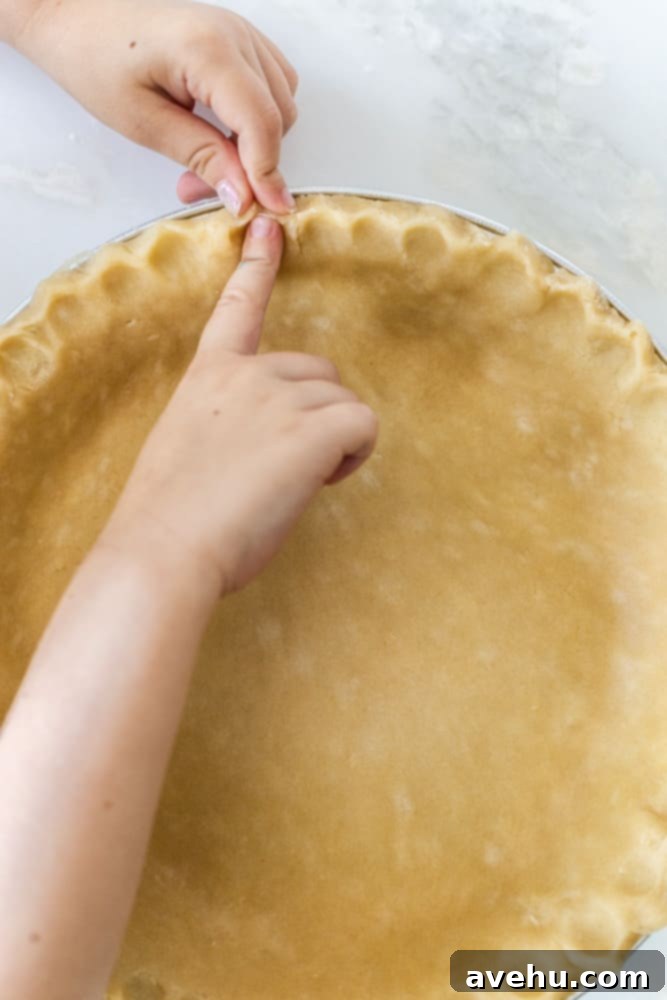
Once your crust is trimmed and crimped, it’s ready for baking according to your chosen pie recipe!
Essential Baking Tips for Your Pie Crust
The method for baking your pie crust will depend on whether your filling is cooked before baking or if it bakes along with the crust. Here are some key tips to guide you:
-
For a double-crust pie with a filling that needs to be baked (e.g., apple pie):
To prevent a soggy bottom crust, lightly sprinkle the bottom of your pie crust with a mixture of 1 teaspoon of all-purpose flour and 1 teaspoon of granulated sugar. This mixture absorbs excess moisture from the filling as it bakes. Fill the pie crust with your prepared filling, then repeat the rolling out process for your second dough disc to create the top crust. Place the top crust over the filling, crimp the edges with the bottom crust, and cut a few vents for steam to escape. For a golden finish, beat an egg (or just an egg yolk with a splash of water) and brush it over the entire top crust. Preheat your oven to 375°F (190°C) and bake for 30-35 minutes, or until the crust is golden brown and the filling is bubbly. If the edges of your pie crust start to brown too quickly, loosely cover them with strips of aluminum foil to prevent burning while the rest of the pie continues to bake.
-
For a pre-baked (blind-baked) crust, typically for fillings that don’t require further baking (e.g., custard or cream pies):
Prick the bottom and sides of the crust all over with the tines of a fork. This prevents the crust from puffing up during baking. Lay a piece of parchment paper directly on top of the pricked crust, then fill it with pie weights, dry beans, or dry rice. These weights help keep the crust from shrinking or bubbling. Bake the weighted crust in a preheated oven at 375°F (190°C) for 15 minutes. Carefully remove the parchment paper and weights, then continue to bake for another 5-10 minutes, or until the crust is golden brown and appears dry. Let the crust cool completely before adding your pre-cooked filling.
-
Creating a pie shield to protect crust edges from burning:
Even if you’re not using foil strips specifically for the first tip, a pie shield is an excellent tool to prevent the delicate edges of your pie crust from over-browning or burning. Take a large piece of aluminum foil, big enough to cover the entire pie. Place it on your counter and set the pie on top. Carefully crimp the foil up around the sides of the pie, so it covers only the outer edges of the crust, leaving the center exposed. This simple shield reflects heat away from the edges, allowing them to bake evenly with the rest of the pie. Apply the shield halfway through baking or whenever you notice the edges are browning faster than the center.
Ready to Bake? Try These Delicious Pie Filling Recipes!
Now that you have your perfect flaky pie crust ready, it’s time to choose a delicious filling. Here are some fantastic recipes that pair wonderfully with this homemade crust:
- Apple Pie Bars
- Easy Cranberry Pie
- Easy Key Lime Pie
Flaky Pie Crust Recipe (Makes 2 Crusts)
This easy-to-follow recipe, suitable for your stand mixer, will guide you to make two perfectly flaky pie crusts for your favorite sweet or savory pies.
Prep time: 10 minutes
Cook time: 35 minutes (if baking empty with weights)
Chilling time: 2 hours
Total time: 2 hours 45 minutes
Yields: 8 servings (per pie)
Ingredients:
- 2 1/2 cups all-purpose flour
- 1/2 cup (1 stick) unsalted butter, cold, cubed small
- 1/2 cup vegetable shortening, cold, cubed small
- 1 teaspoon kosher salt
- 1 tablespoon white vinegar
- 1/3 cup ice water (start with 4-5 tablespoons, add more if needed)
Equipment:
- Stand mixer with paddle attachment (can also be done by hand or food processor)
- Rolling Pin
- Pie plate (metal or aluminum with sloped sides recommended)
- Measuring cups and spoons
- Plastic wrap
Instructions:
-
Mixing the Dough:
- In the bowl of a stand mixer (preferably chilled), add the 2 1/2 cups flour, 1 teaspoon salt, the 1/2 cup cold diced butter, and 1/2 cup cold diced shortening.
- With the mixer on low-medium speed, mix with the paddle attachment until pea-size lumps form. This should take about 2 minutes. The flour should coat the fat, and the mixture will resemble coarse crumbs.
- In a separate cup, combine 1 tablespoon of white vinegar with 1/3 cup ice water. Add the liquid to the flour mixture one tablespoon at a time, continuing to mix on low speed until larger clumps of dough begin to form. You might not need all 1/3 cup of water; often 4-5 tablespoons are sufficient. Stop mixing when the dough looks shaggy and comes together in large clumps, but not a single ball.
- Pour the dough out onto a lightly floured surface. Gently knead the dough a few times just until it comes together into a cohesive ball. Do not overwork the dough. Cut the ball in half with a bench scraper or knife, shape each half into a flat disc, and wrap tightly in plastic wrap.
- Chill the dough in the refrigerator for a minimum of 2 hours before rolling, or store for up to 5 days. For longer storage, freeze for up to 3 months.
-
Rolling Out the Dough:
- Take one pie crust disc out of the fridge and unwrap it onto a lightly floured surface. Lightly flour your rolling pin as well.
- Roll the dough from the center outwards, rotating the disc a quarter turn after every few rolls to prevent sticking and ensure even thickness. If the dough is too stiff, let it sit for 5 minutes. If it becomes too sticky, return it to the fridge for 10-15 minutes. Continue rolling until the pie crust forms a roughly 10-inch round and is about 1/4 inch thick. It should lift easily from your work surface.
- To transfer, gently fold the rolled crust onto itself in half, then carefully lift it and unfold it into your chosen pie plate. Trim any excess dough with a paring knife, leaving about a 1/2 inch overhang, and then crimp the edges decoratively using your fingers or a fork.
- Follow the specific baking instructions for your pie recipe. Refer to the “Essential Baking Tips” section above for guidance on single or double crust pies and blind baking.
Notes:
Tips on baking the crusts:
- For a double-crust pie: Preheat oven to 375°F (190°C). Dust the bottom pie crust with a mixture of 1 tsp sugar and 1 tsp flour to prevent a soggy bottom. Fill with your chosen filling and cover with the second rolled crust. Crimp the edges. Beat an egg and brush it over the top crust for a golden shine. Bake for 30-35 minutes, or as your recipe suggests. If the edges begin to brown too quickly, cover them with strips of aluminum foil to act as a pie shield.
- For a one-crust recipe (blind-baking): Prick the bottom and sides of the crust with a fork. Line the crust with parchment paper and fill with dry rice, beans, or pie weights. Bake for 15 minutes at 375°F (190°C). Remove the weights and parchment paper, then bake for another 5-10 minutes until golden brown. Cool completely before filling with pre-baked fillings.
- Prevent the sides from burning by covering them in tin foil: To create a simple pie shield, rip a large piece of tin foil. Place it on the counter, put the pie on top, and crimp the foil tightly up the sides of the pie so it covers only the outer crust edges, leaving the filling exposed. This protects the edges from over-browning. Continue to bake as directed.
Nutrition Information (per 1 slice serving):
Serving: 1 slice, Calories: 358 kcal, Carbohydrates: 30g, Protein: 4g, Fat: 25g, Saturated Fat: 11g, Cholesterol: 31mg, Sodium: 294mg, Potassium: 42mg, Fiber: 1g, Sugar: 1g, Vitamin A: 355IU, Calcium: 9mg, Iron: 2mg
Recipe Metadata:
Course: Dessert
Author: Sam Adler
Cuisine: American
Did you make this recipe? Please leave a star rating and review in the form below. I read and respond to them all! Also, don’t forget to tag me on Instagram @frostingandfettuccine with all your beautiful desserts!
