Ultimate Fluffy Blackberry & White Chocolate Layer Cake: A Decadent Homemade Delight
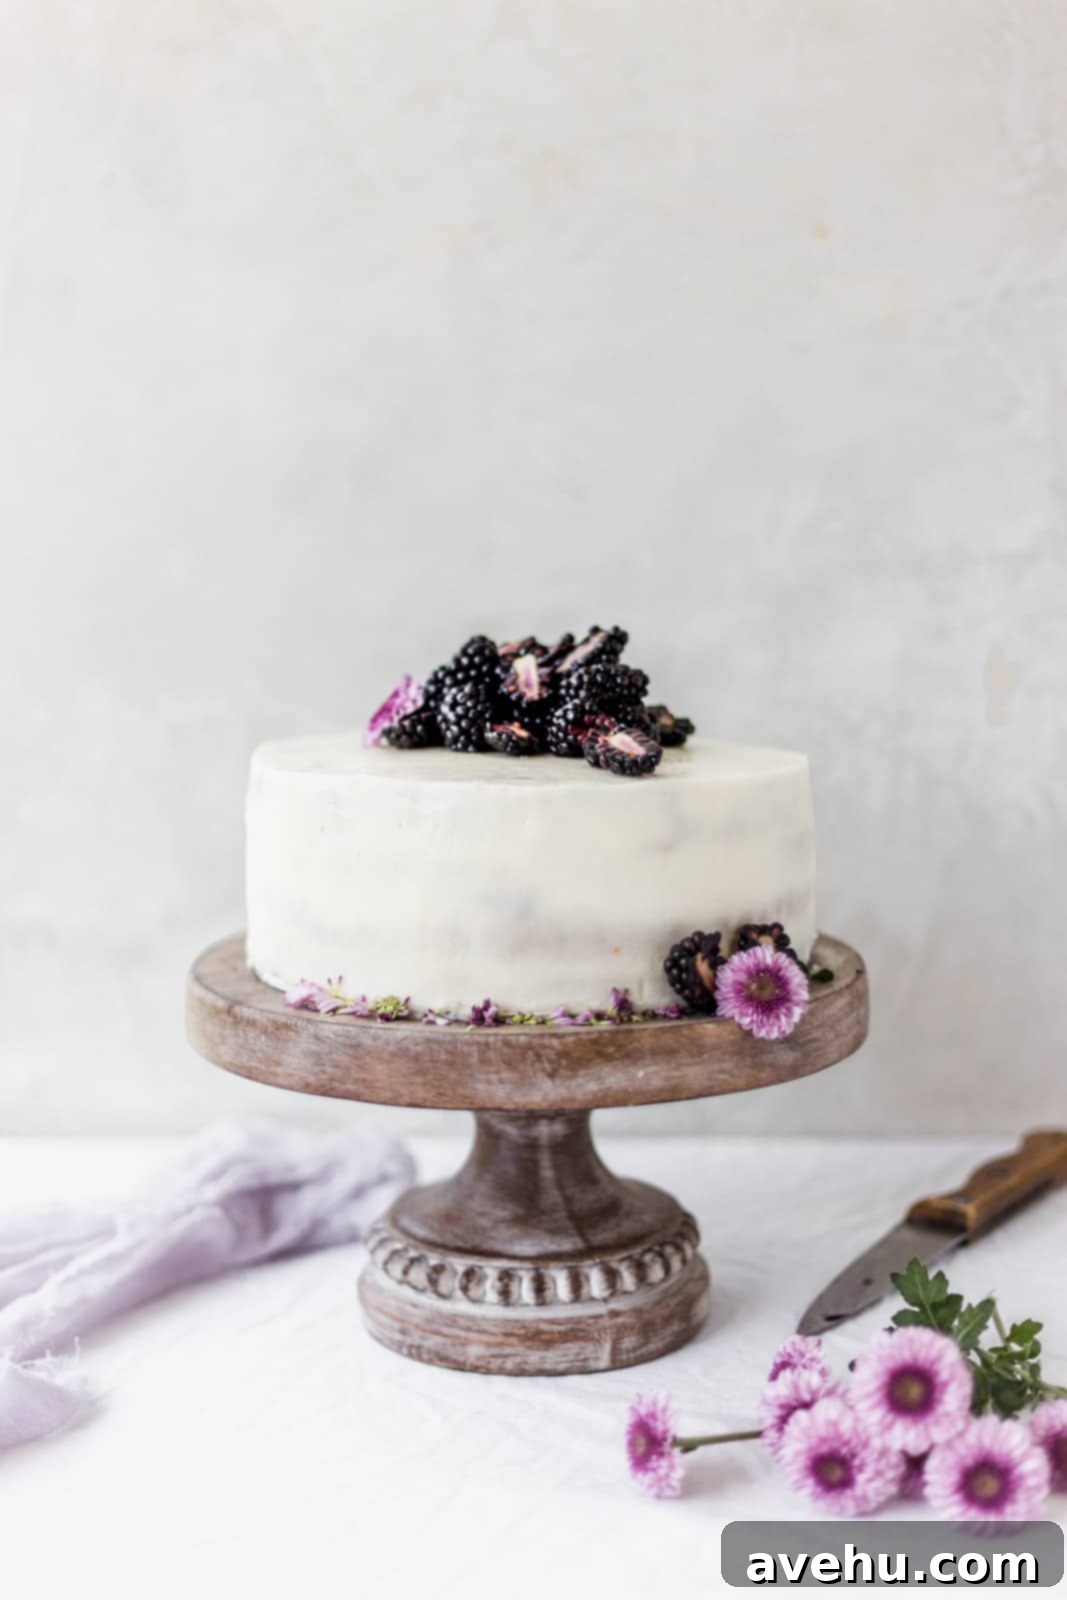
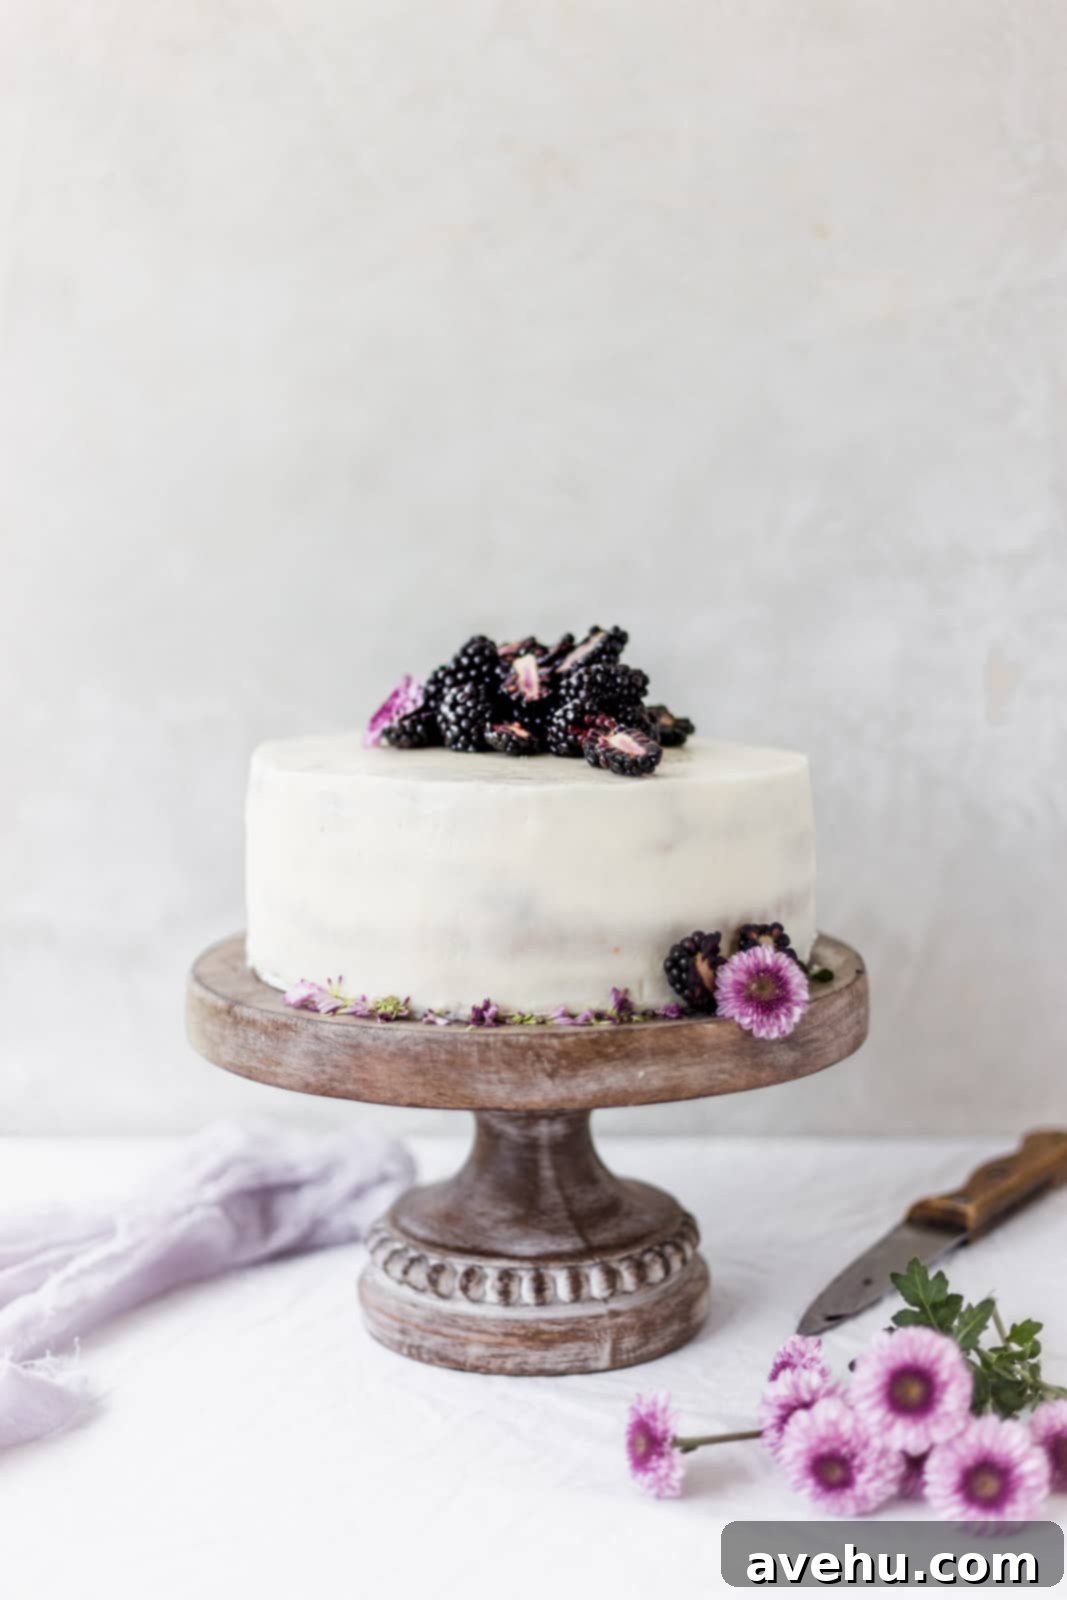
Prepare to be enchanted by this truly remarkable blackberry cake, a celebration of flavor and texture that’s destined to become your new favorite dessert. This cake isn’t just fluffy; it’s exquisitely light, boasting tender layers generously studded with vibrant blackberries, all enveloped in a rich, velvety white chocolate buttercream. It’s the perfect solution for anyone with an abundance of fresh or frozen blackberries, offering a delicious and impressive way to transform them into a show-stopping treat. Its bright, balanced flavors make it an ideal centerpiece for any spring brunch, summer gathering, or special occasion.
As a trained pastry chef with years of experience experimenting with countless flavor combinations, I can confidently say that this pairing of blackberries and white chocolate is pure magic. It’s a testament to how often truly incredible ingredients are overlooked in the vast world of baking. Individually, both blackberries and white chocolate possess unique charms, but when brought together in this cake, they create a symphony of tastes that is utterly captivating and surprisingly underrated.
The secret to its irresistible appeal lies in the exquisite balance. The vibrant tartness and slight tang of the fresh blackberries perfectly cut through the sweet, creamy richness of the white chocolate, resulting in a harmonious flavor profile that is neither too sweet nor too sharp. It’s truly a match made in heaven for your taste buds! This sensational cake, crowned with a rich and silky white chocolate buttercream frosting, is specifically designed to shine during the brighter seasons, making it an essential bake for spring or summer gatherings.
Beyond its incredible flavor, the cake itself is a marvel of baking science. The layers are engineered to be incredibly light and fluffy, yet robust enough to stack beautifully, ensuring your stunning layer cake holds its shape perfectly. While this white chocolate buttercream is a dream, if you’re feeling adventurous or simply prefer other flavors, this versatile cake base pairs wonderfully with other frostings. You could opt for my ultimate cream cheese frosting for a classic tang, or even this bright and zesty orange buttercream frosting to fill and frost the cake. No matter your choice, this homemade blackberry cake is guaranteed to be a huge hit wherever it’s served, leaving everyone asking for a second slice!
Essential Ingredients for Your Blackberry Cake Masterpiece
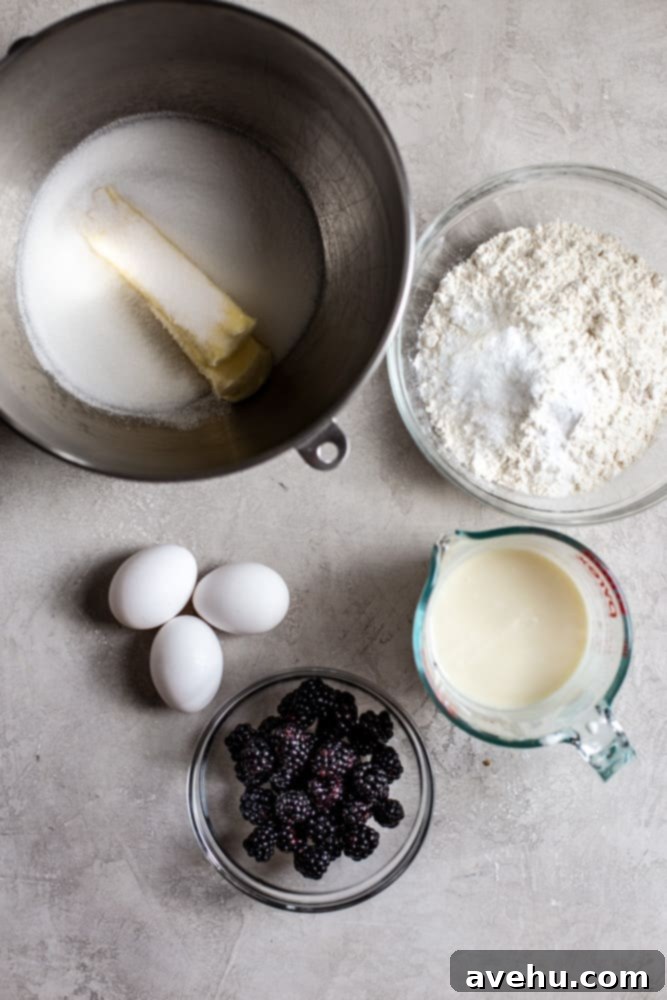
Crafting this delightful blackberry cake from scratch requires a selection of fresh, high-quality ingredients, each playing a crucial role in achieving its signature light texture and rich flavor. Here’s a comprehensive list of what you’ll need to gather before you begin your baking adventure:
- Unsalted Butter: Softened to room temperature, it’s essential for achieving that light, fluffy texture through the creaming method.
- Granulated Sugar: Provides sweetness and helps create air pockets when creamed with butter.
- Large Eggs: Act as binders and contribute to the cake’s structure and richness. Ensure they are at room temperature.
- All-Purpose Flour: The primary structural component of the cake.
- Baking Powder: A leavening agent that helps the cake rise and become airy.
- Baking Soda: Another leavening agent, activated by the acidity in the yogurt, contributing to a tender crumb.
- Kosher Salt: Enhances all the flavors in the cake and balances the sweetness.
- Whole Milk Yogurt: Adds incredible moisture, tenderness, and a slight tang, reacting with the baking soda for a perfect rise.
- Orange Juice: Provides a subtle citrus note that brightens the overall flavor profile and adds additional moisture.
- Fresh or Frozen Blackberries: The star ingredient, offering bursts of tart fruitiness. Both fresh and frozen (not thawed) work wonderfully.
- Extra All-Purpose Flour (for dusting): Crucial for coating the blackberries to prevent them from sinking to the bottom of the cake layers during baking.
Step-by-Step Guide: How to Bake Your Fluffy Blackberry Cake
Making this homemade blackberry cake is surprisingly straightforward, especially since your trusty stand mixer or hand mixer will handle most of the heavy lifting. Follow these simple steps for a perfect bake every time:
- Step 1: Cream Butter and Sugar. Begin by creaming the softened unsalted butter and granulated sugar together until the mixture is light, fluffy, and pale yellow. This process incorporates essential air, which is key to a tender cake crumb.
- Step 2: Incorporate Eggs. Add the large eggs one at a time, ensuring each egg is fully mixed into the butter-sugar mixture before adding the next. This creates a stable emulsion and adds to the cake’s structure. Remember to scrape down the sides of the bowl as needed.
- Step 3: Prepare Dry and Wet Ingredients. In separate bowls, combine your dry ingredients (flour, baking powder, baking soda, kosher salt) and your wet ingredients (whole milk yogurt and orange juice). Keeping them separate at this stage ensures even distribution.
- Step 4: Alternate Additions. Gradually add the dry and wet ingredients to the creamed mixture in alternating fashion, starting and ending with the dry ingredients. Mix on low speed, just until incorporated, to avoid overmixing. This method allows the flour to properly absorb moisture and develop structure without becoming tough.
- Step 5: Dust and Fold Blackberries. Gently toss your fresh or frozen blackberries with a small amount of all-purpose flour. This crucial step prevents the berries from sinking to the bottom of your cake layers during baking. Carefully fold the dusted blackberries into the batter using a spatula, being mindful not to break them.
- Step 6: Bake to Golden Perfection! Divide the batter evenly into your prepared cake pans and bake until golden brown and a toothpick inserted into the center comes out clean.
- Observe the Batter: When mixed correctly, your cake batter will appear smooth, creamy, and wonderfully light, ready to transform into delightful cake layers.
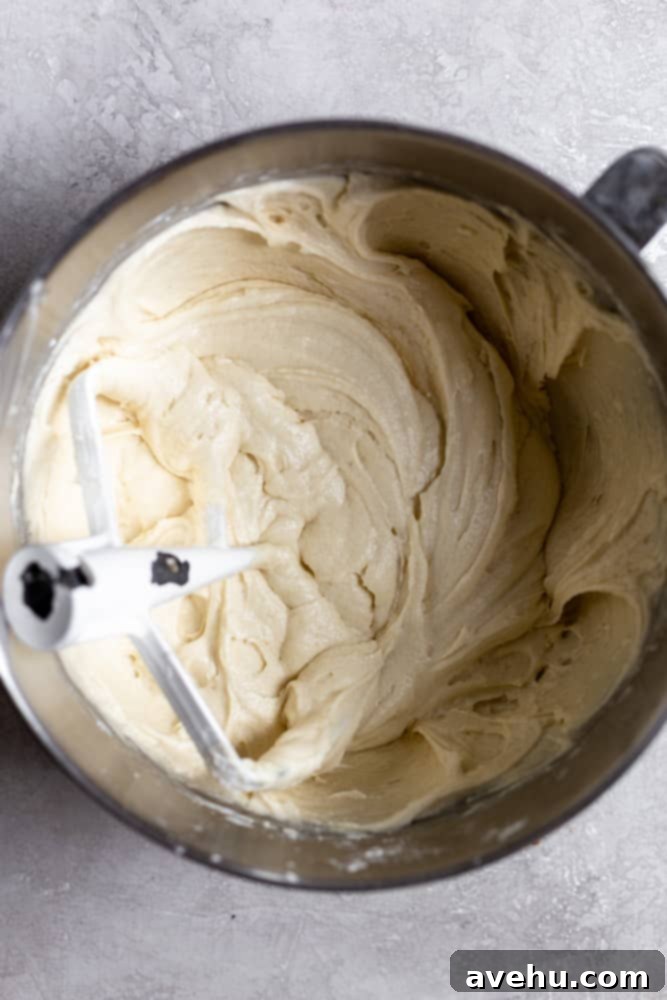
Understanding the Creaming Mixing Method for Perfect Cake Texture
Baking is often a blend of art and science, and there’s a precise method to achieving the light, airy texture of this blackberry cake. It’s not just about dumping all your ingredients into a bowl; the order and technique matter immensely. The reason we follow a specific sequence for this recipe is because we are utilizing a classic cake mixing method known as the creaming method.
The creaming method is foundational to many delicious cakes. It begins with vigorously creaming together the softened butter and granulated sugar until they are light, fluffy, and pale in color. This crucial step isn’t just about combining ingredients; it’s about aeration. As the sugar crystals rub against the butter, they create countless tiny air pockets, trapping air within the mixture. This trapped air is what expands during baking, giving your cake its incredible lift and a tender, melt-in-your-mouth crumb.
Following the initial creaming, you gradually incorporate the eggs, one at a time. This ensures that each egg is fully emulsified into the butter-sugar mixture, contributing to the cake’s structure and richness without deflating the air you’ve worked so hard to incorporate.
The subsequent alternation of dry and wet ingredients is equally important. The flour needs to absorb the moisture from the wet ingredients (like yogurt and orange juice) to properly develop the cake’s structure. If you were to add all the dry ingredients at once, the flour wouldn’t be able to adequately hydrate, leading to a denser, less tender cake. By alternating, you allow for gradual absorption and even distribution, preventing the formation of tough gluten strands that result from overmixing.
Another vital tip to ensure your beautiful blackberries remain suspended throughout your cake layers, rather than sinking to the bottom, is to dust them with a light coating of flour before adding them to the batter. This thin layer of flour creates friction, allowing the berries to adhere to the cake batter’s structure during baking.
To execute this, simply place your fresh or frozen blackberries in a small bowl, sprinkle them with the specified amount of all-purpose flour, and gently toss until they are lightly coated. Once coated, carefully fold them into the prepared cake batter using a spatula. Mix slowly and gently to prevent the delicate berries from breaking up and coloring your beautiful white cake batter.
Expert Tips for Preparing Your Cake Pans
One of the most disheartening experiences in baking is having your perfectly baked cake layers stick to the pan. To prevent this culinary tragedy, proper pan preparation is non-negotiable. I always highly recommend generously lining your cake pans with a thick and even layer of baking spray. For superior release, I particularly favor sprays that have flour added to them, such as Baker’s Joy.
Alternatively, if you prefer a more traditional method, you can precisely cut out parchment paper circles that match the exact diameter of your cake pans. Place these parchment circles at the bottom of the greased pans, which creates a foolproof non-stick barrier. For extra insurance, you can also lightly grease and flour the sides of the pan after placing the parchment.
Taking these preventive measures ensures a smooth and effortless release of your delicate cake layers, avoiding any frustrating situations where you might struggle to get the cake out of the pan in one piece. This small step makes a huge difference in the final presentation of your beautiful homemade blackberry cake.
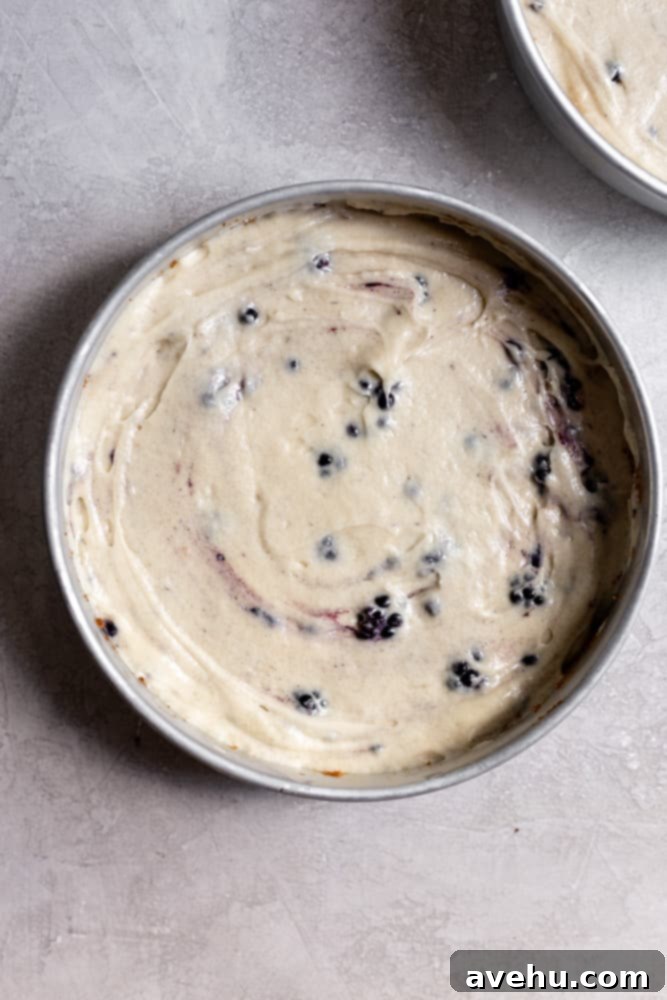
For this delicious blackberry cake recipe, my favorite Wilton cake pans are ideal. You have the flexibility to bake this recipe in either two 8-inch cake pans for standard layers or split the batter among three 6-inch cakepans for a taller, more dramatic presentation. Whichever size you choose, ensure your pans are prepared diligently to guarantee perfectly released layers every time.
Baking Instructions and Achieving Perfectly Level Cake Layers
Once your batter is evenly distributed into the prepared pans, it’s time for the oven. For 8-inch cake pans, bake at 350° F (175°C) for approximately 30-35 minutes. If you’re using 6-inch pans for a taller cake, the baking time will be slightly shorter, typically around 28-30 minutes. Baking times can vary depending on your oven, so it’s always best to rely on visual cues for doneness.
You’ll know your cakes are perfectly baked when a few key indicators are present: the edges of the cake will begin to slightly pull away from the sides of the pan, indicating that the cake has set. Additionally, when you gently press the top of the cake, it should spring back. The most reliable test is to insert a toothpick into the very center of a cake layer; if it comes out clean with no wet batter clinging to it, your cake is done. Avoid overbaking, as this can lead to a dry cake.
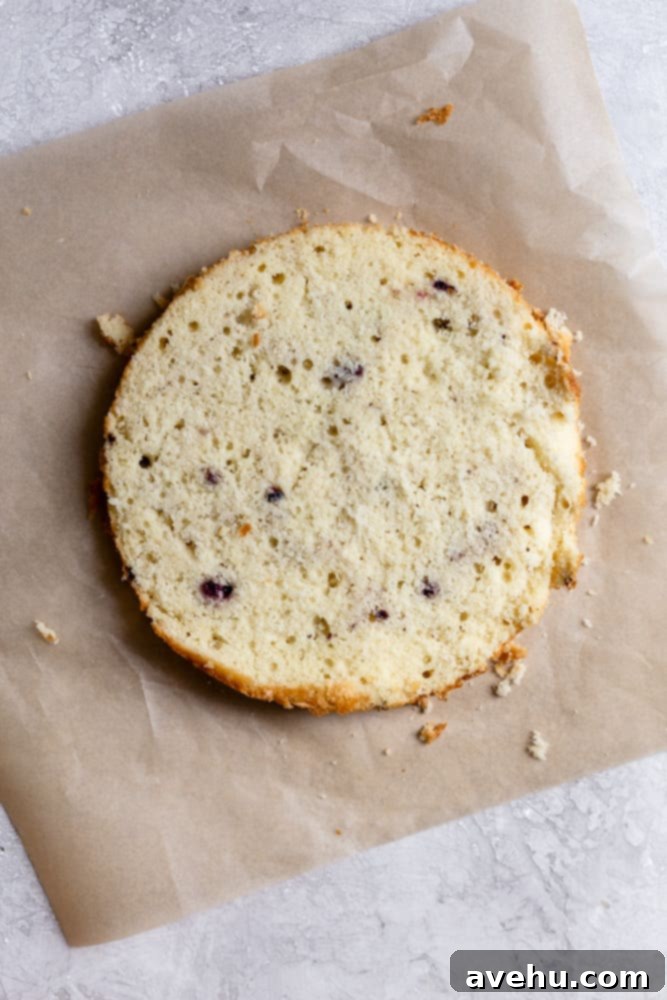
Once cooled, I always take the extra step to level off my cake layers. This means carefully slicing off any domed tops to create flat, even surfaces. This crucial step not only ensures that your cake layers stack beautifully without wobbling but also makes the filling and frosting process significantly easier, resulting in a professional-looking finish. To level your cakes, use a long, serrated knife and a steady hand to slice horizontally across the top of each layer. Don’t worry about achieving absolute perfection; a generally flat surface is all you need for a stunning stacked cake.
Crafting the Decadent White Chocolate Buttercream
No glorious blackberry cake is complete without an equally impressive frosting, and this white chocolate buttercream is a showstopper. For this, you’ll once again rely on your trusty stand mixer or hand mixer. If you used it for the cake batter, be sure to give it a thorough wash and dry before moving on to the buttercream!
The first critical step is to melt the white chocolate. White chocolate can be a bit finicky and has a tendency to seize (harden and become lumpy) if overheated or exposed to moisture. You have two excellent methods for melting:
- Microwave Method: Place the white chocolate chips in a microwave-safe bowl. Microwave in short bursts of 30 seconds, stirring thoroughly after each interval, until smooth and fully melted. Do not rush this process.
- Double Boiler Method: This is my preferred method for gentle and controlled melting. Set up a double boiler by placing about an inch of water in a small pot and bringing it to a gentle simmer on the stove. Place a heat-proof bowl (make sure it’s larger than the pot opening so it sits securely on top without touching the water) over the simmering water. Add the white chocolate to the bowl. The steam from the water will gently melt the chocolate. Stir continuously until the chocolate is smooth and glossy.
Regardless of the method, once your white chocolate is melted, it is absolutely essential to set it aside and allow it to cool to room temperature before adding it to your butter. If the chocolate is still warm, it will melt your softened butter, resulting in a runny buttercream that won’t hold its shape.
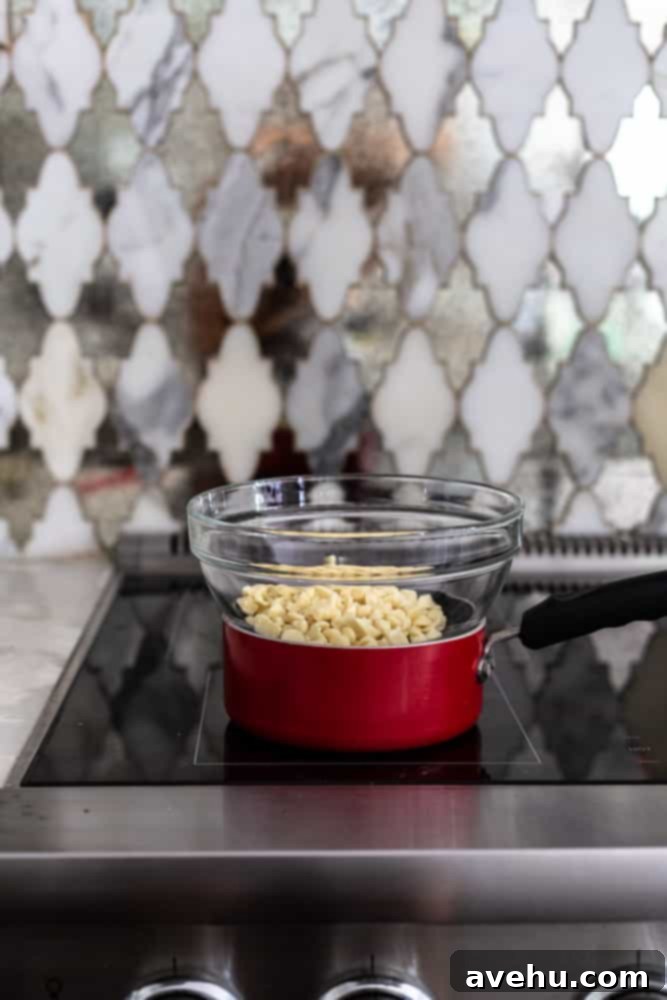
Important Tips for Using a Double Boiler:
- Ensure your mixing bowl is large enough to sit securely on top of the pot without the bottom of the bowl touching the simmering water. Direct contact with boiling water can scorch the chocolate.
- You only need a small amount of water to generate steam – about an inch is perfect. Too much water and it might boil over and introduce moisture to your chocolate.
- Crucially, do not allow *any* water or steam condensation to get into the chocolate. Even a single drop can cause white chocolate to seize and become hard and grainy.
- After melting, let the chocolate cool for at least 5-10 minutes before incorporating it into the buttercream. It should be just slightly warm or at room temperature.
While the chocolate is cooling, add the softened unsalted butter and confectioners’ sugar to the bowl of your mixer. Begin whipping on a low speed to combine the ingredients, gradually increasing the speed to medium-high. Continue to whip until the mixture is light, fluffy, and homogenous. Once the cooled melted white chocolate is ready, slowly pour it into the mixing bowl while the mixer is still running on low. Finally, add the cream. Increase the speed again and mix until all ingredients are thoroughly combined and the buttercream is wonderfully light and smooth. Don’t forget to scrape down the sides of the bowl periodically to ensure everything is incorporated evenly. Continue mixing until you achieve a beautifully fluffy and pipeable consistency.

Decorating Your Delicious Blackberry Cake
This generous white chocolate buttercream recipe yields more than enough frosting to beautifully fill and coat either two 8-inch cake layers or three 6-inch cake layers, giving you ample frosting for a gorgeous finish. If you’re new to the art of cake decorating or simply want to refine your skills, don’t hesitate! You can learn how to decorate your cakes like a pro with some surprisingly simple techniques.
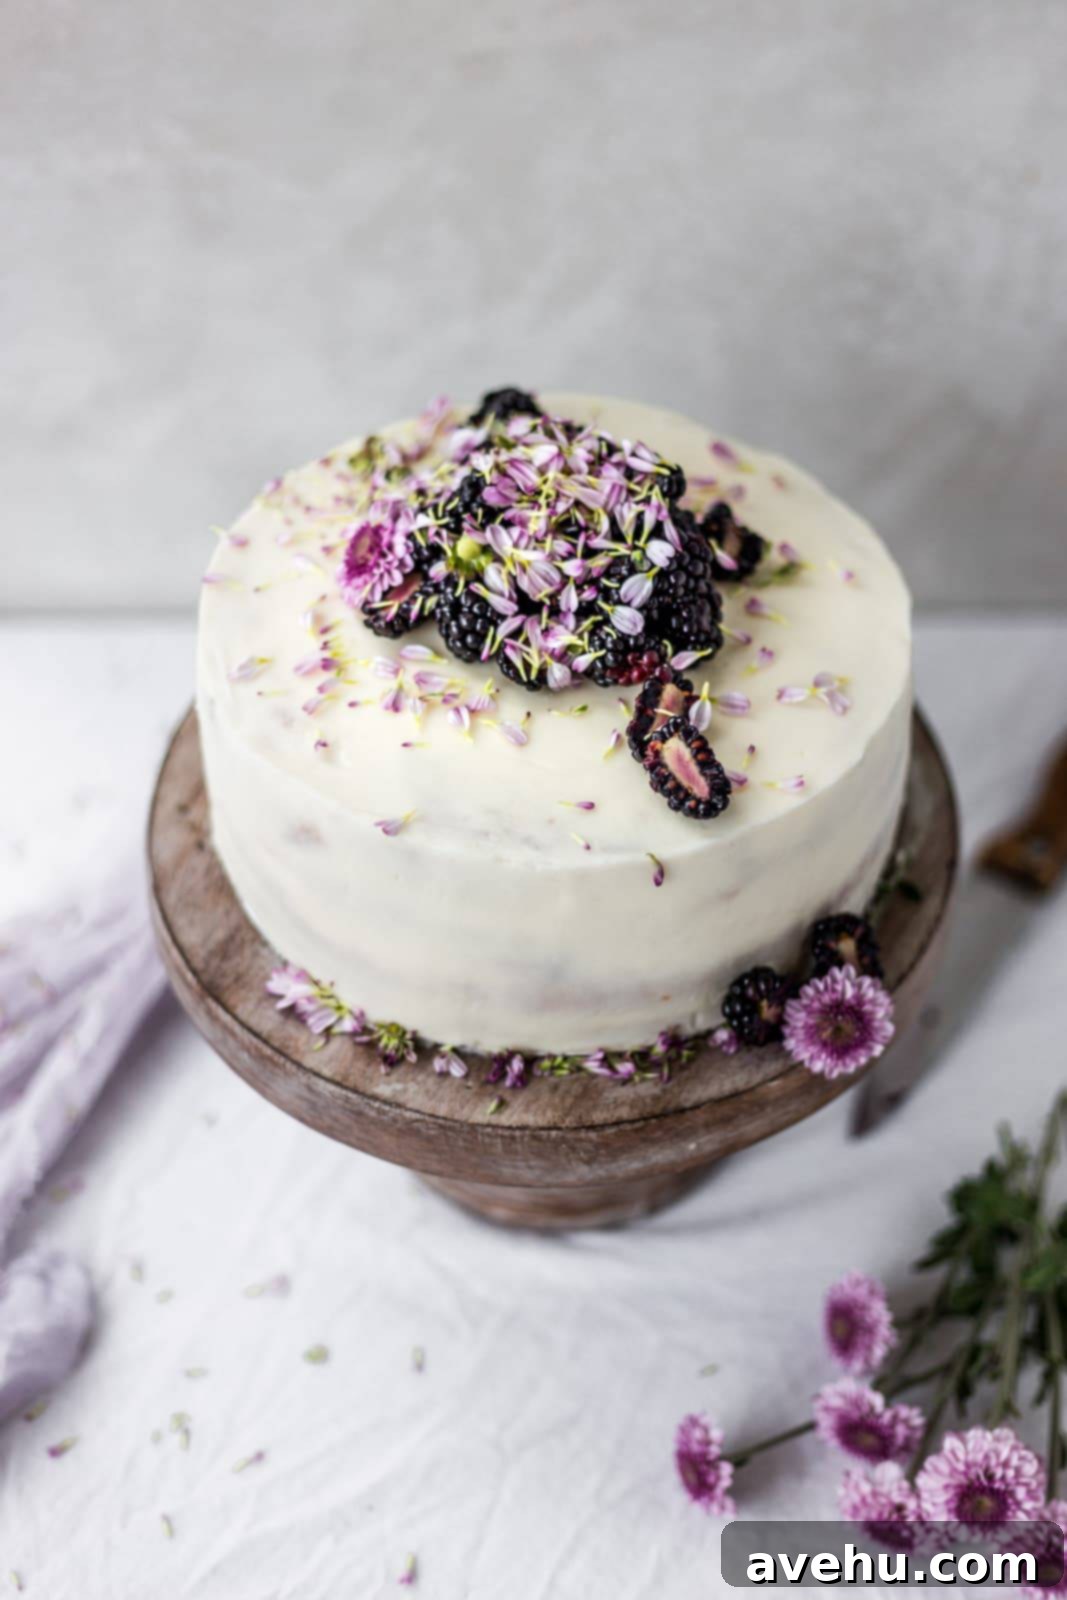
Achieving a polished, professional-looking frosted cake might seem daunting, but it’s not as hard as you might think. With a little patience, the right tools, and practice, you’ll be creating bakery-worthy cakes in no time. Whether you opt for a rustic look or a perfectly smooth finish, this buttercream is a dream to work with, allowing you to express your creativity. Finish your cake with a sprinkle of fresh blackberries and a few edible flowers for an elegant and inviting presentation.
Additional Expert Tips for Your Blackberry Cake Success
- Freezing for Future Enjoyment: This cake is wonderfully freezer-friendly! To ensure its freshness, wrap the entire frosted cake, or individual slices, tightly in multiple layers of plastic wrap, then an additional layer of aluminum foil. It can be frozen for up to 2 months. When you’re ready to enjoy, simply defrost it on the counter for several hours or overnight in the refrigerator. The texture and flavor will remain remarkably delicious.
- Transform into a Bundt Cake: If you love the convenience and elegance of a bundt cake, this recipe adapts beautifully. Simply pour the batter into a well-prepared bundt pan. You’ll need to increase the baking time to approximately 45-55 minutes, or until a toothpick comes out clean. Ensure you generously spray your bundt pan with a high-quality baking spray; my absolute favorite for guaranteeing a clean release is Baker’s Joy.
- Add a Zesty Twist with Lemon: For an extra layer of brightness and a delightful “zing” that complements the blackberries perfectly, consider adding 1-2 teaspoons of fresh lemon zest to the cake batter along with the wet ingredients. The subtle citrus note will elevate the overall flavor profile.
- Master Your Cake Decorating Skills: Beyond the delicious taste, the visual appeal of a cake can make it truly unforgettable. If you’re eager to enhance your cake decorating abilities, explore these helpful resources. Discover 10 ways to make your cakes more professional for general tips and tricks, or delve into this guide on how to decorate your cakes with beautiful fresh flowers for that elegant touch.
- Room Temperature Ingredients: For both the cake and the buttercream, ensure all cold ingredients (butter, eggs, yogurt, cream) are at room temperature. This allows them to emulsify properly, creating a smooth batter and fluffy buttercream.
- Don’t Overmix: After adding the flour, mix the batter only until just combined. Overmixing develops too much gluten, which can lead to a tough, dense cake.
Easy and Moist Blackberry Cake with White Chocolate Buttercream
Pin Recipe
Leave a Review
Save RecipeSaved!
Ingredients
For the Fluffy Blackberry Cake Layers
- 1 cup unsalted butter, softened to room temperature
- 2 cups granulated sugar
- 3 large eggs, at room temperature
- 2 1/2 cups all-purpose flour
- 1 tsp baking powder
- 1/2 tsp baking soda
- 1/2 tsp kosher salt
- 1 cup whole milk yogurt
- 1/4 cup orange juice
- 6 ounces blackberries, fresh or frozen (do not thaw if frozen)
- 2 tbsp all-purpose flour, for dusting blackberries
For the Decadent White Chocolate Buttercream
- 1 cup white chocolate chips , melted and cooled, about 6 oz
- 1 cup unsalted butter, softened to room temperature
- 3 cups confectioners’ sugar, sifted to prevent lumps
- 1 tsp heavy cream, or half-and-half
Instructions
-
Preheat your oven to 350° F (175°C). Prepare your cake pans by thoroughly spraying two 9-inch baking pans with baking spray (preferably with flour) or by lining the bottoms with parchment paper circles and greasing the sides.
-
In the bowl of a stand mixer fitted with the paddle attachment, cream the softened unsalted butter and granulated sugar together on medium speed for about 1 minute. Continue mixing until the mixture is light, fluffy, and pale yellow in color, thoroughly aerating the butter.
-
Add the large eggs one at a time, ensuring each egg is fully incorporated into the mixture before adding the next. Stop the mixer occasionally to scrape down the sides of the bowl with a rubber spatula to ensure all ingredients are well combined.
-
In a separate medium-sized bowl, whisk together the all-purpose flour, baking powder, baking soda, and kosher salt. This ensures even distribution of the leavening agents.
-
In a large measuring cup or a small bowl, combine the whole milk yogurt and orange juice, mixing until smooth.
-
 With the mixer on low speed, gradually add ⅓ of the flour mixture to the creamed butter-sugar-egg mixture and mix just until incorporated. Next, add ½ of the yogurt and juice mixture, mixing on low until combined. Follow this with another ⅓ of the flour mixture, then the remaining juice mixture, and finally the last of the flour mixture. Continue to stop and scrape down the sides of the bowl as needed to ensure a uniform batter.
 -
 In a small bowl, gently toss the blackberries with the 2 tablespoons of all-purpose flour. This step is crucial to prevent the berries from sinking to the bottom of your cake during baking. Carefully and slowly fold the dusted blackberries into the cake batter using a spatula, taking care not to break them or overmix.
 -
 Pour the batter evenly into your two prepared baking pans. Bake for 30-35 minutes for 8-inch pans, or 28-30 minutes for 6-inch pans, until the edges of the cake are golden brown and begin to pull away from the pan. The top of the cake should feel firm to the touch, and a toothpick inserted into the center should come out clean. Allow to cool completely on a wire rack before frosting.
For the Decadent White Chocolate Buttercream
-
 Melt the white chocolate chips using either a double boiler method (as described in the article above) or in the microwave in 30-second increments, stirring after each, until smooth. Crucially, allow the melted white chocolate to cool completely to room temperature before adding it to the butter, otherwise, it will melt your softened butter and compromise the buttercream’s consistency.
 -
In the clean bowl of a stand mixer fitted with the paddle attachment, cream the softened unsalted butter and sifted confectioners’ sugar on medium speed until the mixture is light, fluffy, and well combined.
-
With the mixer running on low, slowly pour in the cooled, melted white chocolate. Once incorporated, increase the speed to medium-high and whip for an additional 30 seconds to ensure it’s fully combined and airy.
-
 Stop the mixer and scrape down the sides of the bowl. Add in the heavy cream (or half-and-half). Continue mixing on medium speed until the buttercream is light, fluffy, and smooth. If you desire a thinner consistency, add an additional ½ teaspoon of cream at a time until it reaches your preferred texture.
 -
 Once your cake layers are completely cooled and leveled, frost them as you wish! For professional decorating tips, refer to our guide on how to decorate cakes like a pro. Garnish with fresh blackberries and optional edible flowers for a stunning presentation.
Notes
This recipe can also be baked in a bundt pan for an elegant alternative. Increase the baking time to 45-55 minutes and ensure your bundt pan is very well greased and floured to prevent sticking!
This blackberry cake can be frozen for up to 2 months. Wrap tightly to preserve freshness and thaw on the counter before serving.
You have the flexibility to use either fresh, ripe blackberries or frozen blackberries for this recipe. If using frozen, do not thaw them before dusting with flour and adding to the batter.
For an extra touch of zest, add 1-2 teaspoons of fresh lemon zest to the cake batter with the wet ingredients.
