Effortless Flaky Puff Pastry Apple Pie: Your Go-To Recipe for a Stunning Dessert
Discover the magic of homemade taste with the simplicity of store-bought convenience! This Flaky Puff Pastry Apple Pie recipe is a delectable dessert that elegantly merges the crisp, buttery layers of ready-made puff pastry sheets with the sweet, succulent juiciness of perfectly baked apples. Forget the fuss of traditional pie dough; this recipe slashes preparation time while delivering an unbelievably impressive result that will have everyone asking for seconds.
Unlike conventional apple pies that demand hours for intricate dough preparation, this recipe embraces the convenience and delightful texture of puff pastry. Puff pastry, a baker’s secret weapon, is renowned for its light, airy, and intensely buttery profile. It’s meticulously crafted by layering dough with butter, then repeatedly folding and rolling it to create hundreds of whisper-thin layers. While making it from scratch can be a multi-day endeavor (as we learned in pastry school!), high-quality store-bought puff pastry makes this elegant dessert accessible to every home baker.
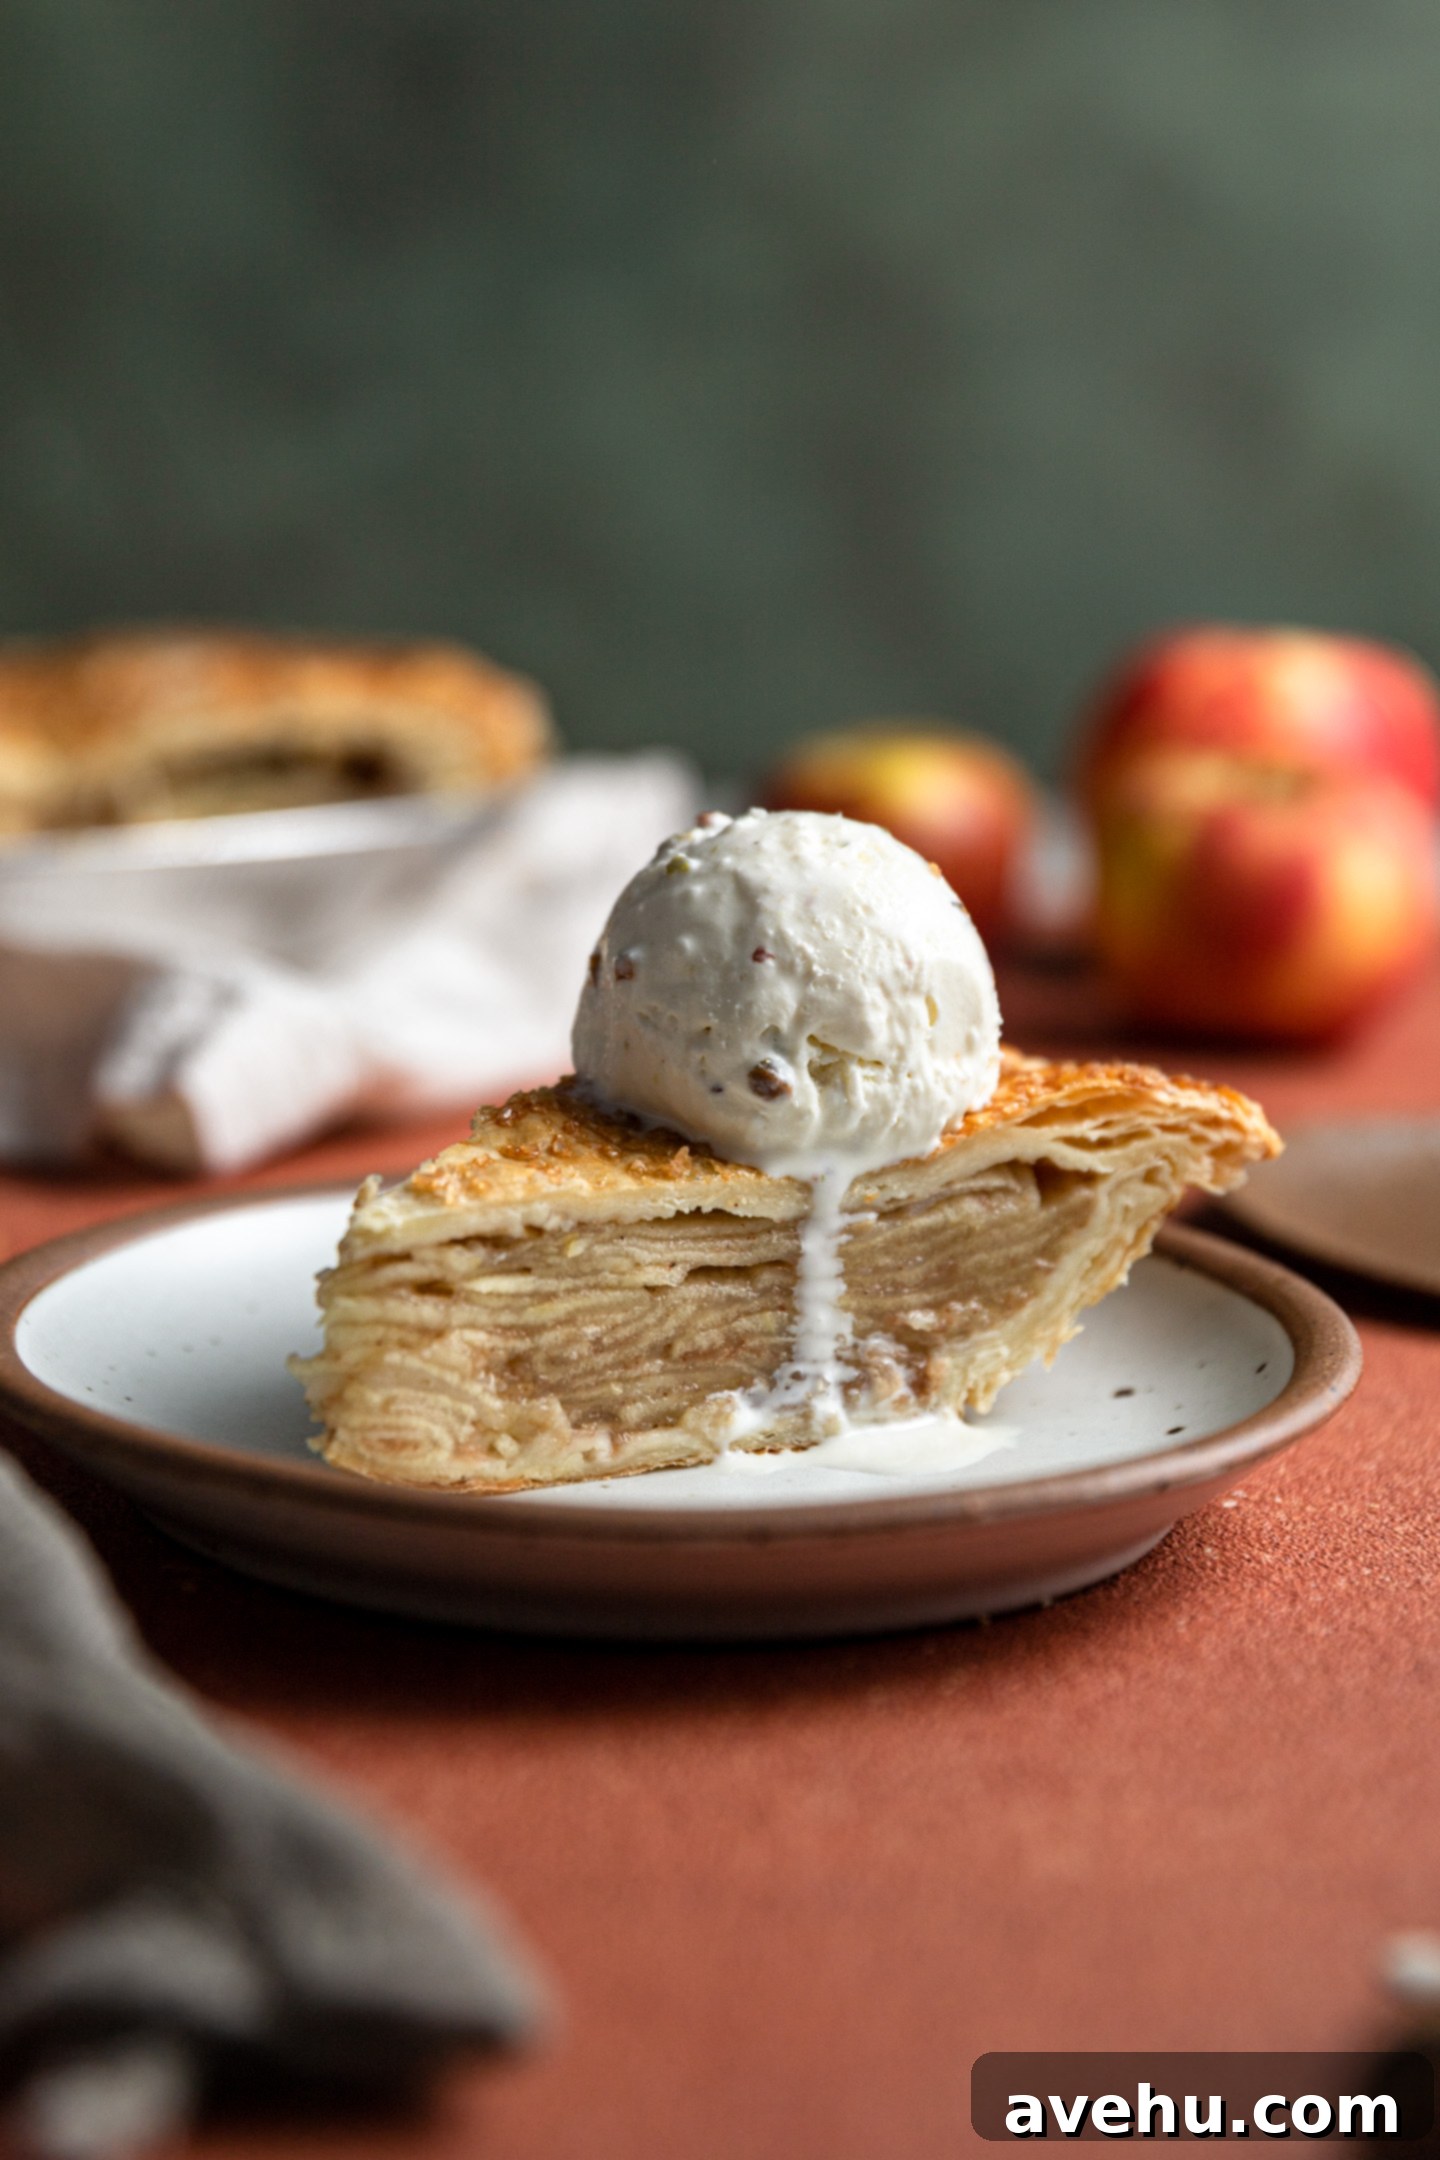
The beauty of using puff pastry as your pie crust lies in its inherent flakiness and dramatic rise in the oven. As it bakes, the butter within the layers creates steam, causing the dough to “puff up” into a magnificent, golden, and incredibly delicate shell. This transformative process results in a pie that is not only easy to make but also boasts a unique, satisfying crunch that perfectly complements the soft, warm, and richly spiced homemade apple filling.
With every bite of this exceptional apple pie, you’ll experience a symphony of textures and flavors: the glorious crunch of the flaky pastry giving way to the tender, spiced apples. It’s a dessert that feels both gourmet and incredibly comforting, earning its permanent spot on your list of easy, impressive treats for any season, especially fall or summer gatherings.
If you’re an apple dessert enthusiast, you’re in for a treat! Beyond this fabulous pie, there are many other simple ways to enjoy apples. For a twist that’s even easier than a full pie, try our Apple Pie Dessert Bars. Or, if you find yourself without traditional pie crust, our apple pie with a graham cracker crust offers a delightfully different, no-bake alternative. For another quick and easy option using store-bought ingredients, don’t miss these delightful apple dumplings!
Why This Puff Pastry Apple Pie Will Become Your Favorite
This recipe isn’t just another apple pie; it’s a game-changer. Here’s why you’ll absolutely love making (and eating!) this Flaky Puff Pastry Apple Pie:
- **Unmatched Ease and Simplicity:** The number one reason to make this pie is its incredible ease. Using store-bought puff pastry eliminates the most challenging and time-consuming part of pie making: preparing the crust from scratch. You skip the kneading, chilling, and delicate handling of traditional pie dough, drastically cutting down on stress and allowing you to enjoy the baking process without a worry.
- **Exquisite Contrast of Flavor and Texture:** This pie offers a truly captivating experience for your palate. The light, airy, and shatteringly crisp layers of the puff pastry crust provide a delightful textural contrast to the soft, warm, and sweet-tart apple filling. Each bite is a harmonious blend of crunch and tender juiciness, spiced perfectly with cinnamon, creating an irresistible dessert that will impress everyone.
- **Perfect for Any Occasion and Quick to Prepare:** Whether you’re looking for a cozy fall treat, a bright summer dessert, or a holiday showstopper, this pie fits the bill. It’s quick enough for a weeknight indulgence yet elegant enough for special gatherings. The minimal prep time, largely thanks to the convenient puff pastry, means you can whip up this delightful dessert without being tethered to your kitchen for hours. It’s an ideal solution when you want a homemade pie flavor without the extensive labor.
Essential Ingredients for Your Flaky Apple Pie
Crafting this incredible puff pastry apple pie requires a thoughtful selection of ingredients, each playing a vital role in achieving that perfect balance of flavor and texture. Here’s what you’ll need:
Choosing the Best Apples: Honeycrisp Or Granny Smith
For the ideal apple pie, the type of apple you choose is paramount. Honeycrisp or Granny Smith apples are highly recommended because they possess a firm texture that allows them to hold their shape beautifully during baking. This prevents the filling from becoming overly mushy or soupy. Other apple varieties tend to break down more easily, releasing too much juice and resulting in a runny, less appealing apple pie filling that can make your crust soggy.
- Puff Pastry Dough (2 sheets from 1 package): This is the hero of our recipe, forming the wonderfully flaky and buttery base and top crust of the pie. Ensure it’s fully defrosted but still cold for optimal handling and flakiness.
- Honeycrisp Apples (or Granny Smith): These apples are celebrated for their crisp, juicy flesh and balanced sweet-tart flavor. Their ability to maintain texture when baked is crucial for a pie with distinct, tender apple slices rather than a homogenous apple sauce.
- Brown Sugar: This adds a deep, caramel-like sweetness to the apple filling, which beautifully complements the natural tartness of the apples and imparts a rich, golden hue.
- All-Purpose Flour: A foundational thickening agent, flour works to absorb some of the juices released by the apples during baking, helping the filling achieve a cohesive, slightly viscous consistency without being too liquidy.
- Cornstarch (1 tbsp + 1 tsp, separated): As an additional, powerful thickening agent, cornstarch ensures your apple filling sets perfectly. It’s particularly effective at creating a clear, glossy sauce around the apples, preventing any excess liquid from making your precious puff pastry crust soggy. The separated amounts are used at different stages for best results.
- Ground Cinnamon: This warm, aromatic spice is quintessential to apple pie, infusing the filling with its comforting, autumnal notes and enhancing the overall flavor profile. It’s the taste of coziness!
- Kosher Salt: A small amount of salt is a flavor enhancer, balancing the sweetness and brightness of the apples and spices, making all the other flavors pop.
- Large Egg (beaten): Used as an egg wash, brushing this over the pastry crust before baking gives it a beautiful golden-brown color and a desirable glossy finish.
- Raw Sugar (Turbinado sugar): Sprinkled generously over the top crust before baking, raw sugar adds a fantastic textural element. Its coarse crystals caramelize slightly, creating a sparkling, crunchy topping and an extra touch of sweetness that elevates the pie’s presentation and taste.
Crafting Your Flaky Puff Pastry Apple Pie: Step-by-Step Guide
Follow these detailed steps to create a show-stopping apple pie with ease:
Step 1: Prepare for Baking & Pre-bake Crust
Preheat your oven to 400°F (200°C). Lightly spray a 9-inch pie pan with non-stick baking spray to ensure easy release. On a lightly floured surface or a piece of parchment paper, gently unroll one sheet of defrosted puff pastry. Carefully line your prepared pie dish with the pastry, allowing a slight overhang. You can either trim the excess or fold it neatly under to create a thicker edge. Using a fork, pierce the bottom and sides of the puff pastry all over – this is crucial for allowing steam to escape and preventing the crust from puffing up too much during the initial bake, ensuring a flat base for your filling. Bake for 10 minutes, then remove from the oven and let it cool completely. This pre-baking step creates a sturdy, par-baked base, essential for preventing a soggy bottom crust once the juicy apple filling is added.
Step 2: Prepare the Apple Pie Filling
While your bottom crust cools, get your apples ready. Peel, core, and thinly slice the Honeycrisp or Granny Smith apples. For perfectly uniform slices, a mandolin is an invaluable tool, but a sharp knife works just as well. Aim for slices about 1/4 inch thick to ensure even cooking. Transfer the sliced apples to a large bowl. Add the brown sugar, 3 tablespoons of flour, 1 teaspoon of cornstarch, ground cinnamon, and kosher salt. Using your hands, gently but thoroughly mix the ingredients, ensuring every apple slice is coated with the fragrant spice and sugar mixture. This hands-on approach helps distribute the ingredients evenly. Next, and this is a critical step for a non-soggy pie, transfer the coated apples to a colander set over a bowl. Let them sit for at least 15-20 minutes to strain off any excess juice that the sugar has drawn out. Discard this juice. After straining, return the apples to a clean bowl and toss with the remaining 1 tablespoon of cornstarch. This additional cornstarch will ensure a perfectly thickened filling.
Step 3: Assemble the Pie
Pour the prepared and drained apple filling into the cooled, pre-baked bottom crust. Don’t worry if the apples mound a little higher than the pie plate; they will soften and settle during baking. In a small bowl, beat the egg to create an egg wash. Brush this egg wash along the edges of the bottom crust – this acts as a delicious glue for the top crust. Carefully unroll the second sheet of puff pastry and lay it gently over the apple filling. Trim any excessive overhang, then crimp the edges of both pastry layers together with a fork to create a decorative, secure seal. To allow steam to escape during baking and prevent the top crust from becoming too soggy or exploding, cut three small slits in the center of the top crust. For maximum flakiness, place the assembled pie in the freezer for 20 minutes. This quick chill helps the butter in the puff pastry firm up, leading to more distinct layers when baked.
Step 4: Bake the Pie to Golden Perfection
After freezing, retrieve the pie. Brush the entire top crust generously with the remaining beaten egg wash, then sprinkle evenly with raw sugar for a delightful crunch and sparkle. Place the pie on the lowest rack in your preheated 400°F (200°C) oven. Baking on the lowest rack ensures the bottom crust receives direct heat, helping it crisp up beautifully and prevent sogginess. Bake for 30 minutes. After 30 minutes, remove the pie from the oven and carefully cover the edges of the crust with thin strips of aluminum foil. This prevents the edges, which tend to brown faster, from burning while the rest of the pie finishes baking. Return the pie to the oven and continue baking for an additional 15-20 minutes, or until the top crust is a deep golden brown and the filling is bubbling gently through the slits.
Step 5: Cool and Serve
Once baked, remove the pie from the oven and place it on a wire rack to cool completely. This cooling period is crucial – it allows the apple juices to thicken and set properly, preventing a runny filling when sliced. While it’s tempting to dive in immediately, patience will be rewarded with a perfectly structured and flavored pie. Once cooled, slice and serve warm. A generous scoop of vanilla ice cream on top is the traditional and highly recommended accompaniment, creating a delightful contrast of warm and cold, creamy and flaky.
Expert Tips for Perfect Puff Pastry Apple Pie Success
Achieving a picture-perfect, flaky, and delicious apple pie is easy with these insider tips:
- **Properly Defrost Puff Pastry:** Ensure your puff pastry sheets are fully defrosted before you even think about unrolling them. If they are still frozen or too cold, the dough will crack and tear when you attempt to roll it out, ruining those precious layers. However, avoid letting it get too warm and sticky, which can cause the butter to melt and the layers to fuse. The ideal state is cold but pliable.
- **Uniform Apple Slices are Key:** When slicing your Honeycrisp or Granny Smith apples, strive for consistent thickness. Using a mandolin is an excellent way to achieve perfectly even 1/4-inch slices. This uniformity ensures that all the apple pieces cook at the same rate, resulting in a tender, not mushy, filling throughout the pie.
- **Pre-Bake the Bottom Crust for Crispness:** To bid farewell to soggy bottom crusts, pre-bake the bottom puff pastry layer in your pie pan for 10 minutes before adding the apple filling. This crucial step helps to dry out and set the pastry, creating a robust, flaky barrier that effectively holds the juicy apple filling without absorbing excessive moisture and becoming soft.
- **Drain Excess Apple Juice Thoroughly:** This is arguably the most vital tip for a non-soggy pie. After mixing your apples with sugar and spices, the sugar will draw out a significant amount of liquid. Strain this excess juice from the apple mixture using a colander, and make sure to discard it. Leaving this liquid in the filling will result in a watery pie that can make your crust unpleasantly soft and compromise the pie’s overall structure and taste.
- **Freeze Before Baking for Maximum Flake:** Don’t skip the 20-minute freezer chill for the assembled pie. This brief period of freezing helps firm up the butter in the puff pastry layers, ensuring they remain distinct and cold when they hit the hot oven. The rapid transition from cold to hot creates maximum steam, which is what gives puff pastry its signature dramatic lift and incredible flakiness.
- **Utilize the Lowest Oven Rack:** For even baking, especially for the bottom crust, place your pie on the lowest rack in your oven. This positioning provides direct heat to the base, ensuring that the bottom crust cooks thoroughly and becomes beautifully golden and crisp, matching the top crust’s perfection.
- **Protect Pie Edges with Aluminum Foil:** About halfway through the baking process, once the edges of your pie begin to look nicely golden, loosely cover them with thin strips of aluminum foil. Pie edges tend to brown much faster than the center. This technique acts as a shield, preventing the edges from over-browning or burning while allowing the rest of the pie to continue baking evenly to a perfect golden finish.
Storage and Freezing Instructions for Your Apple Pie
To enjoy your delicious puff pastry apple pie for longer, proper storage is key:
Storing: Once your baked apple pie has cooled completely to room temperature, cover it loosely with plastic wrap or aluminum foil. You can then store it in the refrigerator for up to 3-4 days. For optimal freshness, avoid tightly wrapping it while still warm, as this can create condensation and make the crust soggy.
Freezing (Best Before Baking): This puff pastry apple pie freezes beautifully *before* baking. To do this, assemble the pie exactly as directed in the recipe, but instead of baking, place the unbaked pie in the freezer, uncovered, for about 1 hour or until it is completely firm. Once firm, wrap the pie tightly first in a layer of plastic wrap, followed by a layer of heavy-duty aluminum foil. This double-layer protection helps prevent freezer burn. The frozen, unbaked pie can be stored in the freezer for up to 2-3 months.
Baking from Frozen: When you’re ready to enjoy your frozen pie, remove it from the freezer and unwrap it. Place the frozen pie directly into a preheated oven (following the original baking temperature). You will likely need to add an additional 15-25 minutes to the overall baking time to account for the frozen state, possibly covering the edges with foil earlier than usual. Monitor for a golden-brown crust and bubbling filling to ensure it’s fully cooked through.
Frequently Asked Questions (FAQ) About Puff Pastry Apple Pie
Here are some common questions to help you perfect your puff pastry apple pie:
Can I use a different type of apples for this pie?
While Honeycrisp and Granny Smith apples are strongly recommended for their superior firm texture and balanced flavor that hold up well during baking, you certainly can experiment with other apple varieties. Good alternatives that generally maintain their shape and offer a lovely taste include Pink Lady, Fuji, Braeburn, and Golden Delicious. If using sweeter apples, you may wish to slightly reduce the amount of brown sugar in the filling. If using tarter apples, a touch more sugar might be needed. Always taste and adjust to your preference!
Can I add other fruits to the apple filling?
Absolutely! Adding other fruits can introduce exciting new dimensions of flavor and texture, making your pie truly unique. Consider mixing in some thinly sliced pears, which complement apples beautifully, or a handful of fresh or frozen cranberries for a tart burst that’s especially wonderful for holiday pies like Thanksgiving. A touch of sliced peaches could also be a delightful addition in the summer months. Just be mindful of the moisture content of any added fruits and adjust your thickening agents (flour/cornstarch) if they are particularly juicy.
How can I make this pie more spiced?
If you crave a deeper, more complex spice profile, enhancing the cinnamon is a great start. Beyond that, a pinch of freshly grated nutmeg or a dash of allspice will introduce warm, earthy notes that elevate the flavor of the apple filling. You could also try a touch of ground cloves or ginger for a bolder kick. For a truly aromatic experience, a small amount of cardamom can add a unique, sophisticated hint. Experiment with these spices to find your perfect blend!
Delightful Ways to Enjoy Your Puff Pastry Apple Pie
While this pie is magnificent on its own, these additions can elevate your dessert experience:
- **Drizzle with Bourbon Caramel Sauce:** For an incredibly indulgent and sophisticated twist, generously drizzle a warm Bourbon Caramel Sauce over each slice. The deep, rich, and slightly boozy notes of the caramel perfectly complement the sweet apples and flaky crust, creating an unforgettable dessert.
- **Streusel Topping for Added Crunch:** If you prefer a different texture on top, consider replacing the top puff pastry crust with a crumbly Streusel Topping. The buttery, sugary oat mixture adds a wonderful textural contrast and an extra layer of sweetness that is always a crowd-pleaser.
- **Classic Vanilla Ice Cream or Whipped Cream:** The timeless pairing! Serve your warm apple pie with a generous scoop of rich vanilla bean ice cream or a dollop of freshly made, lightly sweetened whipped cream. The cool creaminess against the warm, flaky pie is pure heaven.
- **Maple Glaze for Sweetness:** For a simple yet elegant finish, a delicate Maple Glaze can be drizzled over the pie just before serving. The subtle sweetness and distinct flavor of maple syrup add another layer of autumnal charm without overpowering the apple filling.
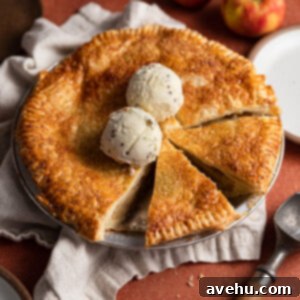
Flaky Puff Pastry Apple Pie
Pin
Review
SaveSaved!
Ingredients
- 2 sheets puff pastry, (from 1 box) defrosted
- 5 Honeycrisp apples, peeled, cored, and thinly sliced (approx. 1/4 inch)
- 1/2 cup brown sugar
- 3 tbsp all-purpose flour
- 1 tbsp cornstarch, + 1 tsp, separated
- 1 teaspoon ground cinnamon
- 1/4 tsp kosher salt
- 1 large egg, beaten
- 2 tbsp raw sugar, (Turbinado sugar)
Instructions
-
Preheat the oven to 400° F (200°C) and spray a 9-inch pie pan with non-stick baking spray.
-
Roll out one of the defrosted puff pastry sheets over a lightly floured surface or a piece of parchment paper.
-
 Line the pie dish with the puff pastry, either trimming off excess or folding under the edges for a neat finish.
 -
Pierce the bottom and sides of the pastry all over with a fork. Bake for 10 minutes, then remove from oven and let cool completely on a wire rack.
-
 Meanwhile, prepare the apples. Peel, core, and thinly slice the apples (a mandolin works great for this!). In a large bowl, combine the sliced apples with ½ cup brown sugar, 3 tbsp flour, 1 tsp cornstarch, 1 tsp ground cinnamon, and ¼ tsp kosher salt. Mix well with your hands to evenly coat the apple slices.
 -
Once the bottom pie crust is cool, transfer the apple mixture to a colander set over a bowl and strain off any excess juice. Discard the juice. Return the drained apples to a clean bowl and toss with the remaining 1 tbsp cornstarch.
-
 Pour the prepared apple filling into the cooled, pre-baked pie crust.
 -
Lightly beat the egg for the egg wash. Brush the beaten egg along the edges of the bottom pie crust. Gently unroll the second puff pastry sheet and lay it over the apples, aligning it with the bottom crust.
-
 Trim any excess pastry from the sides and crimp the edges together with a fork to seal securely. Cut 3 small slits in the center of the top crust to allow steam to escape during baking.
 -
Place the assembled pie in the freezer for 20 minutes to firm up the pastry, which promotes maximum flakiness.
-
Remove the pie from the freezer. Brush the top of the pie crust with the remaining beaten egg wash and sprinkle generously with raw sugar.
-
Bake the pie on the lowest rack in your preheated oven for 30 minutes.
-
 After 30 minutes, remove the pie and carefully cover the edges with thin strips of aluminum foil to prevent burning. Return to the oven and continue baking for another 15-20 minutes, or until the pie is deeply golden brown and the filling is bubbling.
 -
Remove the pie from the oven and let it cool completely on a wire rack before slicing. This allows the juices to thicken and set properly. Serve warm with a scoop of vanilla ice cream on top for an irresistible treat!
Notes
Always opt for Honeycrisp or Granny Smith apples, or a similar firm variety. Their ability to hold shape during baking is key to a structured, delicious pie, ensuring a tender bite without turning to mush.
