The Ultimate Berry Chantilly Cake Recipe: Fluffy Vanilla Layers with Mascarpone Whipped Cream and Fresh Berries
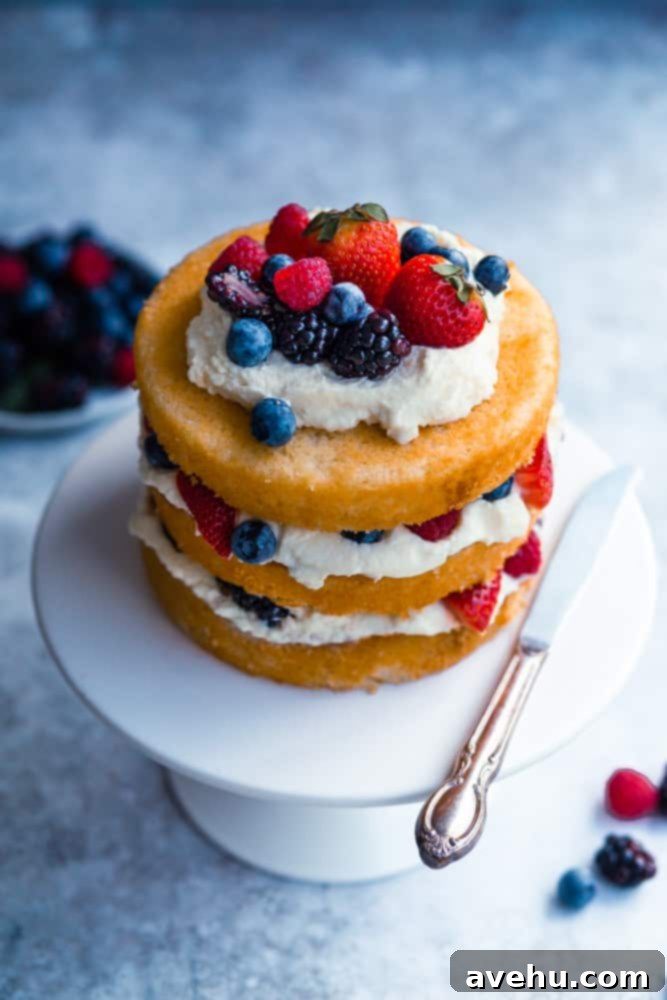
Chantilly cake is a truly delightful dessert, renowned for its delicate balance of flavors and textures. This classic vanilla layer cake features tender, airy cake layers generously filled with a medley of fresh berries and luscious fruit jam. It’s crowned with a light, fluffy, and subtly sweet cream topping, enhanced with rich mascarpone cheese. This particular recipe showcases a stunning three-tiered 6-inch round cake, adorned and filled with an abundance of fresh assorted berries, making it an ideal sweet treat for spring and summer gatherings, or any occasion that calls for a show-stopping dessert.
My household has a deep appreciation for good cake, and this homemade Chantilly cake quickly became a new favorite. I can personally attest that my husband single-handedly devoured an entire one of these cakes, and he had absolutely no regrets! My inspiration for creating this recipe stemmed from hearing rave reviews about the Whole Foods Bakery version. Since their cake isn’t kosher, I was determined to craft my own version that would capture the same amazing flavors and textures. The result was nothing short of spectacular; it certainly did not disappoint.
This impressive yet surprisingly easy-to-make dessert begins with a foundation of fluffy vanilla layer cake. Each tender cake layer is then generously slathered with a vibrant strawberry jam, adding a burst of fruity sweetness. The layers are then meticulously stacked and filled with a decadent mascarpone and whipped cream frosting, which provides a rich yet light counterpoint to the cake. Finally, a lavish amount of fresh, juicy berries—such as strawberries, blackberries, blueberries, and raspberries—are nestled between the layers and artfully arranged on top, creating a visually stunning and incredibly delicious cake.
During my time in pastry school, creating elaborate layer cakes was always one of my most cherished activities. It comes as no surprise that they remain at the very top of my favorite baking projects. In fact, I’ve cultivated an extensive collection of layer cake recipes! If you’re looking for more cake inspiration, you might enjoy my marble layer cake, which is incredibly simple to make yet looks exceptionally fancy. And for a truly tried-and-tested favorite, my classic vanilla cake in a bundt pan boasts an impressive 5-star rating!
This particular berry-filled vanilla layer cake is baked in three separate 6-inch rounds, creating a beautifully proportioned cake that’s perfect for sharing. It’s an ideal size to bring to a backyard barbecue, a potluck, or to celebrate a birthday. The smaller diameter with more layers provides a lovely presentation and makes serving easier for moderate gatherings. While this recipe specifically uses a delightful mascarpone frosting, you can also opt for a classic Chantilly Cream to fill and frost it if you prefer a slightly lighter, less rich finish. Both options yield a delicious result!
What Exactly is a Chantilly Cake?
The term “Chantilly cake” can actually have different meanings depending on geographical location and culinary tradition. In the context of this recipe and what is widely recognized in many parts of the United States, a Chantilly cake is typically a light and fluffy vanilla layer cake generously filled with fresh berries and finished with a delicate whipped cream-based frosting. However, it’s fascinating to note that in other places, such as Hawaii, a “Chantilly cake” refers to a completely different dessert – often a rich chocolate cake topped with a fudge-like, cooked Chantilly frosting. Our recipe focuses on the more common vanilla and berry interpretation, emphasizing freshness and a lighter cream.
Decoding the Meaning of “Chantilly”
A great question indeed! Understanding the origin of the word “Chantilly” helps illuminate the essence of this cake.
At its core, “Chantilly” is simply a refined term for sweetened whipped cream. This elegant cream is traditionally made by whipping heavy cream with confectioners’ sugar (also known as powdered sugar) and a touch of vanilla extract until it reaches a soft, luscious consistency. The name itself originates from Chantilly, France, a region celebrated for its culinary heritage. It truly sounds, and tastes, quite fancy! I distinctly remember this particular cream from my pastry school days; it was the one I could always recall during our cream identification tests, perhaps because its simplicity belied its elegant appeal.
While some Chantilly cakes stick to using classic Chantilly cream for both filling and frosting, our recipe takes a slight but beneficial detour. To provide the cake with greater structural integrity and to ensure the topping remains wonderfully stable, even in warmer conditions, we’ve incorporated mascarpone cheese into the whipped cream. This addition elevates the frosting, making it richer, slightly tangier, and much more reliable for a multi-layered cake.
Essential Ingredients You’ll Need
Creating this magnificent Berry Chantilly Cake requires a selection of fresh, high-quality ingredients for both the cake layers and the irresistible frosting. Here’s what you’ll need:
For the Cake Layers:
- Unsalted Butter: Ensure it’s softened to room temperature. This is crucial for achieving a smooth, creamy base when creaming with sugar, contributing to the cake’s tender crumb. If you’re short on time, I have a detailed post on how to soften butter quickly.
- Granulated Sugar: Not only sweetens the cake but also plays a vital role in its structure, tenderness, and moisture retention.
- Large Eggs: Act as a binding agent, providing structure and richness to the cake while helping it to rise and achieve its fluffy texture.
- All-Purpose Flour: The primary structural component of the cake. For best results, measure accurately, preferably by weight, or spoon it into your measuring cup and level it off.
- Baking Powder: A leavening agent that creates air bubbles, contributing to the cake’s light and airy rise.
- Kosher Salt: Essential for balancing and enhancing all the sweet flavors in the cake. It’s coarser than table salt, so be sure to use kosher.
- Baking Soda: Another leavening agent that works in conjunction with the acidic yogurt to promote a superior rise and tender crumb.
- Vanilla Extract: Provides the classic, warm vanilla flavor that is the signature of this cake. Use good quality extract for the best taste.
- Whole Milk Yogurt: This secret ingredient is key to keeping the cake incredibly moist and tender, thanks to its fat content and acidity.
- Whole Milk: Adds moisture and richness, working alongside the yogurt to create a truly luxurious texture.
For the Mascarpone Whipped Cream Frosting:
- Mascarpone Cheese: As discussed, this Italian cream cheese is a game-changer. It provides a luxurious richness and, more importantly, adds crucial stability to the whipped cream, ensuring it holds its shape beautifully on your layered cake. Make sure it’s softened slightly for easier mixing.
- Heavy Whipping Cream: You need high-fat heavy whipping cream (usually 36% or more milk fat) for this recipe to achieve stiff, stable peaks. Lighter creams or milk alternatives will not yield the same results.
- Confectioners’ Sugar (Powdered Sugar): Sweetens the frosting and helps to stabilize the whipped cream, contributing to its smooth and silky texture.
- Vanilla Extract: Enhances the creamy flavor of the frosting.
For the Filling and Garnish (Other):
- Fresh Berries: The star of the show! Use a generous assortment of your favorites, such as strawberries, blueberries, raspberries, and blackberries. Their vibrant colors and tart-sweet flavors are integral to the Chantilly cake experience.
- Berry Jam: Any berry jam will work wonderfully to add an extra layer of fruity flavor and moisture between the cake layers. Strawberry jam is a classic choice and was used in this recipe, but feel free to experiment with raspberry or mixed berry jam.
Choosing the Best Cake Pans
Having the right tools can make all the difference in your baking endeavors. For this Chantilly cake, I highly recommend using sturdy, reliable cake pans to ensure even baking and easy release. My go-to brand is Wilton, known for consistent quality.
For the classic three-layer, 6-inch cake as shown in this recipe, these 6-inch Wilton cake pans are perfect. If you prefer a larger, two-layer cake (which can also work well), you can use 8-inch Wilton cake pans. Always remember to properly grease and flour your pans, or line them with parchment paper, to prevent sticking and ensure your beautiful cake layers come out cleanly.
How to Bake a Delicious Chantilly Cake
Creating this stunning Berry Chantilly Cake is a rewarding process that can be broken down into three main stages: baking the vanilla cake layers, preparing the luscious mascarpone whipped cream frosting, and finally, assembling the masterpiece. Let’s walk through each step:
First, Prepare and Bake the Cake Layers:
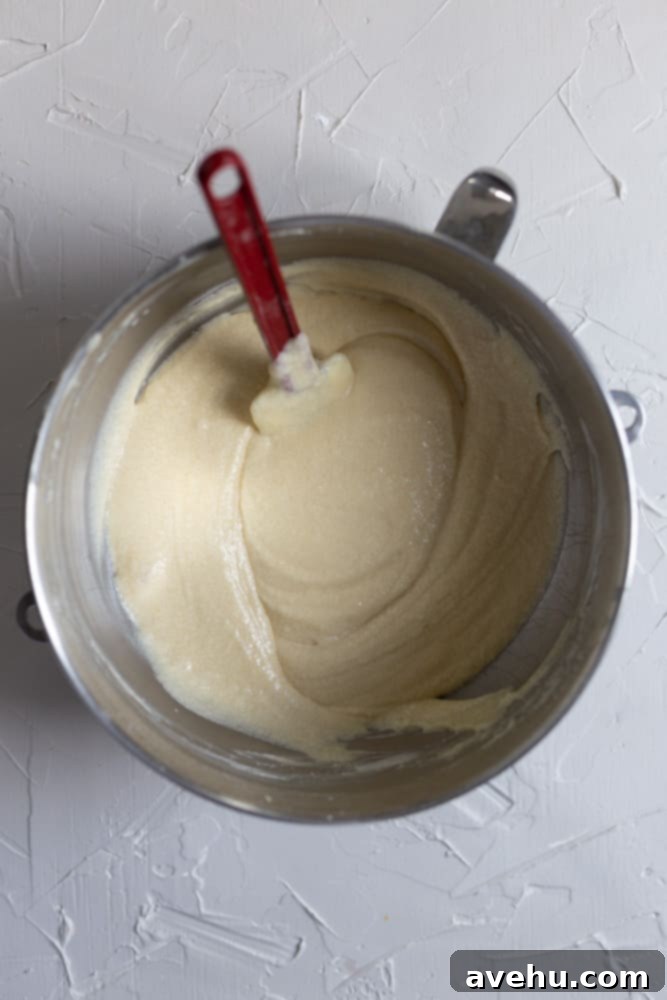
Begin by preheating your oven to 350°F (175°C) and preparing your cake pans. Whether you’re using three 6-inch round pans or two 8-inch round pans, make sure to grease and flour them thoroughly, or use a baking spray with flour. This prevents sticking and ensures your cakes release easily. In a large mixing bowl or the bowl of a stand mixer fitted with the paddle attachment, cream together the softened unsalted butter and granulated sugar until the mixture is light, fluffy, and pale in color, resembling a smooth paste. This usually takes about 1-2 minutes on medium speed. Remember to scrape down the sides of the bowl to ensure everything is well combined. Next, with the mixer running on low speed, add the large eggs one at a time, mixing well after each addition until fully incorporated. Finish by stirring in the vanilla extract.
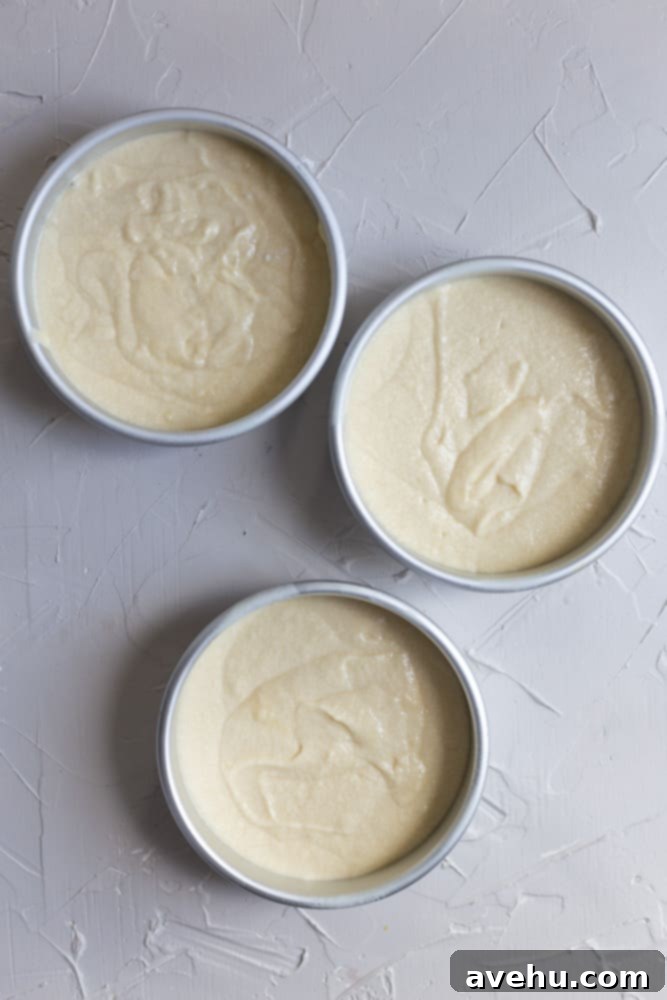
In a separate bowl, whisk together all the dry ingredients: all-purpose flour, baking powder, kosher salt, and baking soda. In a liquid measuring cup, combine the whole milk yogurt and whole milk. Now, you’ll alternate between adding the dry and wet ingredients to the butter mixture, beginning and ending with the dry. Add about one-third of the dry ingredients to the mixer, mix until just combined, then add half of the wet ingredients, mix, and repeat, finishing with the last third of the dry ingredients. Be careful not to overmix the batter; mix only until no streaks of flour remain, as overmixing can lead to a tough cake. Divide the batter evenly among your prepared cake pans and bake for 30-35 minutes. The cakes are perfectly baked when the edges begin to pull away from the sides of the pan, and a toothpick inserted into the center comes out clean. Let them cool in the pans for about 10-15 minutes before inverting them onto a wire rack to cool completely.
Next, Make the Mascarpone Whipped Cream Frosting:
While your cake layers are cooling, prepare the star of the show – the mascarpone topping. In a medium-sized bowl, combine the softened mascarpone cheese with the vanilla extract and confectioners’ sugar. Mix these ingredients together just until they are fully combined and smooth. Be careful not to overmix the mascarpone at this stage. In a separate, chilled bowl (a cold bowl helps the cream whip faster and more stably), use a hand mixer or a stand mixer with the whisk attachment to whip the cold heavy cream on high speed. Continue whipping until stiff peaks form, which typically takes about 2-3 minutes. You’ll know you have stiff peaks when you lift the whisk and the cream stands up straight without drooping. It’s crucial not to over-whip the heavy cream, as it can quickly curdle and become grainy. Gently fold the whipped cream into the mascarpone mixture using a large spatula. Continue folding until the two are fully combined and no streaks of plain cream are visible. The result should be a light, fluffy, yet stable and rich frosting.
Finally, Assemble Your Gorgeous Cake:
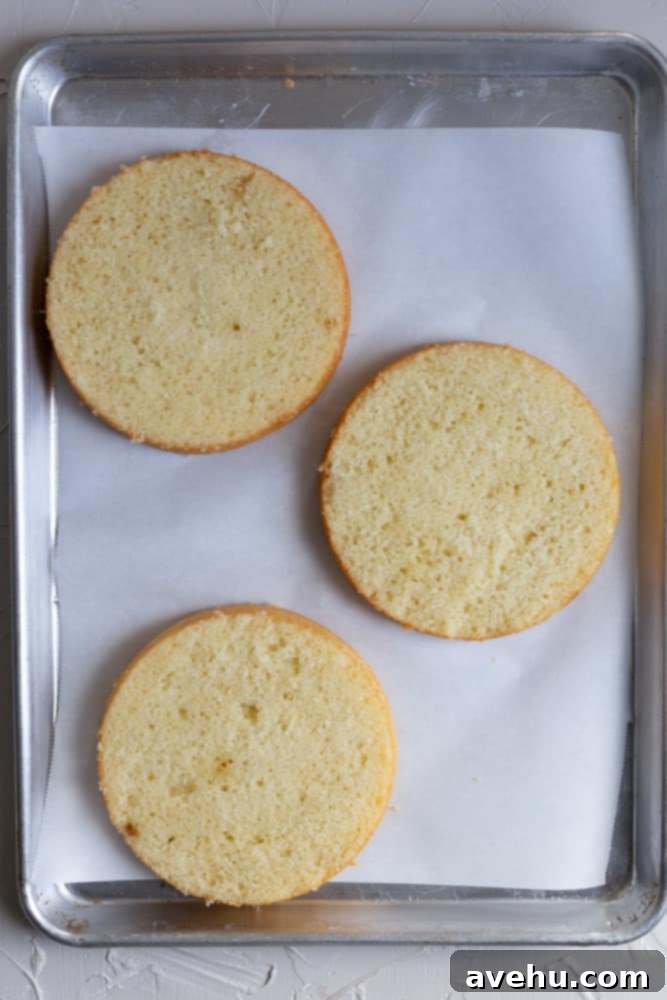
Once your cake layers are completely cool, it’s time for assembly. If your cake tops are domed, use a long serrated knife or a cake leveler to carefully level them off, creating flat surfaces for stable stacking. Place your first leveled cake layer onto your serving plate or cake stand. Generously slather a layer of strawberry jam (or your chosen berry jam) over the top, leaving about a 1-inch border from the edge. This helps contain the frosting. Next, spread an even layer of your prepared mascarpone Chantilly cream over the jam. Then, scatter a generous handful of fresh, assorted berries over the cream. Repeat this layering process with the remaining cake layers, jam, mascarpone Chantilly cream, and fresh berries until you reach the top layer of cake. Now, it’s time to decide on your decorating style!
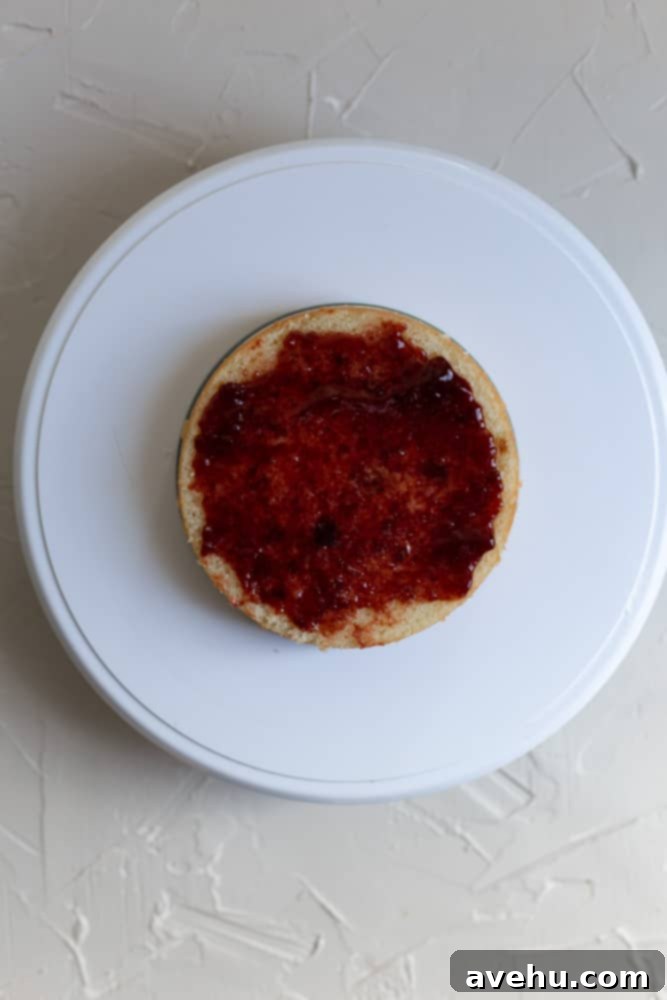
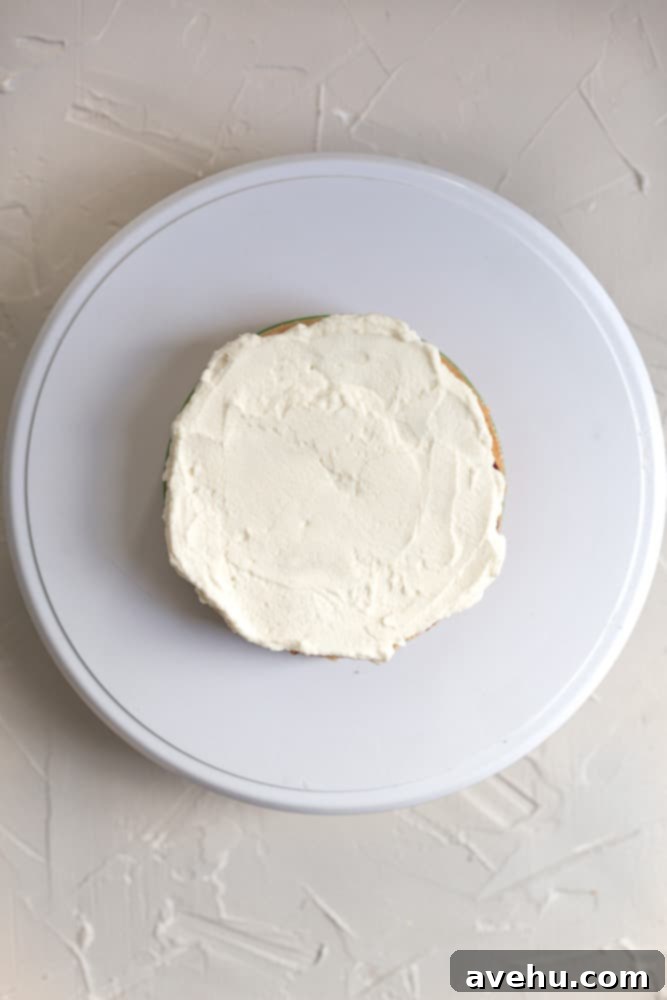
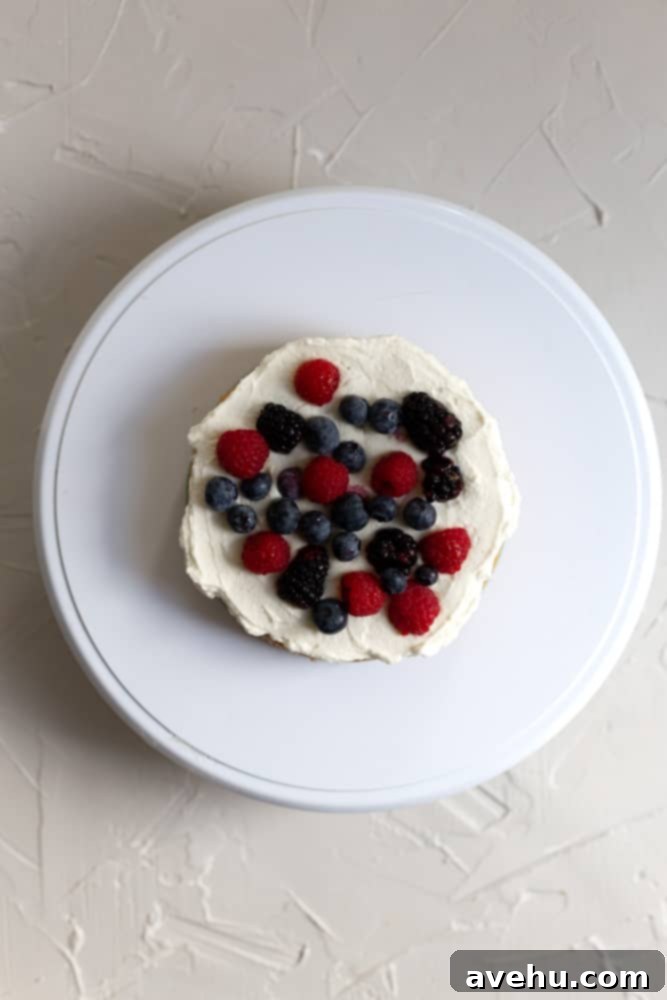
Effortless Decorating for a Stunning Finish
One of the beauties of this Chantilly cake is its versatility in decoration, allowing you to achieve a gorgeous look with minimal stress. You essentially have two primary approaches, each yielding a delightful aesthetic.
The first option is to fully frost the entire cake with your delicious mascarpone whipped cream, creating a smooth, elegant exterior. Once frosted, you can then artfully arrange a generous assortment of fresh berries on top, perhaps creating a colorful crown or a delicate scattered pattern. This traditional approach offers a polished, bakery-style finish.
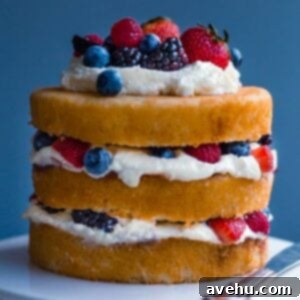
Alternatively, you can embrace the charm of a “naked cake” design, which is how I’ve chosen to present it here. This style involves leaving the sides of the cake mostly exposed, allowing the beautiful layers of cake, jam, cream, and berries to peek through. To achieve this, after stacking and filling your layers, simply add a few elegant dollops of cream on the very top of the cake, or create a thin “crumb coat” layer of frosting on the sides, then artfully arrange your fresh berries on the top surface. I personally adore this naked cake look because it dramatically reduces the pressure and time associated with intricate frosting techniques. It exudes a rustic, effortless beauty that is both appealing and approachable for home bakers.
Storing and Freezing Your Chantilly Cake
Proper storage is essential to maintain the freshness, flavor, and structural integrity of your Chantilly cake. Given its components, special care is needed:
Storing:
Since this recipe incorporates delicate whipped cream and fresh fruit, it is absolutely crucial to store the assembled cake in the refrigerator. Leaving it at room temperature for extended periods will cause the whipped cream to lose its characteristic lift and begin to deflate, compromising both its appearance and texture. To keep your cake at its best, place it in an airtight cake carrier or cover it loosely with plastic wrap to prevent it from drying out or absorbing odors from other foods. Stored correctly in the fridge, your Chantilly cake will remain delicious for up to 5 days. For optimal freshness, I recommend enjoying it within 2-3 days.
Freezing:
While the individual cake layers can be frozen successfully, I do not recommend freezing the fully assembled Chantilly cake. The fresh berries can become mushy upon thawing, and the whipped cream frosting may separate or lose its light texture. If you wish to get a head start and prepare components in advance, you can bake the individual cake layers, allow them to cool completely, and then tightly wrap each layer in several layers of plastic wrap, followed by a layer of aluminum foil. These well-wrapped cake layers can be frozen for up to 2-3 months. When you’re ready to assemble, simply thaw the frozen cake layers at room temperature for a few hours, then prepare the frosting and assemble the cake on the day you plan to serve it.
Planning Ahead: Making the Cake in Advance
This Chantilly cake recipe is surprisingly flexible and can be easily broken down into manageable steps, allowing you to spread out the work and avoid doing everything on a single day. This is a fantastic strategy, especially when preparing for an event or holiday.
You can dedicate the first day to baking the cake layers. Once they are fully baked and cooled, wrap them tightly in plastic wrap to prevent them from drying out. They can be stored at room temperature overnight or, as mentioned above, frozen for longer storage. On the second day, you can prepare the mascarpone whipped cream frosting and proceed with assembling and decorating your cake. This two-day approach significantly reduces the stress and time commitment on the day you plan to serve the cake, allowing you to enjoy the process and present a truly fresh dessert.
Expert Recipe Tips for Success
Achieving a perfect Chantilly cake involves a few key techniques and considerations. Follow these tips to ensure your cake turns out flawlessly:
- Keep Cream Cold: This is paramount for successful whipped cream. Always ensure your heavy cream is very cold before you begin whipping it. If the cream is warm or even at room temperature, its fat molecules won’t emulsify correctly, and it simply won’t whip up as well or hold its shape.
- Chill Your Mixing Bowl: For an extra boost of stability and faster whipping, place your mixing bowl (and even the whisk attachment) in the freezer for about 10-15 minutes before you start whipping the cream. The cold surface helps keep the cream super chilled throughout the process.
- Recognizing Stiff Peaks: You’ll know your heavy cream has reached “stiff peaks” when you stop the mixer, lift the whisk attachment, and the cream forms a peak that stands up straight without drooping or collapsing. It should be firm but still look light and airy. Be vigilant, as over-whipping can quickly turn it grainy.
- Accurate Flour Measurement: Precision in measuring flour is critical for the cake’s texture. The most accurate method is to use a kitchen scale (grams are best). If you don’t have a scale, use the “spoon and level” method: gently spoon the flour into your dry measuring cup until it’s overflowing, then use the straight edge of a knife or spoon handle to level off the excess, without compacting the flour in the cup. Avoid scooping directly with the measuring cup, as this can pack in too much flour, resulting in a dense, dry cake.

Moist Berry-Filled Chantilly Cake (Vanilla Layer Cake)
Pin
Review
SaveSaved!
Ingredients
For the cake
- 1 cup (227 g) unsalted butter, softened
- 1 1/2 cups (300 g) granulated sugar
- 3 (3) eggs, large
- 2 cups (250 g) all-purpose flour
- 1 tsp (1 tsp) baking powder
- 1/2 tsp (0.5 tsp) kosher salt
- 1/4 tsp (0.25 tsp) baking soda
- 1 tsp (1 tsp) vanilla extract
- 1/2 cup (122.5 g) yogurt, whole milk
- 3/4 cup (183 g) milk, whole
For the Frosting
- 8 oz (226.8 g) mascarpone cheese, softened
- 1 tsp (1 tsp) vanilla extract
- 3/4 cup (90 g) confectioners sugar
- 1 cup (238 g) heavy whipping cream
Other
- 1/2 cup (170 g) strawberry jam, or other jam
- Assorted berries, as much as you want!
Equipment
-
Hand or Stand mixer
Instructions
Make the cake
-
Preheat the oven to 350° F (175°C) and spray either 3 6-inch round cake pans or 2 8-inch round cake pans with baking spray (or grease and flour them) and set aside.
-
In a bowl of a hand or stand mixer fitted with the paddle attachment, cream the 1 cup (227g) softened unsalted butter with the 1 1/2 cups (300g) granulated sugar until light and fluffy, about 1-2 minutes on medium speed. Scrape down the bowl. With the mixer running on low, add in the 3 large eggs one at a time, mixing well after each addition. Next, add in the 1 tsp of vanilla extract and mix until just combined.
-
In a separate bowl, whisk together the 2 cups (250g) all-purpose flour, 1 tsp baking powder, 1/2 tsp kosher salt, and 1/4 tsp baking soda. In a liquid measuring cup, combine the 1/2 cup (122.5g) whole milk yogurt and the 3/4 cup (183g) whole milk.
-
 Alternate adding the dry ingredients (in three additions) with the wet ingredients (in two additions) to the butter mixture, mixing on low speed until just combined after each addition. Start and end with the dry ingredients. Mix until no streaks of flour are visible.
 -
 Divide the batter evenly between the prepared cake pans and bake for 30-35 minutes.
 -
 The cake is done when the edges start to pull away from the sides of the pan and a toothpick inserted into the middle of the cake comes out clean. Allow cakes to cool in pans for 10-15 minutes before inverting onto a wire rack to cool completely.
Make the Mascarpone Chantilly Cream
-
In a medium-sized bowl, mix together the 8 oz (226.8g) softened mascarpone cheese with the 1 tsp of vanilla extract and 3/4 cup (90g) of confectioners’ sugar until just combined and smooth. Set aside.
-
Using a hand mixer or the stand mixer with the whip attachment, beat the 1 cup (238g) very cold heavy cream on high speed until stiff peaks form, about 2 minutes. Be careful not to over-whip, as the cream can curdle very quickly.
-
Gently fold the whipped cream into the mascarpone cheese mixture using a large spatula until no more streaks of cream are visible and the mixture is uniformly light and fluffy.
Assemble the cake!
-
 Level off the tops of the cooled cake layers if necessary using a large serrated knife or a cake leveler to create flat surfaces. Place one cake layer on your serving plate. Spread a layer of 1/2 cup (170g) strawberry jam over the top, leaving about 1 inch from the sides. Next, add a generous layer of the mascarpone Chantilly cream. Top with a scattering of fresh, assorted berries. Repeat these steps for the remaining cake layers. Once all layers are stacked, decide on your decoration style: either cover the entire cake with the remaining frosting for a classic look or leave it partially exposed (naked cake style) and simply top with dollops of cream and an abundance of fresh berries for a rustic finish.
Notes
You can make this recipe over two days to make it easier and reduce stress. Bake the cake layers on the first day, cool, and wrap them tightly. On the second day, prepare the frosting and assemble the cake!
