Irresistibly Fudgy Red Velvet Brownies: The Ultimate One-Bowl Recipe with Crinkly Tops
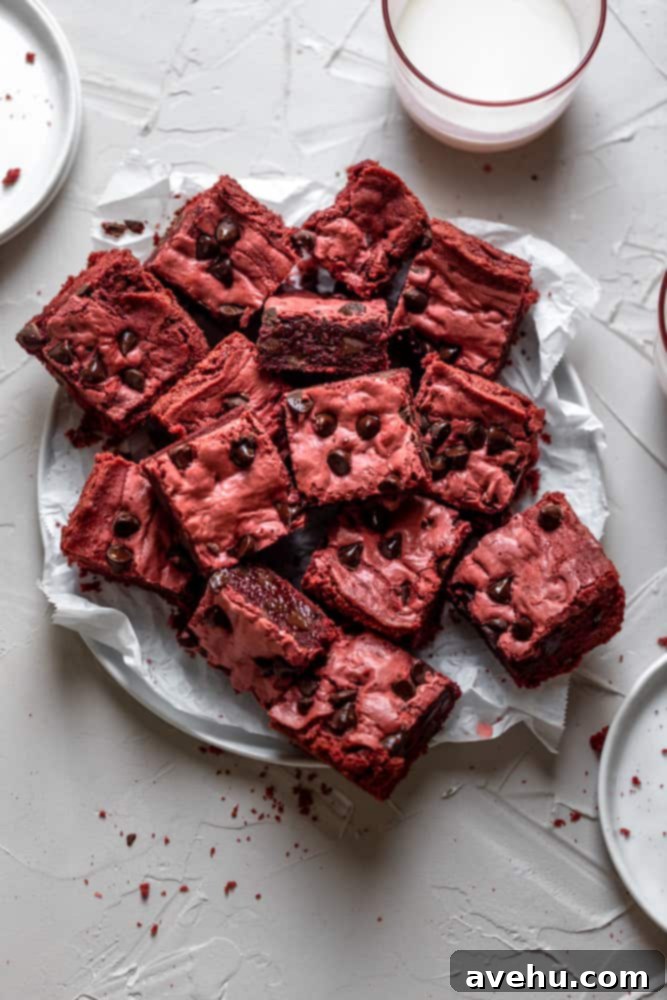
These incredibly fudgy red velvet brownies are a dream come true for any dessert lover, and best of all, they’re so easy to make from scratch! Featuring those coveted crinkly tops that signal a perfect brownie, this recipe simplifies the baking process by requiring just one bowl. They are the quintessential sweet treat, ideal for celebrating Valentine’s Day, impressing guests at a party, or simply enjoying a cozy date night dessert. Prepare for these to quickly become one of your all-time favorite dessert recipes!
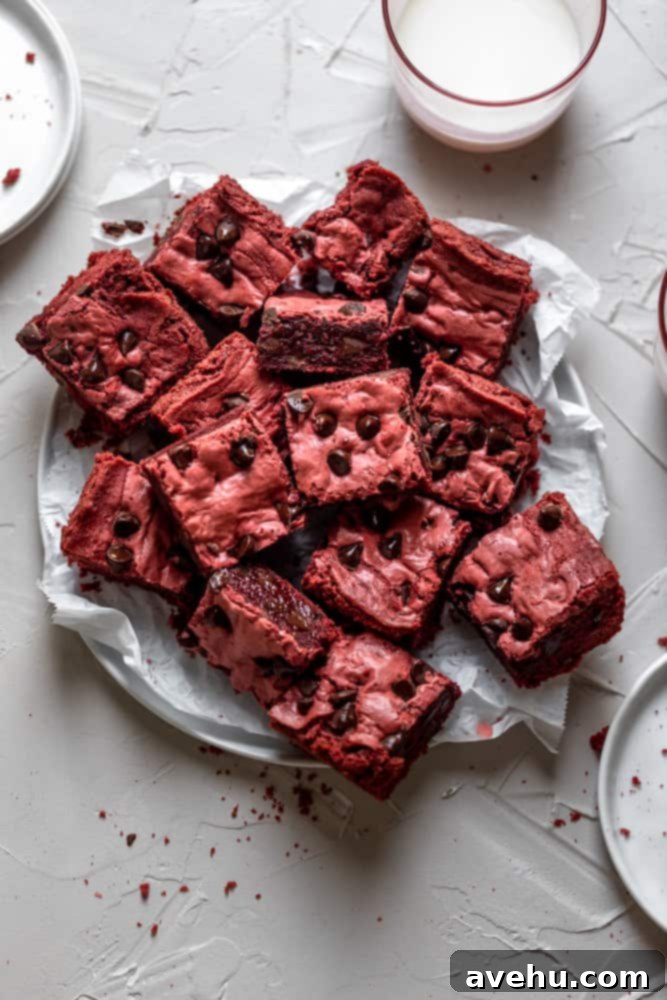
There’s something inherently special about red velvet desserts. Their vibrant, deep red hue immediately catches the eye, making any occasion feel a bit more luxurious and festive. Whether it’s a birthday, an anniversary, or just a Tuesday evening craving, a red velvet treat elevates the moment.
Get ready to indulge in something truly elegant, my friends. We’re embracing a touch of sophistication in our kitchen today!
As a trained pastry chef, I am passionate about exploring diverse interpretations of classic homemade brownies. While I adore my simple one-bowl brownies, the decadent brownies with cream cheese frosting, and my incredibly popular chocolate brownie cookies—these fudgy red velvet brownies hold a truly unique and cherished place in my repertoire.
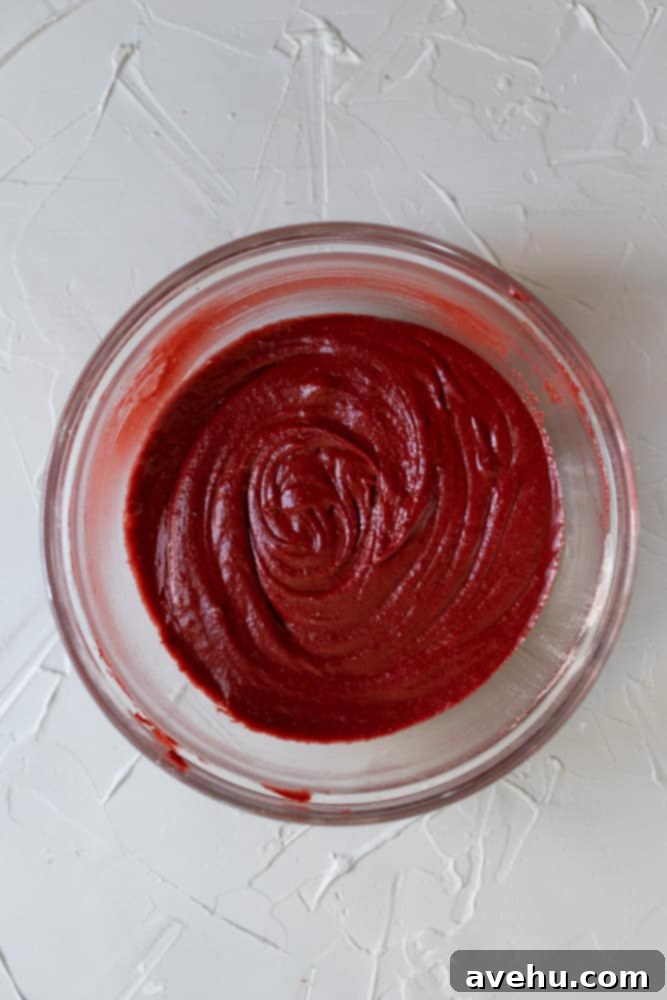
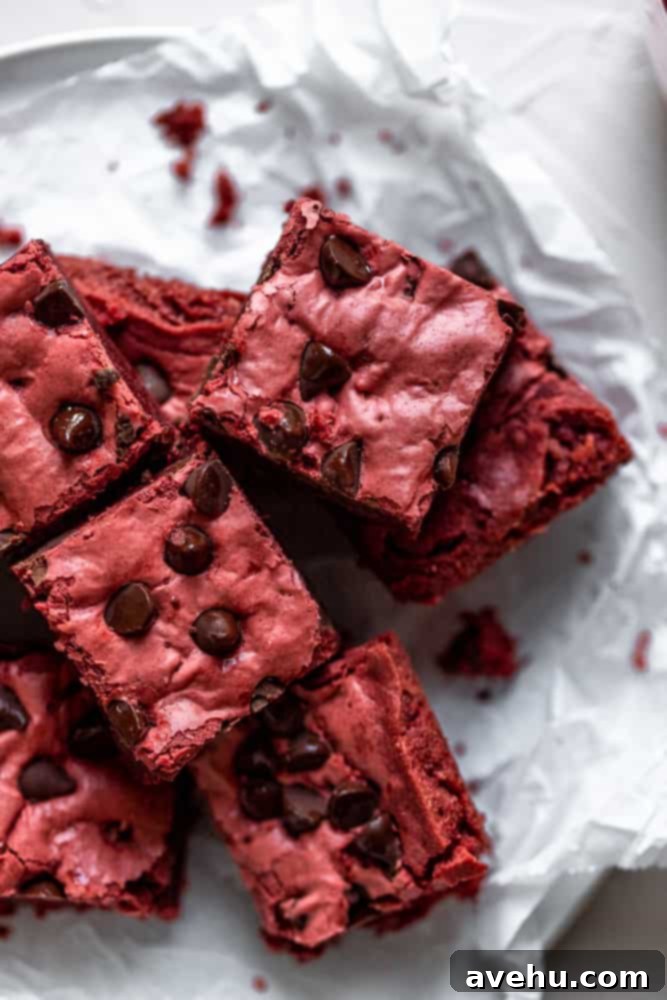
What truly sets this red velvet brownie recipe apart is its remarkable simplicity and the stunning results it delivers. You can effortlessly prepare these brownies using either a hand mixer, a stand mixer, or even just by hand in a single bowl, minimizing cleanup. The batter transforms into a glorious crimson shade, which becomes even more striking once baked. For an extra touch of beauty and flavor, consider drizzling them with this luscious tangy cream cheese glaze, which perfectly complements the rich red velvet.
If you’re a devoted fan of red velvet recipes, you simply must try these other delightful creations: my airy red velvet cheesecake cupcakes, the rich and creamy red velvet cheesecake, or the show-stopping 5-star red velvet bundt cake!
Unlocking the Classic Red Velvet Flavor and Texture
Traditional red velvet desserts are celebrated for their distinctive smooth, velvet-like texture and a unique flavor profile that marries subtle cocoa with a hint of tanginess. This is typically achieved through a special combination of ingredients: a modest amount of cocoa powder, bright red food coloring, white vinegar, buttermilk, and baking soda. The magic happens when the acidic components (buttermilk and vinegar) react with the baking soda and cocoa. This reaction not only helps with leavening but also contributes to the characteristic tender crumb and can enhance the red hue of the cocoa.
For this specific red velvet brownie recipe, I’ve intentionally omitted the buttermilk. Brownies naturally tend to be dense and fudgy, and buttermilk isn’t a critical ingredient for achieving that specific brownie texture. Rest assured, you’ll still experience that beloved classic vanilla and subtle chocolatey taste you expect from an authentic red velvet treat, all while keeping the recipe perfectly suited for a brownie.
Essential Ingredients for Your Red Velvet Brownies
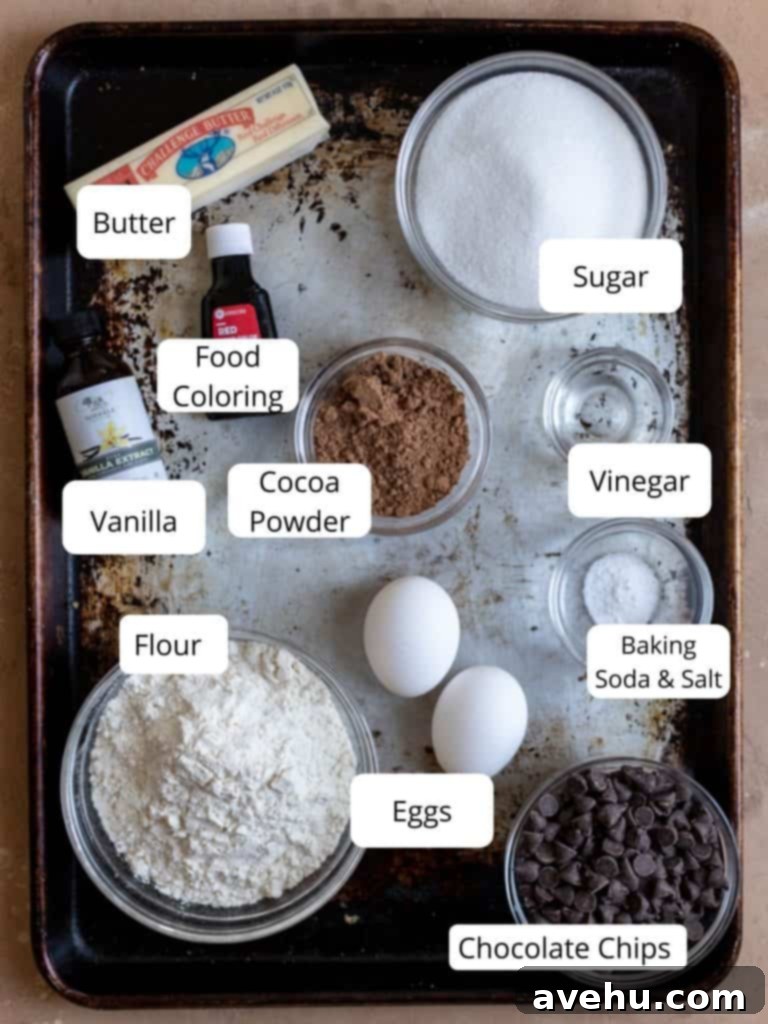
Creating truly remarkable red velvet brownies starts with understanding the role of each ingredient. Here’s a detailed breakdown of what you’ll need and why it matters:
- Unsalted Butter – Melted butter forms the rich, flavorful base of these brownies. It not only imparts a delicious buttery taste but also contributes significantly to their incredibly soft and fudgy texture. Using unsalted butter allows you to control the exact amount of salt in the recipe.
- Granulated Sugar – This is your primary sweetener. Beyond just adding sweetness, sugar plays a crucial role in creating those desirable shiny, crinkly tops that are the hallmark of a perfect brownie. When whisked vigorously with eggs, the sugar crystals help form that delicate, glossy crust.
- Large Eggs – Eggs are vital for structure and moisture. They act as a binder, holding all the ingredients together as the brownies bake. Furthermore, eggs contribute to the fudgy consistency and richness, ensuring a tender bite.
- Vanilla Extract – A generous dash of vanilla extract is essential. It enhances the overall flavor profile, adding a warm, aromatic note that beautifully complements the subtle cocoa and distinctive red velvet taste. Don’t skip this!
- White Vinegar – While it might seem unusual, white vinegar is a secret weapon in red velvet baking. Its acidity reacts with the baking soda, aiding in leavening and contributing to the tender, velvet-like texture. It also helps to deepen the red color and balance the sweetness.
- Red Food Coloring – This is what gives your brownies their iconic, vibrant red color. While liquid food coloring can be used, gel food coloring works best. Gel colors are highly concentrated, meaning you need less to achieve a brilliant shade, and they blend seamlessly into the batter without altering its consistency.
- All-Purpose Flour – As the main dry ingredient, all-purpose flour provides the necessary structure to the brownies. Using the correct amount is crucial for achieving a fudgy rather than cakey texture.
- Unsweetened Cocoa Powder – This adds the distinct, subtle chocolate flavor that is characteristic of red velvet. It also plays a role in the classic red velvet chemical reaction, helping to enhance the color.
- Baking Soda – Working in conjunction with the white vinegar, baking soda is a leavening agent that helps the brownies rise ever so slightly, creating a tender, less dense crumb without making them cakey.
- Kosher Salt – A small amount of salt is a flavor enhancer. It balances out the sweetness and deepens the chocolate and vanilla notes, bringing all the flavors into perfect harmony.
- Semi-Sweet Chocolate Chips – These sweet morsels are folded into the batter and sprinkled on top, providing bursts of rich, melty chocolate in every bite. They add another layer of decadence and texture to the fudgy brownies.
How to Make Fudgy Red Velvet Brownies from Scratch: Step-by-Step Guide
Follow these simple steps to create perfectly fudgy and vibrant red velvet brownies:
- Prepare Your Pan and Oven: Begin by preheating your oven to 350°F (175°C). Line an 8×8 inch square baking pan with parchment paper, leaving an overhang on two sides to easily lift the brownies out later. Alternatively, grease the pan thoroughly with cooking spray. This crucial step prevents sticking and ensures a clean release.
- Melt Butter and Whisk with Sugar: In a microwave-safe medium bowl, melt the ½ cup of unsalted butter. Once melted, add the 1 cup of granulated sugar to the warm butter. Whisk vigorously for about 30 seconds until the mixture is light, slightly foamy, and well combined. This initial whisking helps create those signature shiny, crinkly brownie tops.
- Incorporate Wet Ingredients: Add the large eggs to the butter-sugar mixture one at a time, mixing well after each addition until fully incorporated. Next, stir in the ½ tbsp vanilla extract, ½ tsp white vinegar, and ½ tbsp red food coloring. Mix thoroughly until the vibrant red color is evenly distributed throughout the wet ingredients.
- Combine Dry Ingredients: To the wet mixture, add your dry ingredients: 1 ½ cups all-purpose flour, ¼ cup unsweetened cocoa powder, ¼ tsp baking soda, and ¼ tsp kosher salt.
- Mix Batter and Fold in Chocolate Chips: Using a rubber spatula or an electric mixer on medium-low speed, mix the batter by hand until just combined. Be careful not to overmix, as this can lead to tough brownies. The batter should be thick and consistent. Gently fold in the semi-sweet chocolate chips, reserving a small handful to sprinkle on top for extra visual appeal.
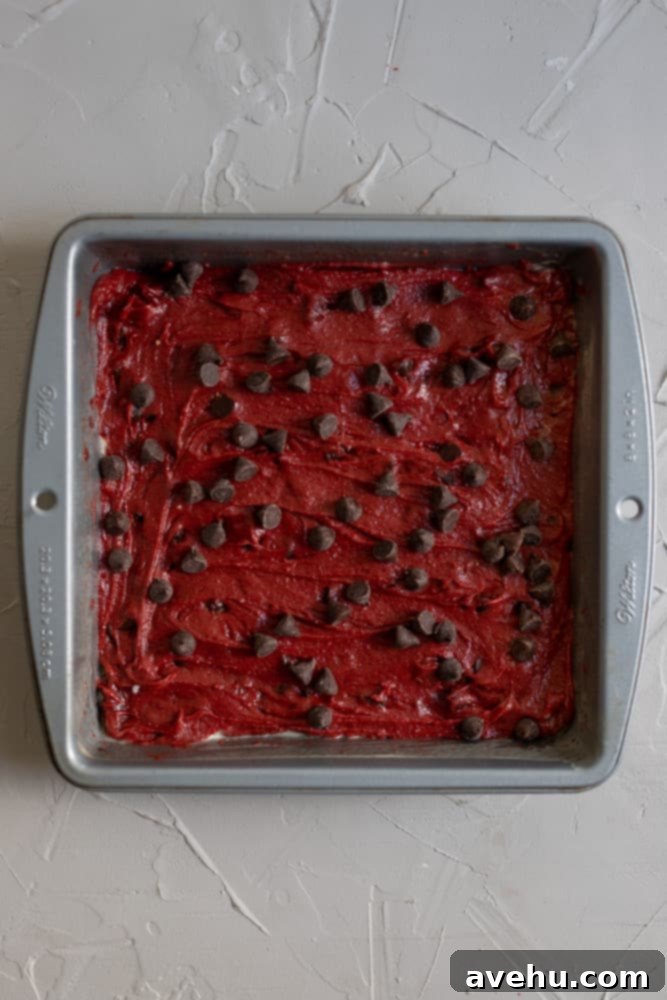
- Bake to Perfection: Pour the luscious red velvet batter into your prepared 8×8 inch pan. Evenly spread it out and then sprinkle the reserved chocolate chips over the top. Bake for 28-30 minutes. For truly fudgy brownies, aim for the 28-minute mark. If you prefer a slightly more cakey texture, bake for the full 30 minutes. An inserted toothpick should come out with moist crumbs attached, but not wet batter.
- Cool Before Cutting: This is arguably the hardest step! Let the brownies cool completely in the pan before attempting to remove and slice them. Cooling allows them to set properly, ensuring clean, perfect squares. If you cut them too soon, they will be too gooey and fall apart. Patience is key for the best results!
Choosing the Best Food Coloring for Vibrant Red Velvet
For achieving that truly iconic and rich red hue in your red velvet brownies, the type of food coloring you use makes a significant difference. For this recipe, I highly recommend using a gel-based food coloring. Gel colors are far more concentrated than traditional liquid food colorings, which means you’ll need only a small amount to achieve a deep, vivid red. This is crucial because adding too much liquid food coloring can thin out your batter, altering the texture of your brownies. Gel colors also dissolve better into the batter, ensuring an even and consistent color throughout without any streaks or pale spots. You can typically find high-quality gel food coloring at specialty baking stores, craft stores like Michaels, or online.
Enhance Your Brownies with Classic Cream Cheese Frosting
While these red velvet brownies are absolutely divine on their own, pairing them with a classic, tangy cream cheese frosting takes them to an entirely new level of indulgence. The slight tartness of the cream cheese frosting provides a perfect contrast to the rich sweetness of the brownies. It’s the quintessential red velvet combination! Simply wait for your freshly baked brownies to cool completely before generously slathering on a thick layer of this delightful homemade cream cheese frosting. The creamy texture and bright flavor will make these brownies even more irresistible.
Expert Recipe Tips for Perfect Red Velvet Brownies
- Room Temperature Ingredients: For the best results and a smooth, evenly mixed batter, ensure all your cold ingredients (like eggs and butter if not melted) are at room temperature. This helps them emulsify better and prevents a lumpy batter.
- Don’t Overmix the Batter: Once you add the dry ingredients, mix only until just combined. Overmixing develops the gluten in the flour, which can lead to tough, chewy brownies instead of tender, fudgy ones.
- Gel Food Coloring is Key: As mentioned, gel food coloring is highly concentrated and delivers a more vibrant, consistent red color without affecting the batter’s consistency. Avoid liquid food coloring if possible, or use it sparingly.
- Achieving Fudgy vs. Cakey: Baking time is crucial for texture. For the ultimate fudgy brownie experience, bake for 28 minutes. If you prefer a slightly lighter, more cake-like brownie, extend the baking time to 30 minutes. Always keep an eye on your oven, as baking times can vary.
- Cool Completely Before Cutting: This tip cannot be stressed enough! Brownies need time to set and firm up as they cool. Cutting them while warm will result in gooey, crumbly pieces. Let them cool for at least 1-2 hours, or even longer, for neat, clean slices. Pop them in the fridge for 30 minutes after they’ve cooled mostly for extra clean cuts.
- Adjust Pan Size for Quantity: This recipe is designed for an 8×8 inch pan. If you double the recipe for a larger crowd, you can bake it in a 9×13 inch pan. Remember to adjust the baking time accordingly, as a larger batch will likely need more time in the oven.
- Parchment Paper is Your Friend: Lining your pan with parchment paper (with an overhang) makes removing the entire batch of brownies a breeze, allowing you to lift them out and cut them on a flat surface, reducing mess and damage.
Red Velvet Brownies: Your Top Questions Answered
What makes these brownies so incredibly fudgy? The secret to our brownies’ intense fudginess lies in a precise balance of ingredients and careful baking. We use a higher ratio of fat and sugar to flour, and crucially, we ensure they are baked for just the right amount of time. Underbaking slightly (meaning a toothpick comes out with moist crumbs, not wet batter) prevents them from drying out and guarantees that dense, moist, and wonderfully gooey center everyone loves.
How do you achieve those coveted shiny, crinkly tops on brownies? The magical crinkly top is created by adequately whisking the melted butter and granulated sugar together with the eggs. This process incorporates air and creates a sugar syrup that, when baked, forms a thin, delicate, glossy crust on the surface of the brownie. Don’t skimp on the initial whisking step!
Can I easily double this red velvet brownie recipe? Absolutely! This recipe scales beautifully. If you need to serve a larger crowd, simply double all the ingredient quantities. You can then bake the doubled batch in a standard 9×13 inch baking pan. Just be sure to account for a slightly longer baking time, typically an additional 5-10 minutes, as the deeper batter will require more time to cook through. Always check for doneness with a toothpick.
What’s the best way to cut brownies for perfect squares? For perfectly neat and even brownie squares, patience and the right technique are key. First, ensure the brownies are completely cooled (chilling them slightly in the fridge can help). Use a long, sharp knife. Wipe the knife clean with a damp cloth after each cut to prevent sticking and ensure clean edges. Start by cutting the entire brownie slab in half, then cut those halves in half again. Rotate the pan and repeat the process in the other direction to create uniform rows and columns of beautiful brownies.
Fun and Flavorful Substitutions for Your Red Velvet Brownies
These fudgy red velvet brownies are fantastic as is, but don’t hesitate to get creative with these delicious variations:
- White Chocolate Chips: Swap out semi-sweet chocolate chips for white chocolate chips to create a beautiful color contrast and a different flavor dimension.
- Generous Cream Cheese Frosting: As previously mentioned, a thick layer of classic cream cheese frosting is always a winner and elevates these brownies to a true showstopper.
- Green Velvet Twist: Feeling adventurous? Use green gel food coloring instead of red for a fun “Green Velvet” brownie, perfect for St. Patrick’s Day or other themed events.
- Nutty Crunch: Before baking, sprinkle a handful of chopped walnuts or pecans over the top of the batter for an added layer of texture and earthy flavor.
- Elegant Powdered Sugar Dust: For a simple yet classy finish, dust the cooled brownies lightly with powdered sugar before serving.
- Chocolate Drizzle: Drizzle melted white, dark, or even milk chocolate over the cooled brownies for an extra touch of decadence and visual appeal.
- Espresso Powder Boost: Add ½ to 1 teaspoon of espresso powder to the dry ingredients to subtly enhance the chocolate flavor without making the brownies taste like coffee.
- Miniature Marshmallows: For a playful twist, sprinkle miniature marshmallows on top during the last 5-10 minutes of baking until they’re slightly puffed and golden.
Storing & Freezing Your Fudgy Red Velvet Brownies
Proper storage ensures your delicious brownies remain fresh and enjoyable for as long as possible:
Storing: To keep these fudgy red velvet brownies fresh, store them in an airtight container at room temperature. They will maintain their delicious texture and flavor for up to 5 days. If you’ve added cream cheese frosting, it’s best to store them in the refrigerator, and they will keep well for about 3-4 days. Allow them to come to room temperature for 15-20 minutes before serving for the best taste and texture.
Freezing: If you find yourself with any leftover brownies (a rare occurrence!), they freeze exceptionally well. To freeze them effectively and prevent freezer burn, first wrap individual brownies (or small batches) tightly in a layer of plastic wrap. Follow this with another layer of aluminum foil. This double-layer protection is crucial for sealing out air. Once wrapped, place them in a freezer-safe bag or container. They will stay perfectly delicious in the freezer for up to 3 months! When you’re ready to enjoy them, simply thaw them on your countertop for a couple of hours until they are completely defrosted. You can even warm them slightly in the microwave for a fresh-baked feel.
Discover More Delicious Brownie & Blondie Recipes!
If you’ve loved these red velvet brownies, be sure to explore some of my other fantastic recipes:
- Strawberry Brownies – A fruity and delightful twist on the classic.
- Chocolate Chip Blondies – Chewy, buttery, and packed with chocolatey goodness.
- One Bowl Brownies – For when you need rich, decadent brownies with minimal cleanup.
- Chocolate Brownie Cookies – All the chewiness of a brownie in a convenient cookie form.

Fudgy and Easy Red Velvet Brownies
15 minutes
30 minutes
45 minutes
16
brownies
Pin
Review
Save
Saved!
Prevent your screen from going dark
Ingredients
-
1/2
cup
(113.5
g)
unsalted butter,
melted -
1
cups
(200
g)
granulated sugar -
2
(2)
eggs ,
large -
1/2
tbsp
(0.5
tbsp)
vanilla extract -
½
tsp
(0.5
tsp)
white vinegar -
1/2
tbsp
(0.5
tbsp)
red food coloring,
gel preferred -
1 ½
cups
(187.5
g)
all purpose flour -
¼
cup
(21.5
g)
cocoa powder -
1/4
tsp
(0.25
tsp)
baking soda -
¼
tsp
(0.25
tsp)
kosher salt -
1
cup
(236.59
g)
chocolate chips,
semi- sweet
Instructions
-
Preheat your oven to 350°F (175°C) and line or generously grease an 8×8 inch baking pan.
-
In a medium-sized microwave-safe bowl, melt the ½ cup unsalted butter. Add the 1 cup granulated sugar and whisk vigorously until the mixture is light and foamy, for about 30 seconds. This helps create those signature crinkly tops.
-
Add the 2 large eggs one at a time, mixing well after each addition. Next, stir in the ½ tbsp vanilla extract, ½ tsp white vinegar, and ½ tbsp red food coloring. Mix until fully combined and the color is even.
-
Now, add the dry ingredients: 1 ½ cups all-purpose flour, ¼ cup cocoa powder, ¼ tsp baking soda, and ¼ tsp kosher salt to the wet mixture.
-
Mix with a hand mixer on low speed or by hand with a rubber spatula until a thick batter forms and no dry streaks remain. Be careful not to overmix.
-
Gently fold in most of the chocolate chips, reserving some to sprinkle on top before baking.
-
Pour the batter into the prepared pan and spread evenly. Top with the extra chocolate chips for visual appeal.
-
Bake for 28-30 minutes, or until an inserted toothpick comes out with moist crumbs attached (not wet batter). For the fudgiest brownies, aim for 28 minutes. Let them cool completely in the pan before removing and serving to ensure they set properly.
Notes
For an extra decadent treat, top with a generous layer of tangy cream cheese frosting once cooled.
Serving:
1
g
,
Calories:
152
kcal
,
Carbohydrates:
30
g
,
Protein:
2
g
,
Fat:
3
g
,
Saturated Fat:
2
g
,
Trans Fat:
1
g
,
Cholesterol:
2
mg
,
Sodium:
62
mg
,
Potassium:
34
mg
,
Fiber:
1
g
,
Sugar:
20
g
,
Vitamin A:
25
IU
,
Vitamin C:
1
mg
,
Calcium:
17
mg
,
Iron:
1
mg
Dessert
Sam Adler
American
Did you make this recipe?
Please leave a star rating and review in the form below. I read them all!
