Ultimate Zesty Lemon Curd Cake: A Moist & Fluffy Homemade Delight
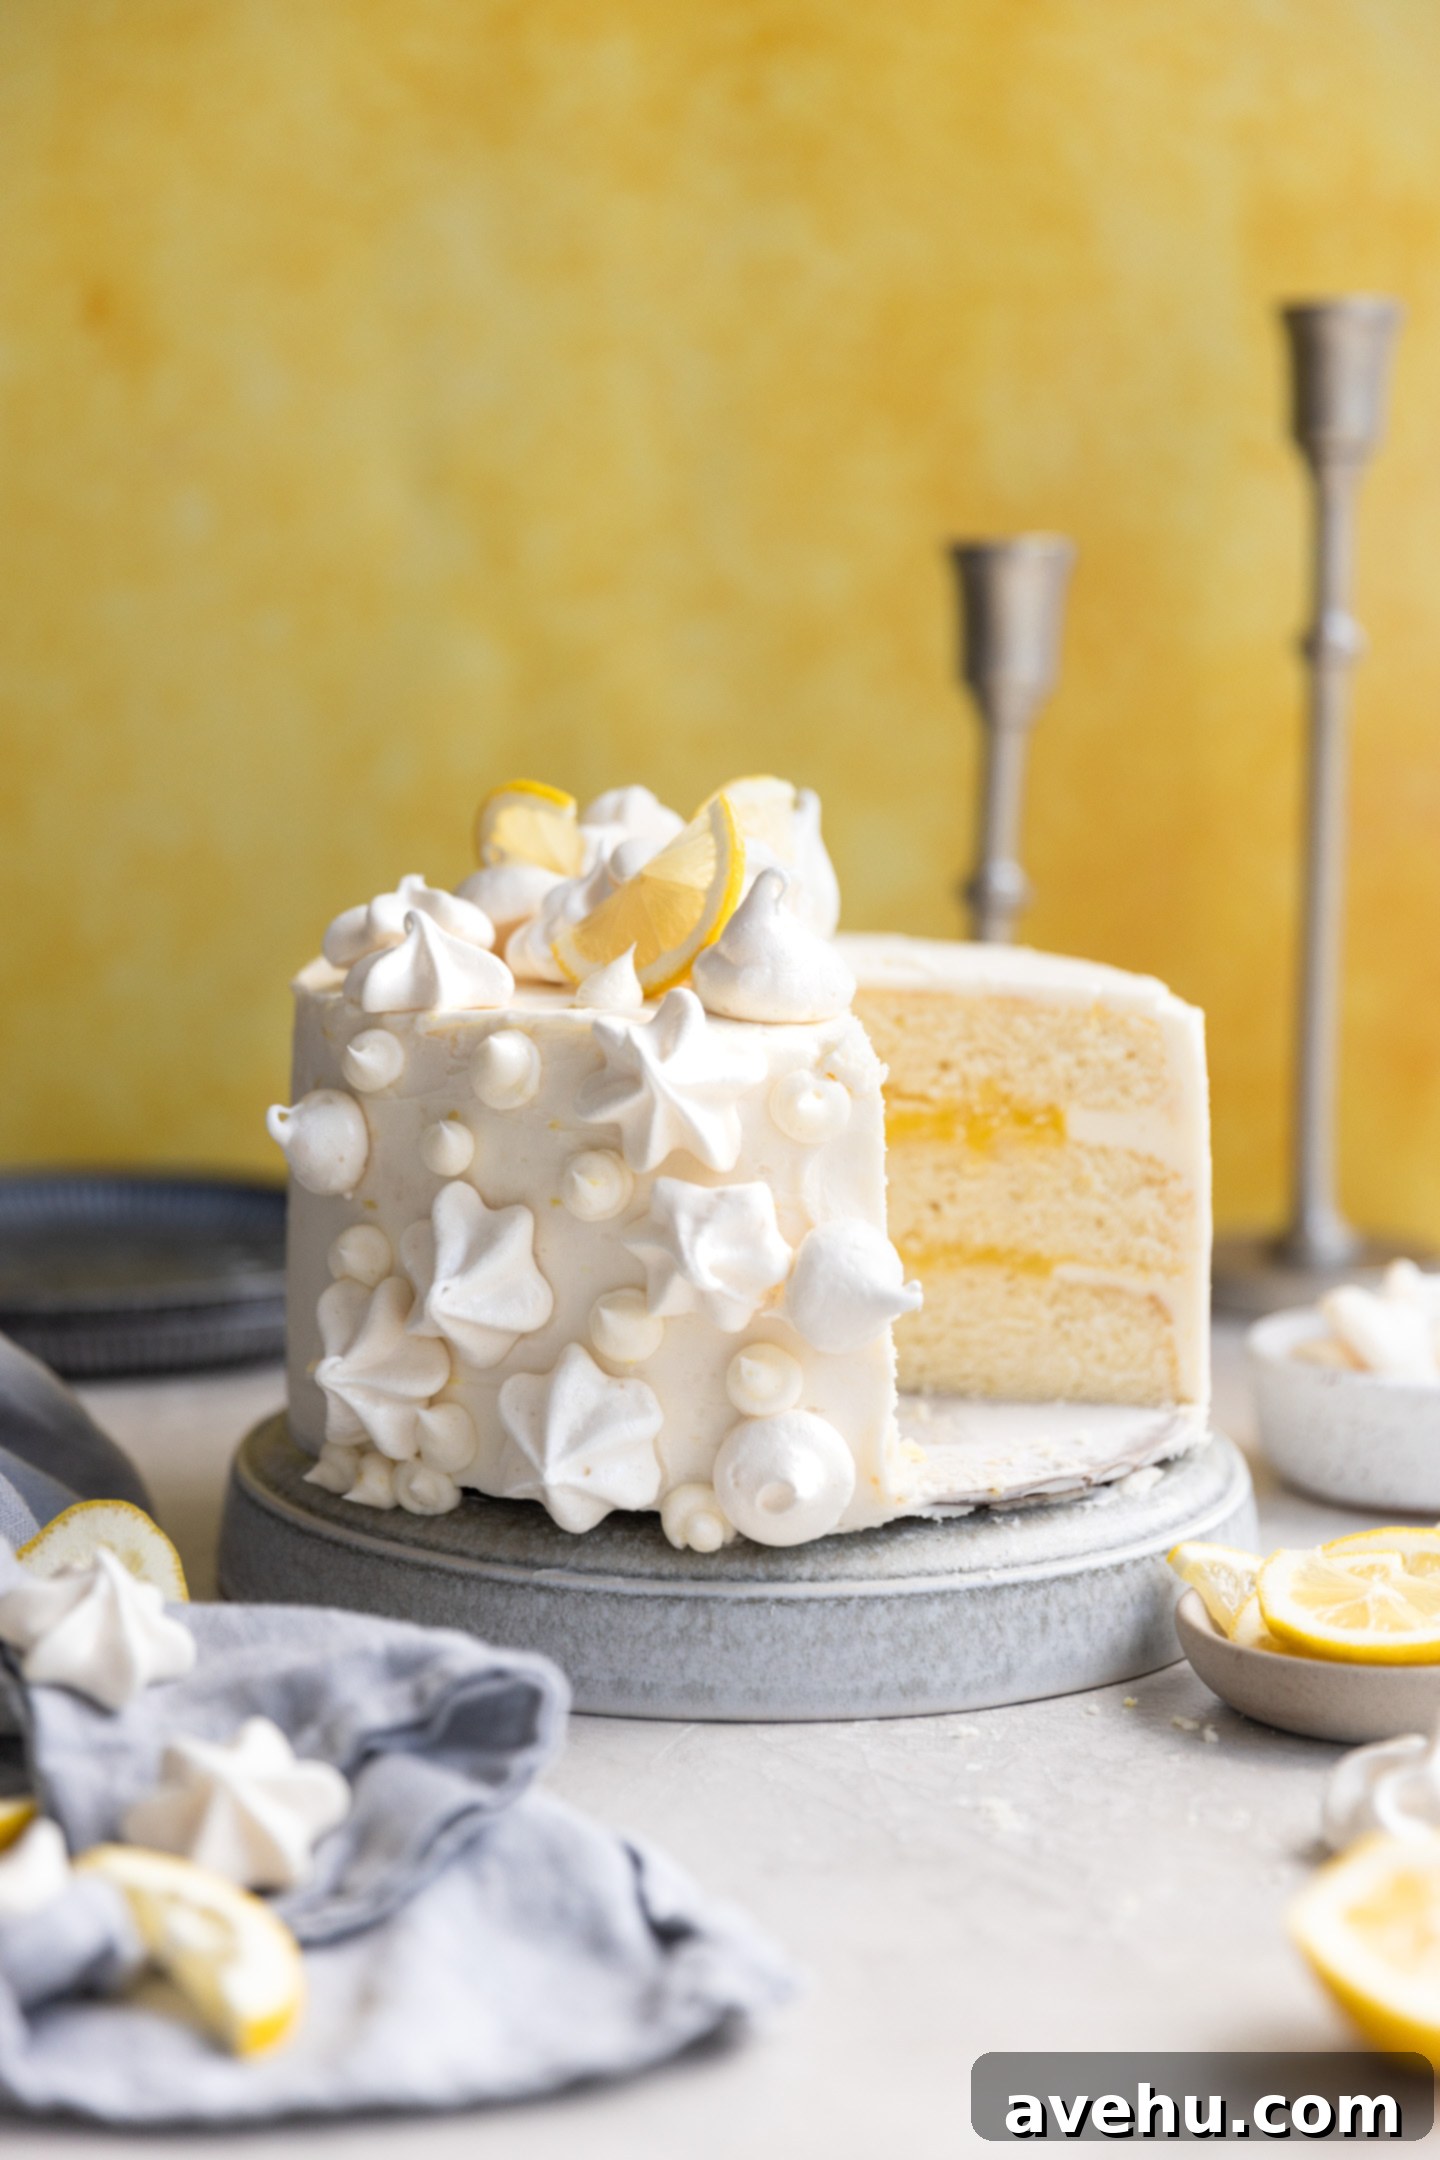
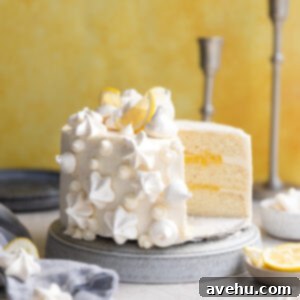
Experience the vibrant burst of sunshine in every slice of this exquisite Lemon Curd Cake. This dessert features three impeccably moist and fluffy lemon cake layers, generously filled with bright, homemade lemon curd, and crowned with a luscious, creamy lemon buttercream frosting. It’s a symphony of flavors, offering the perfect harmony of tart and sweet, all derived from fresh lemon zest and juice. To elevate its presentation, consider adding delicate meringue decorations, transforming this cake into a true showstopper for any special party or elegant occasion!
This lemon curd cake is the quintessential dessert for spring and summer gatherings. Its light, airy texture and refreshingly bright lemon flavor make it an ideal choice for warmer months when you crave something both invigorating and delicious. Each fluffy cake layer is tender and perfectly moist, while the homemade lemon curd filling and the zesty lemon buttercream frosting contribute a delightful burst of tangy sweetness that tantalizes the taste buds. It’s not just a cake; it’s an experience.
At the heart of this recipe is the incredible lemon curd. This smooth, velvety filling is a culinary marvel, crafted from a harmonious blend of fresh eggs, granulated sugar, rich butter, and, of course, abundant fresh lemon juice and zest. Its signature tangy and zesty profile beautifully balances the inherent sweetness of the sugar and the luxurious richness of the butter. With a consistency akin to a creamy pudding, homemade lemon curd is wonderfully versatile. Beyond this cake, it can be used to fill delicate pastries, swirl into these delectable lemon curd muffins, or serve as a vibrant center for cookies, much like these delightful lemon curd cookies!
The optional yet highly recommended meringue decorations truly transform this recipe into an unforgettable dessert, perfect for any special occasion. Whether you’re hosting an elegant brunch, celebrating a baby shower, or simply enjoying a summer barbecue, this lemon curd cake is guaranteed to impress your guests and become the centerpiece of your dessert table. Its stunning appearance and irresistible flavor make it an absolute must-have in your recipe collection.
If your love for lemon runs deep but you’re seeking a quicker dessert solution, don’t miss out on this highly-rated and reader-favorite lemon pudding bundt cake. For smaller, individual portions, these easy-to-make lemon cupcakes are a fantastic alternative. And for those who enjoy a different flavor profile, you can also frost this glorious cake with a tangy and rich lemon cream cheese frosting, offering a delightful twist on this classic.
Why You’ll Adore This Lemon Curd Cake
This isn’t just another cake recipe; it’s a culinary journey that promises delicious rewards. Here’s why this lemon curd cake will quickly become a cherished favorite:
- An Absolute Showstopper: From its vibrant color to its elegant layers, this cake is visually stunning. Even without the optional meringue decorations, its natural beauty and delicious aroma command attention, making it the perfect centerpiece for any celebration.
- The Unparalleled Taste of Homemade: Once you experience the silky smooth texture and intensely fresh flavor of homemade lemon curd, you’ll understand why store-bought jars simply can’t compare. Making it from scratch is incredibly rewarding and elevates the entire cake.
- Versatile Frosting Options: While our zesty lemon buttercream is a dream, this recipe also presents an equally impressive and fun alternative frosting option that allows for creative expression and suits different taste preferences.
- Perfect Balance of Flavors: The cake masterfully blends the sweet richness of the cake and frosting with the bright, tart zing of fresh lemon, creating a harmonious taste that is never overly sweet.
- Incredibly Moist and Tender: Thanks to the reverse creaming method, the cake layers are exceptionally moist with a delicate, fluffy crumb that practically melts in your mouth.
Essential Ingredients You’ll Need
For this recipe, fresh lemons are paramount! You’ll need approximately a whole bag, totaling about 8 large lemons. About 4 of these will be dedicated to zest, and all 8 will be juiced (you can zest first, then juice the same lemons). The quality of your lemons directly impacts the vibrant, fresh flavor of both the cake and the curd. Avoid bottled juice or pre-grated zest, as they lack the bright intensity of fresh citrus. To extract the maximum juice with ease, a reliable lemon juicer is highly recommended.
- White Granulated Sugar: Provides essential sweetness, balances the tart lemon, and contributes to the cake’s tender crumb.
- All-Purpose Flour: The primary structural component of the cake, ensuring a tender yet stable foundation.
- Baking Powder & Baking Soda: These leavening agents work in harmony to give the cake its signature fluffy, airy rise and light texture.
- Kosher Salt: A crucial flavor enhancer, salt balances the sweetness, brightens the lemon notes, and helps activate the leavening agents for optimal rise.
- Fresh Lemon Juice & Lemon Zest: The stars of the show! These provide the intense, fresh citrus flavor that permeates the cake, perfectly complementing both the homemade lemon curd and the luscious buttercream frosting.
- Softened Unsalted Butter: Adds a rich, creamy fat content to the cake batter, contributing significantly to its incredible moisture and luxurious texture. Learn how to soften butter quickly for best results.
- Buttermilk: Reacts with the baking soda to enhance leavening, creating a more tender crumb and adding a subtle tang that enriches the cake’s flavor.
- Large Eggs and Egg Whites: Provide essential structure and stability to the cake, aiding in its rise and setting properly during baking.
- Zesty Lemon Buttercream: This easy-to-make sweet and tangy frosting provides a dreamy, creamy topping that ties all the layers together with a final flourish of lemon flavor.
For the Zesty Homemade Lemon Curd:
- Egg Yolks: These are the foundational ingredient for the curd, imparting rich flavor, creamy texture, and acting as a natural thickener.
- Granulated Sugar: Sweetens the curd, harmonizing with the tartness of the lemon juice for a balanced and delightful flavor.
- Fresh Lemon Juice and Zest: Provides the quintessential bright, tangy, and aromatic lemon flavor that defines the curd, and also contributes to its thickening process.
- Cold Unsalted Butter: Crucial for achieving the perfect creamy, non-greasy consistency. Adding it cold at the end emulsifies beautifully, enriching the curd and helping it set into a luxurious spread. Ensure your butter is cold when adding it!
For the Elegant Meringue Decorations (Optional):
- Egg Whites: These are the base for your airy meringue decorations, providing the necessary structure and stability when whipped. A fantastic bonus: these are the egg whites carefully saved from the lemon curd recipe, minimizing waste!
- Cream of Tartar: A vital stabilizer that helps the egg whites whip up faster, achieve greater volume, and form perfectly stiff, glossy peaks.
- Granulated Sugar: Sweetens the meringues and is essential for their structural integrity. The sugar helps the meringue hold its piped shape and become delightfully crisp when baked.
How to Create This Stunning Lemon Curd Cake from Scratch
For this lemon layer cake, we utilize the renowned reverse creaming method. Unlike traditional methods where butter and sugar are creamed first, here, all the dry ingredients are combined initially, and then the softened butter is added. This unique approach coats the flour particles with butter, which inhibits excessive gluten development. The result? An exceptionally tender, incredibly fluffy, and wonderfully moist cake crumb – pure baking magic!
Step 1: Prepare for Baking. Begin by preheating your oven to 350°F (175°C). Prepare three 8-inch or 9-inch round cake pans by generously coating them with baking spray or lining the bottoms with parchment paper. Set them aside, ready for the batter.
Step 2: Combine Dry Ingredients and Butter. In the spacious bowl of a stand mixer fitted with the paddle attachment (or using a hand mixer), combine the white sugar, all-purpose flour, baking powder, kosher salt, baking soda, and fresh lemon zest. Mix on low speed for about 30 seconds until all dry ingredients are uniformly combined. Next, add the softened butter into the mixture. Continue mixing on low speed for 30 seconds to one minute, until the mixture takes on a sandy, crumbly texture, and the butter is fully incorporated into the dry ingredients.
Step 3: Incorporate Wet Ingredients. With the mixer still on low speed, gradually pour in the fresh lemon juice and buttermilk. Increase the speed to medium and mix for another 30 seconds, ensuring everything is well combined. Stop the mixer and use a rubber spatula to scrape down the sides of the bowl, ensuring no dry pockets remain. Finally, add the two large eggs and the additional egg white. Mix on medium speed for precisely 30 seconds, just until the batter is smooth and well emulsified, taking care not to overmix.
Step 4: Bake and Cool the Cake Layers. Divide the silky cake batter evenly among the three prepared cake pans. Bake for 25-30 minutes, or until a wooden skewer inserted into the center of a cake comes out clean. Once baked, allow the cakes to cool in their pans for 10 minutes. This allows them to firm up slightly. Then, invert them onto a wire rack to cool completely. It’s crucial that the cakes are entirely cool before assembly to prevent the frosting and curd from melting.
Crafting the Silky Lemon Curd:
Step 1: Separate Egg Whites and Yolks. Carefully separate the egg yolks from the whites. It’s vital to be meticulous here. Set the whites aside in a clean bowl if you intend to make the meringue decorations.
Critical Note: If even a tiny speck of egg yolk finds its way into the egg whites, the meringues will not whip up properly into stiff peaks. Handle with extreme care!
Step 2: Combine Curd Ingredients. In a small, heatproof bowl or large measuring cup, combine the egg yolks, granulated sugar, fresh lemon zest, and freshly squeezed lemon juice. Whisk vigorously until the mixture is smooth and thoroughly combined.
Step 3: Cook to Perfection. Pour the lemon mixture into a heavy-bottomed saucepan. Place the pan over low to medium-low heat. This step requires patience and constant attention: consistently stir the mixture with a whisk or rubber spatula for approximately 10 minutes. Do not be tempted to rush this process or increase the heat too quickly, as this will scramble or cook the eggs rather than thickening the curd. The curd is perfectly done when it thickly coats the back of a spoon. To test, draw a line with your finger across the spoon’s coated back; if the line remains distinct and doesn’t run, your curd is ready.
Step 4: Add Butter and Strain. Immediately remove the pan from the heat. Add the cold, cubed unsalted butter directly into the hot curd. Stir continuously until the butter has completely melted and is fully incorporated, making the curd incredibly smooth and glossy. To ensure the ultimate silky texture, strain the finished lemon curd through a fine-mesh sieve into a clean container. This removes any potential cooked egg bits or lemon zest fragments.
Step 5: Chill the Lemon Curd. Pour the strained curd into a container. To prevent a skin or film from forming on the surface, place a piece of plastic wrap directly onto the surface of the curd, ensuring it touches the entire top. Then, cover the container with a lid or another layer of plastic wrap and chill it in the refrigerator for at least 1 hour, or until it is firm and cold. This chilling process is essential for the curd to thicken properly before filling the cake.
Creating Optional Meringue Decorations:
Step 1: Prepare for Baking. Preheat your oven to a low 200°F (95°C). Line a large sheet tray with parchment paper; this will prevent sticking and make cleanup a breeze.
Step 2: Whip the Meringue. In the bowl of an electric mixer (either a hand mixer or a stand mixer with a whisk attachment), combine the reserved five egg whites and the cream of tartar. Begin whipping on medium speed until the egg whites become foamy. Then, gradually and slowly pour in the granulated sugar while continuing to mix. Increase the mixer speed to high and whip for up to 5 minutes, or until you achieve glossy, stiff peaks. The meringue should hold its shape firmly when the whisk is lifted. Be careful not to overmix, as this can cause the meringue to become dry and brittle.
Step 3: Pipe onto Parchment. Transfer the whipped meringue into a piping bag fitted with your favorite large star tip (or any decorative tip). Pipe individual meringues onto the prepared parchment paper-lined sheet tray. You can place them relatively close together as they will not spread significantly during baking.
Step 4: Bake and Cool. Bake the meringues in the preheated oven for 90 minutes. After 90 minutes, turn off the oven but leave the meringues inside for an additional hour. This slow cooling process helps them dry out completely and become perfectly crisp without browning. Once fully cooled, remove them from the oven. If not using immediately, store the meringues in an airtight container at room temperature to maintain their crispness.
Whipping Up the Zesty Lemon Buttercream:
Step 1: Combine Sugar and Butter. In the bowl of a stand mixer fitted with a paddle attachment (or using a hand mixer), combine the confectioner’s sugar and room-temperature unsalted butter. Begin mixing on low speed to gradually incorporate the sugar into the butter, then increase to medium speed. Continue mixing for approximately 1-2 minutes until the mixture is light and fluffy.
Step 2: Add Wet Ingredients and Finish. Stop the mixer and use a rubber spatula to scrape down the sides of the bowl, ensuring all ingredients are well combined. Return the mixer to low speed and add the fresh lemon zest, fresh lemon juice, milk, and the optional pinch of kosher salt. Mix on medium speed for about 3 minutes until the buttercream is incredibly light, airy, and fluffy, with a beautifully smooth consistency.
Assembling Your Magnificent Lemon Curd Cake:
Step 1: Prepare Cakes and Frosting. Ensure all cake layers are completely cool. If your cake layers have domed tops, use a serrated knife or a cake leveler to carefully level them, creating flat surfaces for stable stacking. Prepare a piping bag by fitting it with a large round tip, or simply fill a zip-top bag with the buttercream and snip off one corner to create an opening.
Step 2: Create a Buttercream Dam. Place one leveled cake layer onto a cake board or your chosen serving platter. Using your prepared piping bag, pipe a sturdy line of lemon buttercream around the outer edge of the cake layer. This is called a “dam.” This clever technique serves two important purposes: it creates a barrier to keep the luscious lemon curd filling securely inside the cake, preventing any spills, and it adds structural support, helping to keep your cake layers from sliding around.
Step 3: Fill with Lemon Curd and Stack. Carefully fill the inside of the buttercream dam with a generous layer of the chilled homemade lemon curd, spreading it evenly. Gently place the second cake layer on top, aligning it perfectly. Repeat the “dam and fill” process with the second layer of cake and lemon curd. Finally, top with the third and final cake layer.
Step 4: Frost and Decorate. Using an offset spatula, frost the entire stacked cake with the remaining lemon buttercream, creating a smooth, even coating. Work quickly, especially if your kitchen is warm. Once frosted, immediately decorate the cake with your optional meringue decorations, fresh lemon slices, or any other desired garnishes. Decorating immediately ensures the meringues adhere well and remain crisp. Serve promptly to enjoy the freshest flavors!
An Exciting Alternative Frosting Idea!
For a dramatically different yet equally stunning presentation, consider skipping the traditional lemon buttercream frosting altogether. Instead, once you’ve whipped your egg whites for the meringues, use that fresh, unbaked meringue to frost the entire exterior of your assembled cake. For an impressive finish, use a kitchen torch to lightly toast the meringue, creating beautiful golden-brown peaks and a delightful caramelized flavor. Serve this spectacular creation immediately! This method not only offers a unique aesthetic and flavor profile but also significantly cuts down on both preparation time and the number of ingredients needed, as you won’t have to prepare the separate lemon buttercream. It’s a wonderful way to add a sophisticated touch with less fuss.
Expert Tips for Recipe Success
Achieving a perfect lemon curd cake is incredibly satisfying. Here are some pro tips to ensure your baking journey is smooth and your final dessert is flawless:
- Patience is Key for Lemon Curd: The most crucial step for a perfect lemon curd is slow cooking. It’s imperative to cook the egg and lemon mixture over consistently low heat while stirring constantly. This gentle heat gradually thickens the curd without curdling the eggs. Rushing this step by increasing the heat will likely lead to scrambled eggs rather than smooth curd. Expect it to take the full 10 minutes (or even a little longer) for the curd to reach the right consistency – don’t cut corners here!
- Level Your Cake Layers: For a professional-looking, stable, and evenly stacked cake, it’s essential to level off any domed tops of your cooled cake layers. A dedicated cake leveler or a sharp, long serrated knife works wonders for this step, ensuring your cake stands tall and proud.
- Don’t Waste Those Whites: Remember to carefully save the egg whites when making the lemon curd! These are precisely what you’ll need for those elegant meringue decorations. As a general guide, you’ll need about ½ cup (approximately 50g) of sugar for every large egg white to create robust meringues.
- Decorate with Meringues Just Before Serving: Meringue decorations are at their peak when they are crisp and delicate. If you add them to the cake too far in advance, they can absorb moisture from the frosting and the air, becoming soft and losing their wonderful crispy texture. For the best experience, adorn your cake with meringues just before you plan to serve it. Additionally, any leftover meringues should be stored in an airtight container at room temperature to prevent them from becoming stale or sticky.
- Ensure Ingredients are at Room Temperature (for cake & buttercream): For the cake batter and buttercream, ingredients like butter, eggs, and buttermilk should be at room temperature. This allows them to emulsify properly, creating a smooth batter and light, fluffy frosting.
- Don’t Overmix the Cake Batter: Once you add the wet ingredients, mix only until just combined. Overmixing can develop too much gluten, resulting in a dense, tough cake rather than a tender, fluffy one.
Storage and Freezing Guidelines
Proper storage is essential to maintain the freshness and quality of your homemade lemon curd cake:
Storing the Assembled Cake: Since this cake contains fresh lemon curd and buttercream, it must be stored in the refrigerator. Cover the cake tightly with plastic wrap or place it inside an airtight cake container to prevent it from drying out and absorbing other odors from the fridge. When stored correctly, the cake will remain fresh and delicious for up to four days in the refrigerator. For best flavor, allow slices to come to room temperature for about 15-20 minutes before serving.
Storing Leftover Lemon Curd: Any unused homemade lemon curd can be stored separately. Transfer it to a clean, airtight container and keep it refrigerated. It will stay fresh for up to a week, ready to be used in other desserts or spread on toast!
Freezing the Cake Layers: This cake can be successfully frozen for longer storage, up to two months. For optimal results, it’s best to freeze the cake layers *without* the lemon curd filling and buttercream frosting. Once the cake layers are completely cooled, wrap each individual layer tightly in several layers of plastic wrap, ensuring no air can get in. Then, place the wrapped layers in a resealable freezer bag or an airtight freezer-safe container. To thaw, simply remove the desired cake layers from the freezer and let them come to room temperature on a wire rack before you assemble and decorate them with the fresh lemon curd and frosting.
Freezing Lemon Curd: Homemade lemon curd also freezes exceptionally well, extending its shelf life for up to six months. Transfer the cooled curd into an airtight, freezer-safe container or a heavy-duty freezer bag. Be sure to remove as much air as possible before sealing to prevent freezer burn. Thaw the frozen lemon curd gradually in the refrigerator overnight before using it to fill your cake or for other purposes. Give it a gentle whisk after thawing to restore its smooth consistency.
Meringue Decorations: Unfortunately, meringue decorations do not freeze well. Freezing them will cause them to absorb moisture, leading them to become soft, sticky, and lose their desirable crisp texture. It’s always best to prepare the meringues fresh just before you plan to serve the cake to ensure they are perfectly crisp and visually appealing.
Expand Your Cake Decorating Skills
Do you have a passion for decorating beautiful cakes? I’m excited to share some valuable insights and techniques directly from my 12+ years of professional cake decorating experience! Dive into these helpful posts to refine your skills and create even more stunning desserts:
- Discover the secrets to baking and expertly stacking a magnificent two-tier cake.
- Learn 10 essential ways to make your cakes look more professional, impressing everyone with your polished finishes.
- Master the art of decorating a cake with fresh or edible flowers for an elegant touch.
- Troubleshoot common baking issues and find out why cakes sometimes sink in the middle, along with solutions.
Moist and Zesty Lemon Curd Cake
Pin
Review
SaveSaved!
Ingredients
For the cake:
- 2 cups (400 g) white sugar
- 3.5 cups (437.5 g) all purpose flour
- 2 tsp (2 tsp) baking powder
- 1 tsp (1 tsp) kosher salt
- 1/2 tsp (0.5 tsp) baking soda
- 1 tbsp (1 tbsp) lemon zest, from 1 large lemon
- 1 cup (227 g) butter, 227g softened
- ¼ cup (59.15 ml) fresh lemon juice, from 2 large lemons
- 1 cup (240 g) buttermilk
- 2 (2) eggs, large
- 1 (1) egg white
For the lemon curd:
- 5 (5) egg yolks, separated carefully
- 3/4 cup (150 g) granulated sugar, 150g
- zest from one lemon
- 1/2 cup (118.29 ml) lemon juice, from 4 large lemons
- 6 tbsp (6 tbsp) unsalted butter, cold
For the meringue decorations (optional):
- 5 (5) egg whites, ( saved from the lemon curd)
- ⅛ tsp (0.13 tsp) cream of tartar
- 1 ¼ cup (250 g) sugar, (250 g) – you need 50 grams of sugar (½ cup) per egg white for the meringues.
For the lemon buttercream:
- 3 1/2 cups (420 g) confectioners sugar
- 1 cup (227 g) unsalted butter, at room temperature
- 2 tsp (2 tsp) lemon zest
- 2 tsp (2 tsp) fresh lemon juice
- 1 tbsp (1 tbsp) milk
- pinch (pinch) kosher, salt optional
Instructions
-
Preheat the oven to 350°F and spray 3, 8-9” round cake pans with baking spray or line with parchment paper.
-
In the bowl of a hand or stand mixer fitted with the paddle attachment add the 2 cup sugars, 3.5 cups all purpose flour, 2 tsp baking powder, 1 tsp kosher salt, 1/2 tsp baking soda, and 1 tbsp lemon zest.
-
Mix on low speed until combined. Add in the 1 cup butter and mix for 30 seconds to one minute until the mixture looks sandy.
-
 With the mixer on low speed add ¼ cup fresh lemon juice, and 1 cup buttermilk. Mix again for 30 seconds moving up from low to medium speed. Stop the mixer and scrape down the sides.
 -
Add the 2 eggs and egg white and mix on medium for 30 seconds.
-
 Pour the batter evenly into the 3 pans and bake for 25 minutes. Cool in the pan for 10 minutes then flip onto a wire rack to cool completely.
Make the lemon curd.
-
Separate the egg yolks from the whites carefully. Set the whites aside if you want to make the meringues to decorate. If you get any yellow into the whites the meringues wont whip so you need to be very careful.
-
 Combine the 5 egg yolks, 3/4 cup sugar, lemon zest, and 1/2 cup freshly squeezed lemon juice in a small bowl or measuring cup and whisk to combine.
 -
 Pour it into a heavy bottomed pan over low- medium heat. Consistently stir the mixture for 10 minutes until it has thickened. You don’t want to rush this part or raise the heat as it will cook the eggs.
 -
 The mixture is done when it coats the back of a spoon. If you take your finger and make a line through the curd on the back of the spoon and it stays in place, it’s done.
 -
 Take the pan off the heat and immediately add the 6 tbsp cold butter. Stir until melted.
 -
 Strain the curd through a fine mesh strainer to make it smooth.
 -
 Pour the curd into a container and place a piece of plastic directly on top to prevent a film. Then cover and chill in the fridge for 1 hour.
Optional meringue decorations
-
Preheat the oven to 200 F and line a sheet tray with parchment paper.
-
 Combine the remaining 5 egg whites and ⅛ tsp cream of tartar in the bowl of an electric mixer like a hand mixer or stand mixer. Whip on medium speed until foamy, then slowly pour in the 1 ¼ cup sugar. Move to high speed and whip for up to 5 minutes for glossy stiff peaks. Do not overmix.
 -
 Add the meringue to a piping bag fitted with a large star tip and pipe meringues on the parchment paper. They can be close together as they won’t rise. Bake for 90 minutes, then shut off the oven and leave the meringues in for another hour. Remove from the oven and place in an airtight container if not using right away.
Make the lemon buttercream.
-
In the bowl of a hand or stand mixer fitted with a paddle attachment, combine the 3 1/2 cups confectioners sugar and 1 cup softened butter. Mix on low speed working up to medium as the sugar combines with the butter. About 1-2 minutes.
-
Stop the mixer and scrape down the sides. Turn the mixer back to low speed and add the 2 tsp lemon zest, 2 tsp of lemon juice, 1 tbsp milk, and the pinch of salt if using. Mix on medium for 3 minutes until fluffy.
-
Level off the tops of the cake if needed. Fit a piping bag with a large round tip or fill a zip top bag with the frosting and snip off the end.
-
 Place one layer of cake on a cake board. Pipe a line around the edges of the cake. This is called a dam, it helps keep the lemon curd filling inside the cake without spilling out. Fill the inside with lemon curd.
 -
 Repeat with the second cake layer, then top with the last layer of cake.
 -
 Frost the cake with the remaining lemon buttercream and decorate immediately with the meringues.
