Mastering Easy Marble Cupcakes: Your Guide to Bakery-Quality Vanilla and Chocolate Swirls
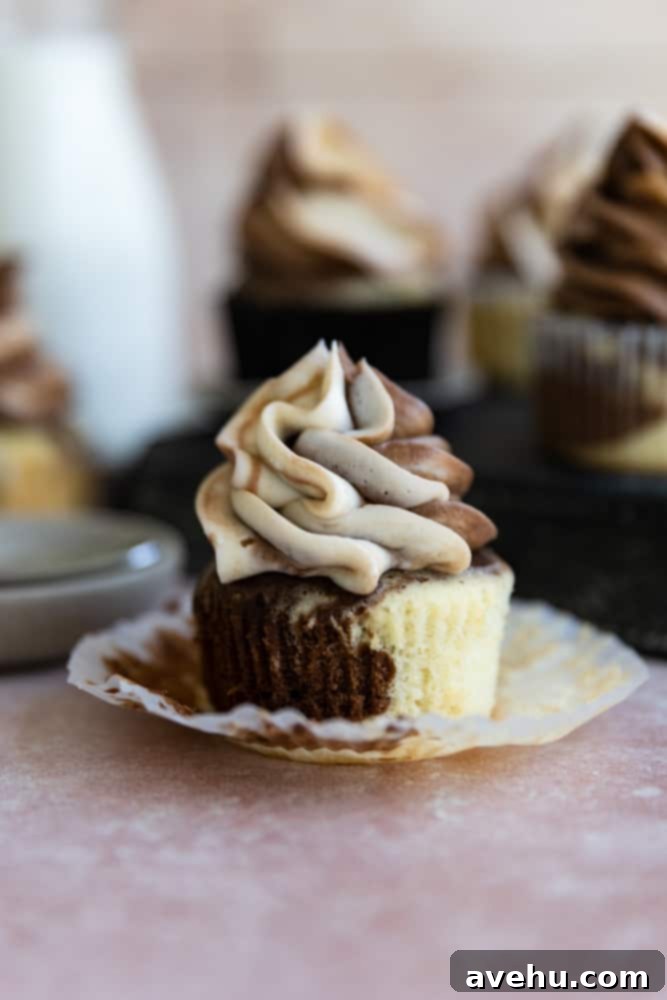
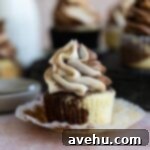
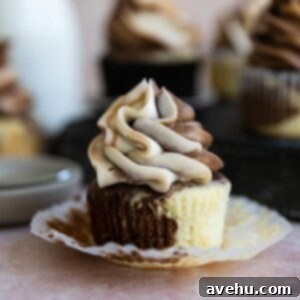
These Marble Cupcakes are incredibly easy to make, yet they boast an impressive, professional appearance that will surely delight. Crafted with just a few simple ingredients, this recipe cleverly saves time by utilizing a single versatile batter. Topped with a beautiful swirl of contrasting vanilla and chocolate frosting, these cupcakes truly look like they came straight from a gourmet bakery!
Often, when you admire a beautifully marbled dessert in a bakery window, you might assume it required hours of intricate work to achieve that stunning color and texture. As a trained pastry chef who has prepared countless marbled creations, I can assure you that it’s surprisingly straightforward when you follow this innovative one-batter marble cupcake recipe! This technique simplifies the process significantly, making homemade marble desserts accessible to everyone.
At its core, a marbled baked good is essentially a classic vanilla cake swirled with rich chocolate batter, creating its signature elegant, variegated appearance. While marble desserts are traditionally found in forms like a majestic marble bundt cake or a comforting marble loaf cake, this versatile recipe can effortlessly be adapted into delightful individual cupcakes!
The true genius of this recipe lies in its efficiency: you only need to prepare one base batter. Simply portion out a cup of the prepared vanilla batter, then easily transform it into a chocolate batter by incorporating a bit of unsweetened cocoa powder. A gentle swirl of the two batters into your cupcake liners, and voilà – you have a sophisticated, bakery-style treat that’s not only homemade and delicious but also incredibly satisfying to create. The experience is elevated even further when these moist marble cupcakes are crowned with a perfectly swirled marble frosting, as detailed below!
Beyond the signature marble frosting, these versatile cupcakes pair wonderfully with various other toppings. You could opt for a rich chocolate buttercream frosting for an intense cocoa experience, a timeless and comforting classic vanilla frosting, or even a decadent and airy white chocolate buttercream frosting for a touch of elegance. The possibilities are endless to match any preference or occasion.
If you’re feeling ambitious and want to truly impress your friends and family, this fundamental recipe can also be scaled up to create a spectacular layered marble cake. With the techniques you’ll learn here, you’ll have all the confidence to tackle larger projects. You absolutely can do it!
WHY YOU SHOULD MAKE THIS RECIPE FOR MARBLE CUPCAKES
- Visually Stunning & Impressive: These marble cupcakes are designed to captivate! They look so professional and elegant that your guests will be convinced they came straight from a high-end bakery, making them perfect for any special occasion or a delightful everyday treat.
- Surprisingly Easy One-Batter Method: Don’t let their sophisticated appearance intimidate you. This recipe simplifies the baking process by using just one foundational cake batter that is then cleverly divided and flavored, saving you time and effort compared to preparing two separate batters. It’s a fantastic recipe for bakers of all skill levels.
- Perfect for Any Celebration: Whether it’s a birthday party, a holiday gathering, a casual brunch, or simply an afternoon pick-me-up, these marble cupcakes are a crowd-pleaser. Their classic flavor combination and attractive swirl make them universally appealing and suitable for any event.
- Versatile Frosting Pairings: The beauty of marble cake is its adaptability. It serves as an excellent canvas for a wide array of frosting recipes. This means you can easily customize your cupcakes by experimenting with different frosting flavors and styles each time you bake them, keeping things fresh and exciting.
- Rich & Moist Texture: Thanks to carefully selected ingredients like cake flour and buttermilk, these cupcakes achieve an incredibly tender crumb and a moist, buttery texture that melts in your mouth with every bite.
INGREDIENTS NEEDED FOR MARBLE CUPCAKES
For the cupcakes:
- Cake Flour: This specialized flour, with its lower protein content, is essential for giving the cupcakes a wonderfully tender crumb and a light, airy texture that is far superior to using all-purpose flour.
- Baking Powder and Baking Soda: These two powerful leavening agents work in harmony. Once activated by the liquid and acidity in the batter, they create carbon dioxide bubbles that help the cupcakes rise beautifully and become incredibly fluffy.
- Salt (Kosher): Far more than just a seasoning, salt plays a crucial role. It not only activates the leavening agents, ensuring a good rise, but also provides a vital contrasting flavor to the sweetness of the sugar, balancing the overall taste profile.
- Unsalted Butter: The backbone of our moist cupcake base, unsalted butter contributes rich flavor and essential fat. It makes the cupcakes incredibly moist, tender, and imparts a delicious buttery note. Ensure it’s softened to room temperature for optimal creaming.
- Granulated Sugar: This fine sugar sweetens the cupcake batter and also helps retain moisture, contributing to the soft and tender texture.
- Egg and Egg White: The whole egg and additional egg whites act as binders, holding all the ingredients together and providing structure. They also contribute to the rise and help the cupcakes set perfectly after baking, creating a delicate, fine crumb.
- Vanilla Extract: A fundamental flavor enhancer, vanilla extract infuses the base batter with its warm, aromatic notes, forming the delightful vanilla portion of our marble creation.
- Buttermilk: Adding a subtle tang and significant moisture, buttermilk reacts with the baking soda to create a lighter, more tender cupcake. Its acidity is key to a soft texture.
- Unsweetened Cocoa Powder: This is the magic ingredient that transforms a portion of our vanilla batter into the rich chocolate swirl. Use good quality cocoa powder for the best flavor and color.
For Chocolate and Vanilla Marble Frosting:
- Butter: This forms the incredibly creamy and smooth base for both the vanilla and chocolate frostings. Softened butter is crucial for achieving a light and airy consistency.
- Confectioners’ Sugar (Powdered Sugar): Finely milled, this sugar blends seamlessly into the butter, creating a smooth, sweet frosting without any grainy texture. It’s vital for the characteristic lightness of buttercream.
- Vanilla Extract: Used in both batches of frosting, vanilla extract provides a comforting, aromatic flavor that complements both the vanilla and chocolate components beautifully.
- Cream or Milk: These liquids are used to thin out the frosting to a perfect spreadable consistency, ensuring it remains smooth, creamy, and easy to pipe without being too stiff or too runny.
- Cocoa Powder: For the chocolate half of the frosting, cocoa powder delivers a deep, rich chocolate flavor and gives it a beautiful, natural brown color.
- Salt: Just a pinch of salt in the chocolate frosting helps to enhance the cocoa’s natural flavor and cuts through any potential bitterness, making the chocolate taste even more vibrant and delicious.
HOW TO MAKE MARBLE CUPCAKES: A STEP-BY-STEP GUIDE
Prepare for Baking: Begin by preheating your oven to 350°F (175°C). Line a standard 12-cup muffin tin with cupcake liners. Set this aside, ready for your batter.
Combine the Dry Ingredients: In a medium-sized bowl, meticulously combine the cake flour, baking powder, baking soda, and kosher salt. Whisk these ingredients thoroughly for about 30 seconds to ensure they are well distributed and free of any lumps. This step is crucial for an even rise and texture.
Cream the Wet Ingredients: In the bowl of your hand mixer or stand mixer, fitted with the paddle attachment, cream the softened unsalted butter on medium speed for about 1 minute until it becomes smooth. Stop the mixer, scrape down the sides of the bowl to ensure all butter is incorporated, then add the granulated sugar. Continue mixing on medium speed for 2 minutes until the mixture is visibly lightened in color and appears fluffy. This aeration is key to a tender cupcake.
Incorporate Eggs and Vanilla: Scrape down the bowl again. Add the whole egg, the two egg whites, and the vanilla extract. Mix on medium speed for another 1 minute, ensuring everything is thoroughly combined and the mixture is smooth.
Create the Base Batter: Now, you will alternate adding the dry ingredients and buttermilk. Start by adding one-third of the dry ingredient mixture to the wet ingredients, mixing on low speed until just combined. Then, add half of the ½ cup buttermilk, mixing until incorporated. Repeat this process, ending with the dry ingredients. It’s vital to mix only until the ingredients are combined; overmixing will develop the gluten in the flour too much, resulting in dense, tough cupcakes instead of light and fluffy ones.
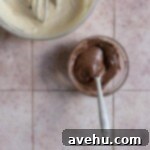
Make the Chocolate Swirl Batter: Gently remove 1 cup of the prepared vanilla batter and place it into a separate small bowl. To this portion, add the 2 ½ tablespoons of unsweetened cocoa powder and the remaining 2 teaspoons of buttermilk. Stir these ingredients together until the cocoa powder is fully incorporated and the batter is a uniform chocolate color. Be careful not to overmix.
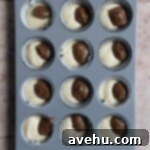
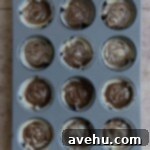
Assemble and Swirl Cupcakes: Fill each prepared muffin liner approximately halfway full with the vanilla batter. Next, carefully add about ½ tablespoon of the chocolate batter on top of the vanilla base. To create the classic marble effect, take a skewer, a toothpick, or a thin knife and gently swirl through both batters in each cup a few times. Don’t overdo the swirling, as too much mixing will blend the colors completely rather than create distinct marble patterns.
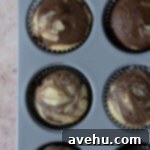
Bake and Cool: Transfer the muffin tin to your preheated oven and bake for 18-19 minutes. To check for doneness, a toothpick inserted into the center of a cupcake should come out clean. Once baked, remove the cupcakes from the oven and allow them to cool in the muffin tin for 5 minutes before transferring them to a wire rack to cool completely. Cooling completely is essential before frosting to prevent the frosting from melting.
How to Make the Swirled Marble Frosting
Creating a beautiful swirled marble frosting is easier than it looks and adds that perfect bakery-style finish to your cupcakes. Here’s how to achieve it:
Make the Vanilla Frosting:
Mix the Butter and Sugar: Add the softened butter and confectioners’ sugar into the bowl of a stand mixer fitted with the paddle attachment. Begin mixing on low-medium speed for about 1 minute. This slow start prevents a cloud of sugar from erupting. Ensure the butter is thoroughly combined with the sugar.
Add Vanilla and Cream for Perfect Consistency: Increase the mixer speed to high and beat for 2 minutes. Stop the mixer, scrape down the sides of the bowl, then add the vanilla extract and cream (or milk). Continue mixing on high for another 1 minute. At this stage, your vanilla frosting should be light, fluffy, and hold stiff peaks, meaning it will maintain its shape and not be at all runny.
Prepare for Chocolate Frosting: Carefully remove as much of the vanilla frosting as you can from the bowl and the paddle attachment, transferring it to a separate container. There’s no need to wash the mixing bowl; the residual vanilla will only enhance the flavor of the chocolate frosting.
Make the Chocolate Frosting:
Mix Butter, Sugar, and Cocoa: In the same unwashed bowl, add the ½ cup softened butter, 1 ½ cups confectioners’ sugar, and ⅓ cup unsweetened cocoa powder. Start mixing on low speed to incorporate the dry ingredients, gradually increasing to medium speed as the mixture begins to combine and thicken. Keep mixing until well blended.
Add Cream and Salt: Stop the mixer and add the ½ teaspoon of cream (or milk) and ⅛ teaspoon of kosher salt. Resume mixing on medium speed until the cocoa is fully distributed, and the frosting becomes wonderfully fluffy and smooth. The salt helps to deepen the chocolate flavor.
Fill a Piping Bag for Marbling: This is where the magic happens! Select a piping bag and fit it with your desired piping tip (a large star tip works beautifully for cupcakes). Now, carefully fill one side of the piping bag with the vanilla frosting, and the other side with the chocolate frosting. It’s crucial to load them side-by-side, ensuring both frosting flavors extend down to the tip. Do not layer one frosting on top of the other, as this won’t create the marble effect when piped.
Frost the Cupcakes: With your dual-flavored piping bag, swirl the frosting over each cooled cupcake, starting from the center and working your way outwards and upwards. As you pipe, the two colors will naturally merge and swirl together, creating that captivating marble effect on top of your delicious cupcakes!
TIPS FOR RECIPE SUCCESS
Achieving bakery-quality marble cupcakes at home is simple with these expert tips:
- Sift Your Dry Ingredients: For the lightest, fluffiest cupcakes, always sift your cake flour, cocoa powder, baking powder, and baking soda. Sifting removes any lumps and aerates the dry ingredients, ensuring they combine smoothly into your batter without any undesirable pockets of unmixed flour.
- Do Not Overmix the Batter: This is perhaps the most crucial tip for tender cupcakes. Mix the batter only until the ingredients are just combined. Overmixing develops the gluten in the flour, which can lead to dense, tough, and chewy cupcakes instead of soft, delicate ones. Stop mixing as soon as you see no streaks of dry ingredients.
- Ensure Room Temperature Ingredients: Always make sure your butter, eggs, and buttermilk are at room temperature before you start baking. Room temperature ingredients emulsify much better, creating a smooth, cohesive batter that traps air more efficiently. This leads to a more consistent rise and a finer, more tender crumb in your finished cupcakes. If you forgot to take your butter out, learn how to soften butter quickly.
- Use a Piping Bag for Flawless Frosting: Employing a piping bag filled with both vanilla and chocolate frosting side-by-side is the easiest and most effective way to achieve a stunning, professional-looking marble effect on your frosted cupcakes. For a quick alternative, you can also use two separate ziplock bags, snipping off one corner of each, and then inserting both into a third larger piping bag (or even a third ziplock bag).
- Don’t Overfill Cupcake Liners: For perfectly domed cupcakes that bake evenly and don’t spill over, fill your muffin liners no more than two-thirds full. This allows ample space for the cupcakes to rise without creating messy tops.
- Cool Completely Before Frosting: Patience is key! Ensure your cupcakes are entirely cool to the touch before you even think about applying frosting. Attempting to frost warm cupcakes will result in melted, runny frosting and a messy presentation.
- Precision in Swirling: When creating the marble pattern in the batter, use a light hand and only a few swirls. Too many swirls will blend the colors entirely, losing the distinct marble effect. A simple “S” shape or a figure-eight pattern through the batter is often enough.
STORAGE AND FREEZING YOUR MARBLE CUPCAKES
Proper storage ensures your delicious marble cupcakes remain fresh and moist for as long as possible:
Storing: Once your marble cupcakes have completely cooled and been frosted, the best way to maintain their freshness and flavor is to store them in an airtight container. Keep this container at room temperature, and your cupcakes will remain wonderfully moist and delicious for up to 3 days. For optimal freshness, avoid direct sunlight or warm spots.
Freezing: If you’re planning ahead or have leftovers, marble cupcakes freeze beautifully! To freeze, first ensure each cupcake is completely cool. Wrap each individual cupcake tightly in plastic wrap, then place them in a freezer-safe bag or an airtight container. They can be frozen for up to 2 months. When you’re ready to enjoy them, simply transfer the wrapped cupcakes to your counter and let them thaw overnight at room temperature. For best results, unwrap them just before serving to prevent condensation from making the frosting sticky.
FREQUENTLY ASKED QUESTIONS (FAQ) ABOUT MARBLE CUPCAKES
Here are answers to some common questions about making perfect marble cupcakes:
Do I have to use cake flour for these marble cupcakes?
While you don’t *have* to, using cake flour will undoubtedly produce a significantly more tender and delicate marble cupcake with a finer crumb, which is highly recommended for that bakery-quality texture. If cake flour isn’t available, you can substitute it with all-purpose flour. Alternatively, you can easily make your own cake flour substitute: for every cup of all-purpose flour, remove 2 tablespoons and replace them with 2 tablespoons of cornstarch, then whisk well before measuring.
What can I use instead of buttermilk?
If you find yourself without buttermilk on hand, don’t fret! It’s incredibly easy to make a suitable substitute. Simply add 1 tablespoon of lemon juice or white vinegar to a liquid measuring cup. Then, fill the rest of the cup with regular milk (any fat percentage works) until it reaches the 1-cup mark. Give it a gentle stir and let it sit for about 5 minutes. The milk will curdle slightly, and you’ll have a perfect buttermilk substitute ready for use, providing the necessary acidity for a tender crumb.
Do frosted cupcakes need to be refrigerated?
Generally, no. Marble cupcakes frosted with a buttercream made from butter, powdered sugar, and cream (like this recipe) can be safely stored at room temperature in an airtight container for up to 3 days. However, if you live in a particularly hot or humid climate, or if you’re baking during the summer months, it’s advisable to store your frosted marble cupcakes in the refrigerator to prevent the butter in the frosting from softening too much. Just be sure to bring them back to room temperature for about 15-30 minutes before serving for the best texture and flavor.
Can I use different flavors for the swirl instead of just chocolate?
Absolutely! The one-batter technique is incredibly versatile. Instead of cocoa powder, you could use a small amount of fruit puree (like raspberry or strawberry for a pink swirl), a dash of espresso powder for a mocha swirl, or even food coloring to create vibrant, colorful marble effects. Just ensure any liquid additions are minimal to avoid altering the batter consistency too much.
What’s the best way to prevent dry cupcakes?
Several factors contribute to moist cupcakes. First, avoid overmixing the batter, as mentioned in our tips. Second, measure your flour accurately, preferably by weight, as too much flour is a common cause of dryness. Third, do not overbake! Bake only until a toothpick comes out clean. An extra minute or two in the oven can make a big difference. Finally, ensuring your butter and buttermilk are at room temperature helps create a more cohesive, moist batter.
WAYS TO ENJOY YOUR MARBLE CUPCAKES
These classic marble cupcakes are delicious on their own, but you can easily change up their flavor profile by pairing them with different types of frosting to suit any palate or occasion. Here are some of our favorites to inspire you:
- Smooth Brown Sugar Buttercream: For a warm, caramel-like sweetness that complements the vanilla and chocolate beautifully.
- Fluffy Marshmallow Frosting: Adds a light, airy, and delightfully sweet topping, reminiscent of a classic s’mores flavor.
- Raspberry Buttercream Frosting: A vibrant and tangy option that provides a wonderful fruity contrast to the rich chocolate and sweet vanilla.
- Coffee Buttercream: For coffee lovers, this bold and aromatic frosting enhances the chocolate notes and adds a sophisticated twist.
Easy & Moist One Batter Marble Cupcakes
Pin
Review
SaveSaved!
Ingredients
- 1 ¾ cup (218.75 g) cake flour, (207g)
- 1 tsp (1 tsp) baking powder
- ¼ tsp (0.25 tsp) baking soda
- ¼ tsp (0.25 tsp) kosher salt
- ½ cup (113.5 g) unsalted butter, (113g) softened to room temperature
- 1 cup (200 g) granulated sugar, (200g)
- 1 (1) egg, (50g)
- 2 (2) egg white, (70g)
- 2 tsp (2 tsp) vanilla extract
- 1/2 cup (120 g) buttermilk, at room temperature (118mL) plus 2 tsp, separated
- 2 ½ tbsp (2.5 tbsp) Unsweetened cocoa powder
Vanilla frosting:
- 1/2 cup (113.5 g) butter, softened or margarine or butter substitute
- 1 1/2 cups (180 g) confectioners sugar
- 1/2 teaspoon (0.5 teaspoon) vanilla extract
- 1 teaspoons (1 teaspoons) cream, or milk
Chocolate frosting:
- 1/2 cup (113.5 g) unsalted butter, softened
- 1 1/2 cup (180 g) confectioners sugar
- ⅓ (⅓) rd cup unsweetened cocoa powder
- 1/2 tsp (0.5 tsp) heavy cream, or milk
- 1/8 tsp (0.13 tsp) kosher salt
Instructions
-
Preheat the oven to 350F and line a muffin tin with 12 cupcake liners.
-
In a medium size bowl combine the 1 ¾ cup cake flour, 1 tsp baking powder, ¼ tsp baking soda, and ¼ tsp kosher salt. Whisk until combined.
-
 In the bowl of a hand mixer or stand mixer fitted with the paddle attachment cream the ½ cup butter for 1 minute on medium speed. Scrape down the bowl and add 1 cup sugar.
 -
Mix on medium speed for 2 minutes until light and fluffy.
-
 Scrape down the bowl and add the egg, 2 egg whites and 2 tsp vanilla extract. Mix for 1 minute on medium speed.
 -
Add in 1/3rd of the dry ingredients, then half of the 1/2 cup buttermilk and alternate, starting and ending with the dry ingredients.
-
 Mix only until combined. Do not overmix.
 -
 Remove 1 cup of the vanilla batter and put it in a small bowl. Add the 2 ½ tbsp cocoa powder and 2 tsp remaining buttermilk into the separated vanilla batter (the one cup) and stir to combine.
 -
 Fill the muffin liners half way full with the vanilla batter, then add ½ tbsp of the chocolate batter.
 -
 Swirl the batter with a skewer, toothpick, or thin knife to make a swirl effect.
 -
 Bake for 18-19 minutes and cool.
For the marble frosting:
-
First make the vanilla frosting. Add the 1/2 cup butter and 1 1/2 cups powdered sugar into the bowl of a stand mixer fitted with the paddle attachment. Mix on low-medium speed for 1 minute.
-
 Move to high speed for 2 minutes, stop, then add in the 1/2 tsp vanilla and tsp creamer. Mix again on high for 1 minute.
 -
Remove as much frosting as you can from the bowl and paddle but dont wash the bowl, there’s no need.
-
Make the chocolate frosting. In the same bowl add the 1/2 cup butter, 1 1/2 cup confectioners sugar, and ⅓ cup cocoa powder and mix on low speed working your way up to medium as the mixture combines.
-
 Stop the mixer and add the 1/2 tsp cream, and 1/8 tsp of kosher salt. Mix again on medium speed until the chocolate is mixed throughout and the frosting is fluffy.
 -
 Using a piping bag fitted with a tip, fill up one side with vanilla frosting, and the other side with chocolate frosting. Make sure both frosting flavors are able to reach down to the tip. Do not top one frosting on top of the other, more like side by side in the piping bag.
 -
 Swirl the frosting over the cupcakes for the marble effect!
