Gooey One-Bowl Chocolate Chip Blondies: The Ultimate Easy Dessert Recipe
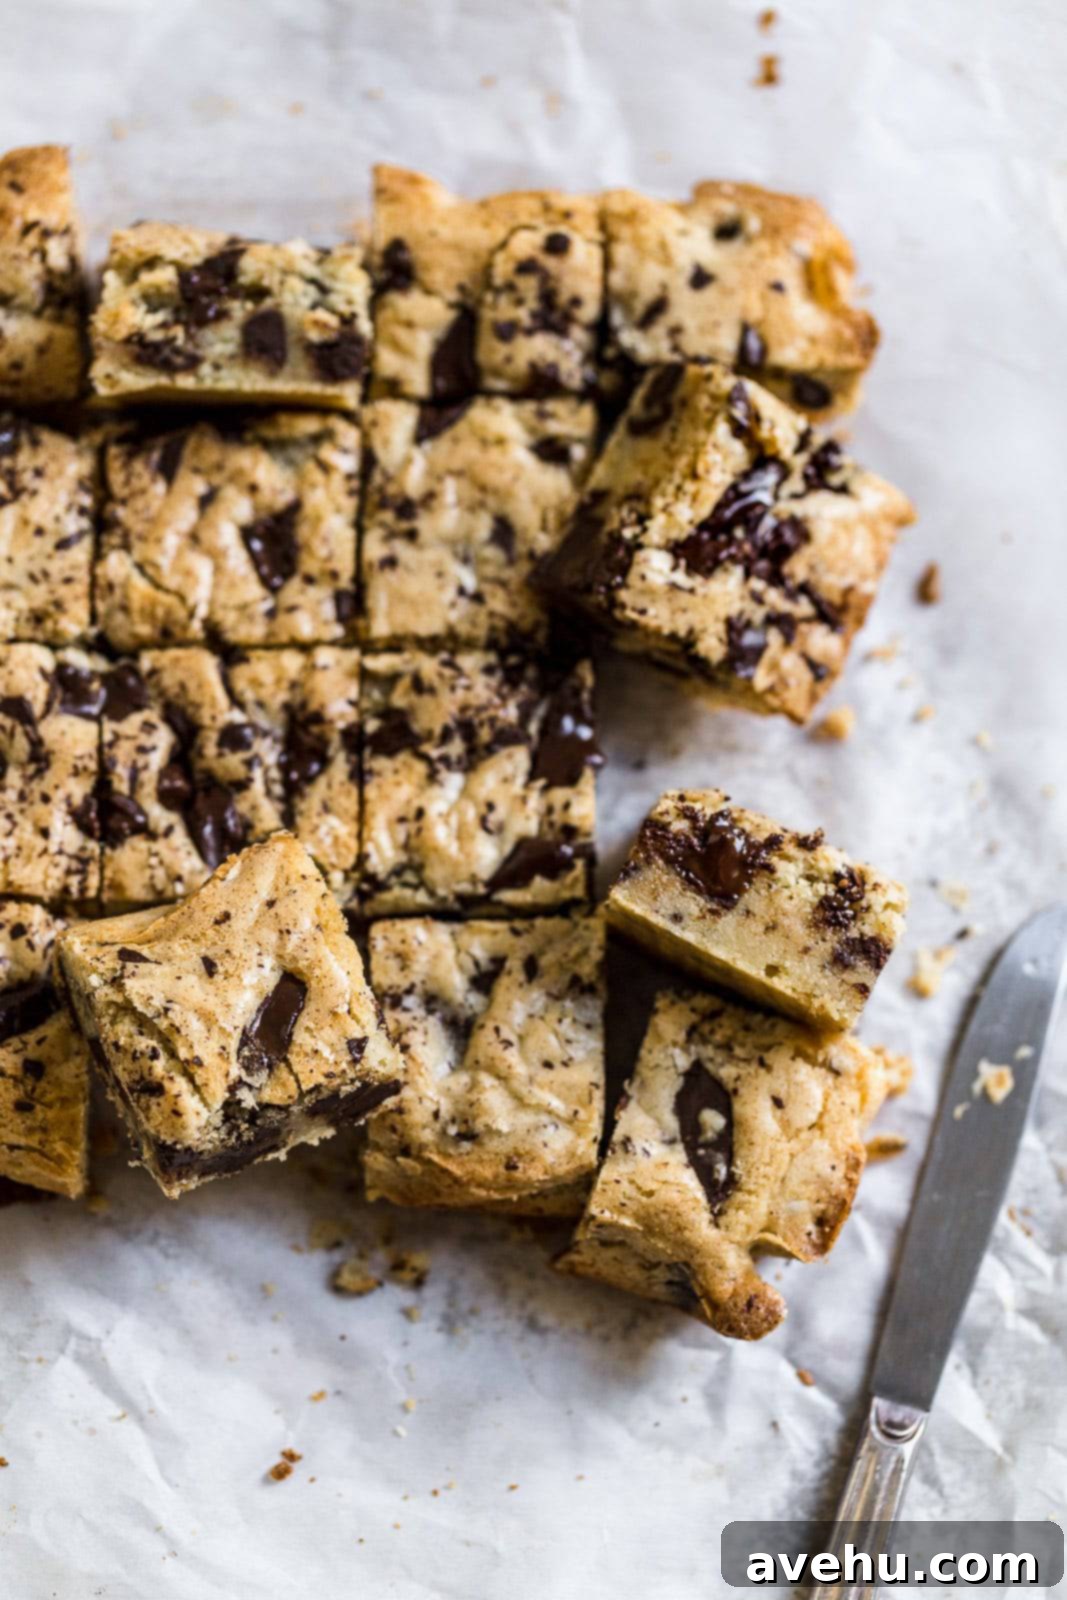
Prepare to fall in love with these incredibly easy-to-make, one-bowl blondie cookies! Requiring less than an hour from start to finish, they are the perfect solution for satisfying your sweet tooth or impressing guests with minimal effort. These delightful bars boast a wonderfully gooey interior, contrasting beautifully with their crisp, shiny, and alluringly crackled tops. Infused with a rich, sweet vanilla flavor and hints of caramelized butter, they offer a comforting taste that’s reminiscent of a classic butterscotch candy. Whether you’re heading to a potluck, a barbecue, or simply craving a quick homemade treat, these chocolate chip blondies are guaranteed to be a crowd-pleaser and a new family favorite.
Among all the delicious treats out there, blondies hold a special place as one of my absolute favorite desserts to bake. Much like my highly popular one-bowl brownie recipe, these irresistible blondies are incredibly simple to prepare, requiring just one mixing bowl and approximately 40 minutes of your time. Each bite delivers a harmonious blend of thick, buttery richness and chewy, gooey goodness, all generously studded with decadent semi-sweet chocolate chips. They offer a delightful flavor profile similar to a brownie, but with their own distinct golden, vanilla-infused charm, providing a unique and equally satisfying experience without the cocoa.
What’s the Essential Difference Between Blondies and Brownies?
The fundamental distinction between blondies and brownies lies primarily in their flavor base. Blondies do not incorporate any melted chocolate or cocoa powder, which gives them their characteristic “blonde” color and a distinctly sweet, rich vanilla flavor. Instead of chocolate taking center stage, blondies celebrate the warm, caramelized notes of brown sugar and butter, often enhanced by a generous amount of vanilla extract. Despite this key difference, their core ingredients and baking methods are remarkably similar, leading to comparable textures and preparation ease.
Indeed, it’s their lack of cocoa and a lighter appearance that gives them their whimsical name – blondies, a delightful counterpart to their darker, chocolate-laden cousins. Think of them as the vanilla version of a brownie, offering a different but equally compelling taste sensation.
These particular blondies excel at achieving that coveted gooey center and the signature shiny, crinkled top that is the hallmark of a perfectly baked bar cookie, much like a gourmet brownie. During my time in pastry school, we were always encouraged to develop our own unique recipes, and I couldn’t be prouder of how this one turned out! Of course, I also have a soft spot for other creations like these rich coffee blondies, the vibrant red velvet brownies, and these indulgent chocolate brownie cookies.
Why You’ll Absolutely Adore This Easy Blondie Recipe
There are countless reasons why these gooey chocolate chip blondies are destined to become a staple in your baking repertoire. From their simplicity to their delicious versatility, they tick all the boxes for a perfect homemade dessert.
- Effortlessly Delicious: These are a truly gooey and delicious dessert that can be prepared and baked in approximately 40 minutes, all without the need for a stand mixer or any fancy equipment. Just a bowl, a whisk, and your enthusiasm!
- Minimal Cleanup: Say goodbye to piles of dishes! You only need to dirty one single bowl to mix all the ingredients for these fantastic blondies, making cleanup an absolute breeze.
- Infinitely Customizable: This recipe serves as a perfect blank canvas for your creativity. You can easily add in any fun toppings, mix-ins, or flavors your heart desires, making each batch uniquely yours.
- Irresistible Texture: Expect nothing less than thick, delightfully chewy, and utterly delicious blondies with every bite. Their texture is a perfect balance of tenderness and chewiness that keeps you coming back for more.
- Perfect for Any Occasion: Whether it’s a casual weeknight treat, a family gathering, a school bake sale, or a festive holiday party, these blondies are versatile enough to suit any event. Their crowd-pleasing flavor makes them a universal favorite.
- Golden & Crinkly Tops: Achieve that sought-after, professional-looking shiny, crinkled top that signifies a perfectly baked, moist blondie. It’s a visual cue of the deliciousness within!
Essential Ingredients for Perfect Blondie Cookies
The beauty of this blondie recipe lies in its simplicity, using readily available ingredients that come together to create something truly magical. Here’s a closer look at what you’ll need and why each component is crucial:
- Unsalted Butter: Using melted butter is key to achieving that signature gooey and chewy texture in blondies. The melted fat coats the flour, inhibiting gluten development and contributing to a tender crumb. Unsalted butter allows you to control the overall saltiness of the recipe.
- White Granulated Sugar: Sugar isn’t just for sweetness; it plays a vital role in the blondies’ texture. It helps create those desirable crispy edges and contributes to the shiny, crackled top. Granulated sugar also interacts with the melted butter to form that wonderful caramel-like flavor.
- Large Eggs: Eggs are essential for structure and binding in blondies. They provide moisture, richness, and help emulsify the batter, ensuring a cohesive and well-risen bar. Using room temperature eggs is crucial for proper incorporation into the batter.
- Pure Vanilla Extract: Vanilla extract is the star flavor in blondies, lending its sweet, aromatic, and almost caramel-like notes that define this dessert. Don’t skimp on good quality vanilla – it makes a noticeable difference!
- All-Purpose Flour: This forms the foundational structure of our blondies. All-purpose flour provides the necessary gluten to hold everything together without making the blondies tough, contributing to their chewy texture.
- Baking Powder: As a leavening agent, baking powder helps the blondies rise beautifully in the oven, giving them a slight lift and a tender, airy quality without making them cakey if baked correctly.
- Kosher Salt: A pinch of kosher salt is a flavor enhancer, balancing the sweetness and bringing out the complex vanilla and caramel notes. It’s important to use kosher salt, as its larger flakes and milder flavor are different from table salt; using the wrong type or amount can significantly alter the taste.
- Semi-Sweet Chocolate Chips: While I personally prefer the balanced sweetness of semi-sweet chocolate chips, feel free to use your favorite! Milk chocolate, dark chocolate, white chocolate, or even a combination can create exciting variations. They add pockets of melty chocolate goodness throughout the blondies.
Simple Steps to Bake Irresistible Blondie Cookies
Making these gooey chocolate chip blondies is incredibly straightforward, thanks to our one-bowl method. Follow these simple steps for a perfect batch every time:
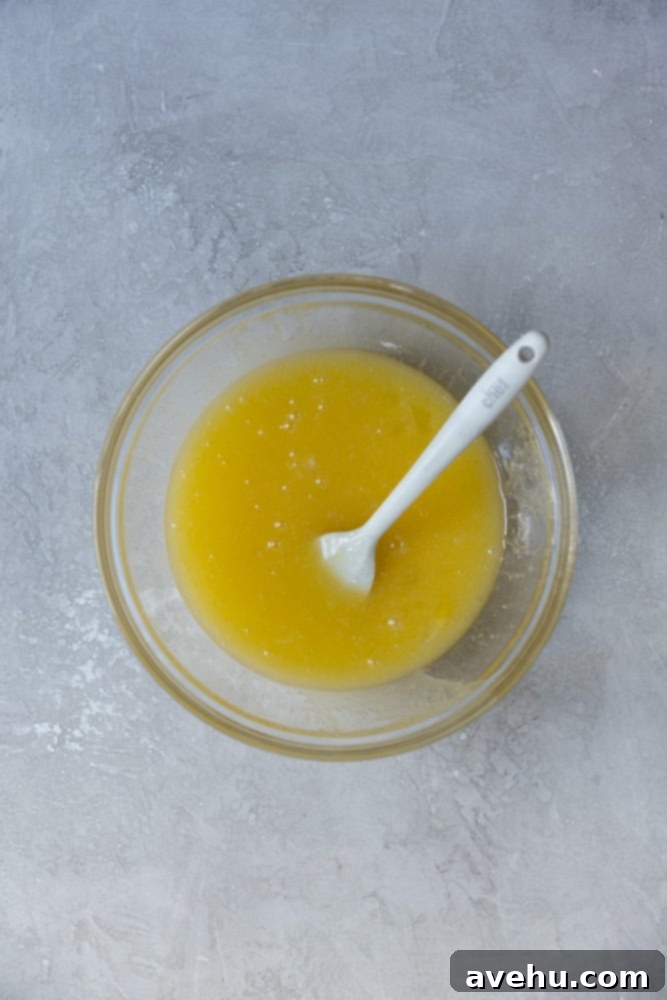
Step 1: Prepare the Wet Ingredients. In a microwave-safe large bowl, melt the unsalted butter until fully liquid. Allow it to cool for about 2 minutes – it should still be warm but not scorching hot. Then, add the granulated sugar, room temperature large eggs, and pure vanilla extract. Using a whisk, stir vigorously until all ingredients are well combined and the mixture becomes slightly frothy and lighter in color, typically taking about one minute. This step is crucial for achieving that characteristic shiny, crackled top.
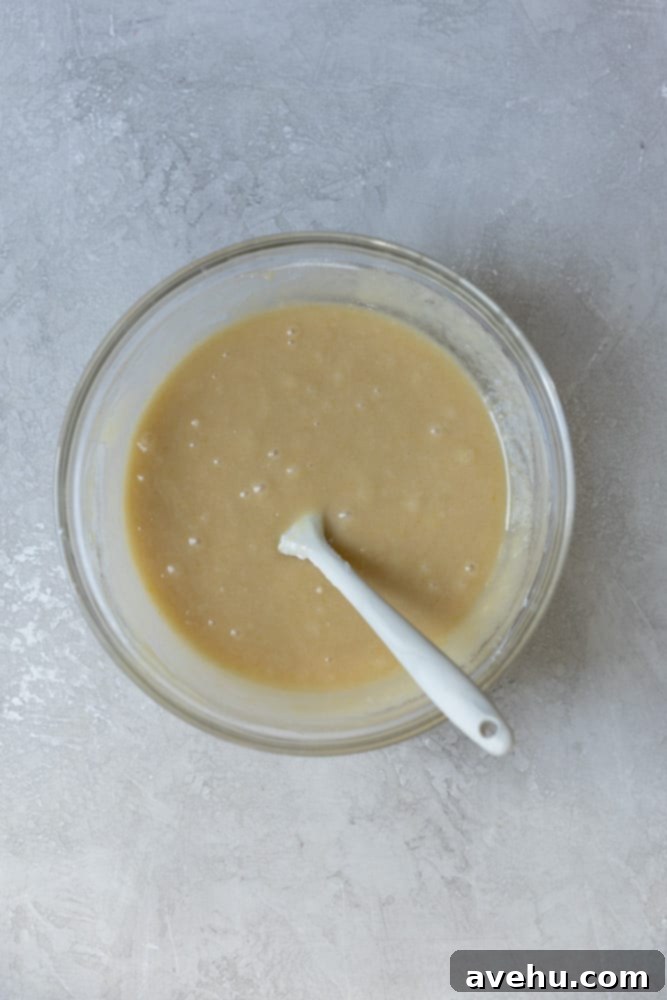
Step 2: Incorporate the Dry Ingredients. To the wet mixture, add the all-purpose flour, baking powder, and kosher salt. Switch from a whisk to a rubber spatula or a wooden spoon for easier mixing. Gently fold the dry ingredients into the wet until just combined. Be careful not to overmix; over-developing the gluten can lead to tough blondies. Mix just until no streaks of dry flour remain and the batter is thick and smooth.
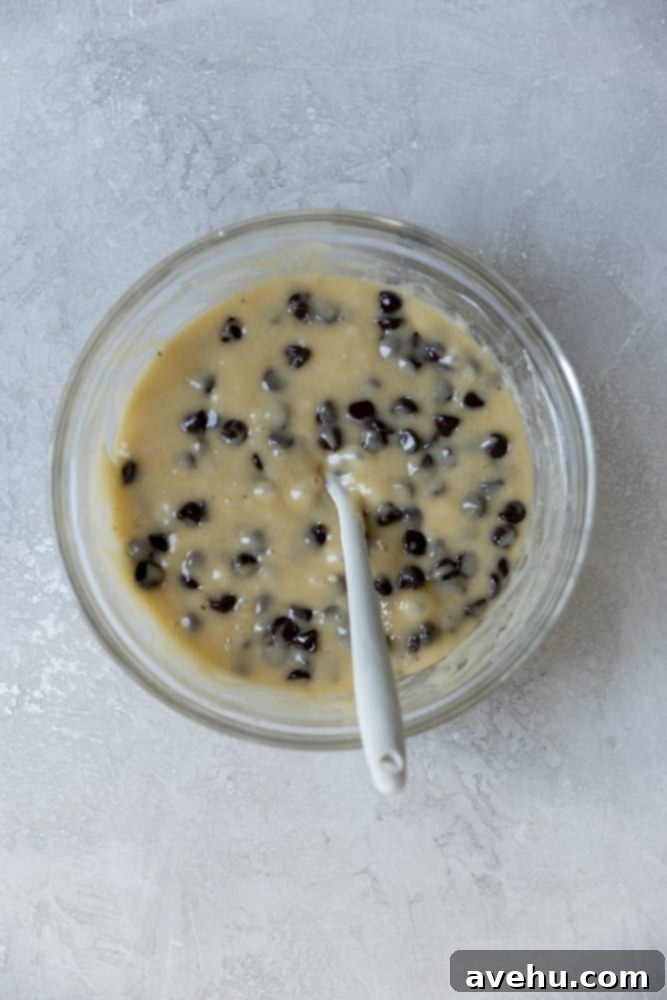
Step 3: Fold in the Chocolate Chips. Add your chosen semi-sweet chocolate chips (or any other desired mix-ins) to the batter. Gently fold them in with your spatula until they are evenly distributed throughout the blondie batter. You want chocolatey goodness in every bite!
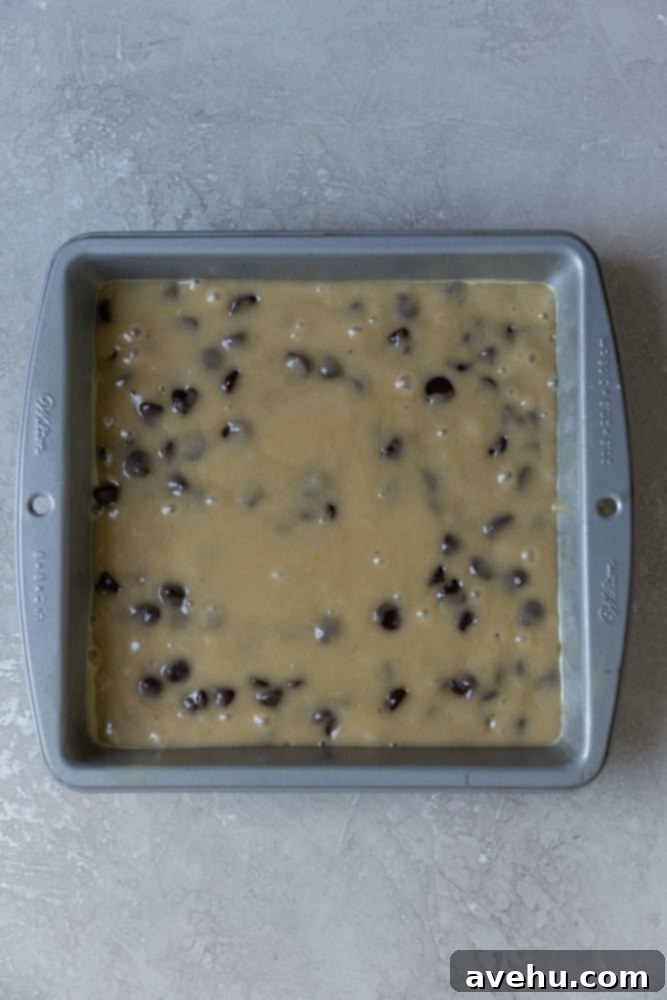
Step 4: Bake to Golden Perfection. Prepare an 8×8 inch baking pan by either spraying it generously with baking spray or lining it with parchment paper, leaving an overhang on the sides for easy removal. Pour the prepared blondie batter into the pan and spread it evenly. Bake the blondies in a preheated oven at 350°F (175°C) for approximately 35-40 minutes. You’ll know they are perfectly done when the edges are golden brown, the top is beautifully crinkled, and a gentle press in the center yields a slight spring-back but still feels soft and gooey. For chewier blondies, aim for the lower end of the baking time; for a slightly more cake-like texture, bake a few minutes longer.
Choosing the Best Pan for Baking Blondies
The type of baking pan you choose can significantly impact the final texture and appearance of your blondies. For this specific recipe, an 8×8 inch pan is recommended, which will yield thicker, chewier bars. However, you can certainly use a 9×13 inch pan; just be aware that the blondies will be thinner and will require a reduced baking time of approximately 25-30 minutes.
When it comes to materials, the best pans for baking blondies are typically made of glass, ceramic, or a light-colored metal. These materials are superior because they distribute heat more evenly across the entire surface of the pan. This consistent heat transfer ensures that your blondies bake uniformly, resulting in a perfect golden-brown exterior and a beautifully cooked interior.
In contrast, using a darker metal pan can lead to uneven baking. Darker metals absorb more heat and tend to bake the edges and top of your dessert much faster than the center. This often results in blondies with burnt or overly crisp edges and an underbaked, doughy middle. For the most consistent and delicious results, always opt for lighter-colored bakeware.
Achieving the Perfect Blondie Texture: Gooey vs. Cakey
The hallmark of a truly exceptional blondie, much like a gourmet brownie, is its delightfully gooey interior. Our recipe is designed to produce blondies that are rich, chewy, and wonderfully moist, almost melting in your mouth. If your blondies turn out more cake-like in texture, it’s a clear indication that they were baked for a little bit too long. The extra oven time allows too much moisture to evaporate, resulting in a drier, more crumbly consistency.
For that ultimate gooey texture, it’s essential to keep a close eye on your baking time and trust the visual cues. The edges should be lightly golden, and the center should still feel slightly soft when gently pressed, though not liquid. Remember, blondies continue to cook slightly as they cool in the pan, so it’s often better to underbake them by a minute or two rather than overbake. If you prefer a slightly firmer or more cake-like blondie, simply add an extra 5-7 minutes to the baking time. Experiment to find your personal perfect texture!
Expert Recipe Tips for Blondie Perfection
To ensure your blondies are nothing short of spectacular, keep these valuable tips in mind:
- Dairy-Free Alternative: If you or your guests have dietary restrictions, these blondies can easily be made dairy-free. Simply substitute the unsalted butter with your favorite dairy-free butter alternative (like a plant-based stick butter) and opt for dairy-free chocolate chips. The results will be just as delicious!
- Room Temperature Eggs are Key: This is a crucial step often overlooked. Always use room temperature eggs. Cold eggs can cause the melted butter in your batter to seize and solidify, leading to a lumpy, uneven mixture. A cold batter won’t combine as smoothly or bake as correctly, potentially resulting in dense or inconsistently textured blondies. To quickly bring eggs to room temperature, place them in a bowl of warm (not hot) water for 5-10 minutes.
- Mastering the Gooey Texture: For that perfectly gooey, chewy center, bake your blondies for exactly 35 minutes when using an 8×8 inch pan. If you prefer a blondie that leans more towards a cakey consistency, extend the baking time by an additional 5-7 minutes. Watch for the edges to be golden and the center to be set but still soft.
- Don’t Overmix the Batter: Once you add the flour, mix until just combined. Overmixing develops the gluten in the flour too much, which can lead to tough, dense blondies rather than the desired chewy, tender ones. A few streaks of flour are better than an overmixed batter.
- Cool Completely for Best Slices: While it’s tempting to dig in immediately, allowing the blondies to cool completely in the pan is essential for clean cuts and a fully set texture. If you try to cut them warm, they might crumble or fall apart. Patience is rewarded!
- Chocolate Choices Abound: Don’t limit yourself to just semi-sweet chocolate chips! This recipe is incredibly adaptable. Feel free to use any kind of chocolate you want to add into this recipe – milk chocolate, dark chocolate, white chocolate, chocolate chunks, or even a mix for a more complex flavor profile.
How to Serve Your Delicious Blondies
While these blondies are undeniably delicious at any temperature, the absolute best way to serve them is slightly warm. When warm, the chocolate chips inside become beautifully melted and gooey, creating an irresistible experience. You can gently reheat individual servings in the microwave for a few seconds if they’ve cooled. Many enthusiasts also love pairing a warm blondie with a scoop of their favorite ice cream – vanilla bean, salted caramel, or even a rich chocolate ice cream would be divine! A drizzle of caramel sauce or a sprinkle of sea salt can elevate the experience even further. They are also fantastic with a dollop of whipped cream and fresh berries for a refreshing contrast. For a simpler indulgence, a warm blondie with a cup of coffee or tea makes for a perfect afternoon treat.
The Best Technique for Cutting Blondies Cleanly
Achieving neat, uniform cuts for your blondies can elevate their presentation. Here’s a tried-and-true method for perfectly sliced blondies:
- Cool Completely & Prepare: First, ensure your blondies have cooled completely in the pan. This firming up is crucial for clean cuts. Once cool, carefully flip the entire baked blondie slab out of the pan and onto a piece of parchment paper or a clean cutting board.
- Heat Your Knife: To get the cleanest cuts, you’ll need a sharp chef’s knife. Run the blade under very hot tap water for about 30 seconds to heat it up. Immediately wipe the knife completely dry with a clean kitchen towel. A warm, dry knife will glide through the sticky blondies without dragging.
- First Vertical Cuts: Place the blondie slab so its longest side is horizontal to you. Cut the blondies in half down the middle vertically, which will give you two equal, rectangular parts.
- Second Vertical Cuts: Take those two halves and cut them in half again (vertically), ensuring you now have four equally sized, long rectangular sections.
- Horizontal Cuts: Rotate your cutting board or the blondie sections 90 degrees so the longest side is now vertical to you. Repeat the heating and wiping process for your knife. Then, make four horizontal cuts across the four sections.
By following these steps, you should ideally have 16 equal-sized blondie cookies, perfect for sharing!
Storing and Freezing Your Delicious Blondies
Ensuring your blondies stay fresh and delicious is simple with these storage tips:
Storing: To maintain their optimal gooey texture and flavor, store these blondie cookies in an airtight container at room temperature. They will remain wonderfully fresh and enjoyable for 3-5 days. If you find them getting a little firm, a quick 10-15 second zap in the microwave can bring back their melted chocolate and gooey goodness.
Freezing: Blondies freeze exceptionally well, making them perfect for meal prep or saving for future cravings. Allow the blondies to cool completely to room temperature before freezing. Once cooled, gently loosen the sides of the pan with a knife or an offset spatula to release the entire slab from the pan. Flip the blondies over onto a large sheet of plastic wrap and seal them tightly, ensuring no air can get in. For extra protection against freezer burn, place the plastic-wrapped blondies into a freezer-safe bag or an airtight container. They can be frozen for up to 3 months. To enjoy, simply thaw them at room temperature or warm gently in the microwave.
Exciting Blondie Variations and Mix-Ins
This classic blondie recipe is wonderfully adaptable, serving as a perfect canvas for countless flavor combinations. Don’t hesitate to get creative with your mix-ins! Here are some fantastic ideas to inspire your next batch:
- White Chocolate Chips: For a sweeter, creamier blondie, swap out or combine semi-sweet chips with white chocolate chips. Their milky flavor pairs beautifully with the vanilla base. (See the image above for a sneak peek!)
- Toasted Nuts: Add a delightful crunch and nutty flavor with toasted pecans, walnuts, almonds, or macadamia nuts. Toasting them beforehand enhances their aroma and taste.
- Colorful M&M’s: A handful of M&M’s not only adds a pop of color but also a fun, candy-coated crunch that kids and adults alike will love. Great for holiday themes!
- Triple Threat Combination: Why choose just one? Combine white chocolate chips, nuts, and M&M’s for a truly decadent and textured blondie experience.
- Soft Caramels: Chop up soft caramel candies and fold them into the batter for pockets of gooey, melted caramel throughout the blondies – pure bliss!
- Toffee Bits: These crunchy, buttery pieces add an irresistible toffee flavor and a delightful texture to your blondies.
- Shredded Coconut: For a tropical twist, incorporate shredded coconut. Toasted coconut would add even more depth of flavor.
- Dried Fruits: Dried cranberries, cherries, or apricots can add a lovely tartness and chewiness that complements the sweet blondie base.
- Pretzels or Potato Chips: For a sweet and salty crunch, crush some pretzels or potato chips and gently fold them in. The contrast is surprisingly delicious!
- Spices: A pinch of cinnamon, nutmeg, or even a touch of cardamom can add warmth and complexity to the vanilla flavor.
- Basically Anything: From sprinkles and mini marshmallows to crushed cookies (like Oreos or Biscoff), the possibilities are truly endless. Let your imagination guide you!
Gooey One-Bowl Chocolate Chip Blondies
Pin
Review
SaveSaved!
Ingredients
- 1 cup unsalted butter, melted and slightly cooled
- 1 ½ cups granulated sugar
- 2 large eggs, at room temperature
- 1 tablespoon pure vanilla extract
- 2 cups all-purpose flour
- ½ tsp baking powder
- Pinch kosher salt, not table salt
- 1 bag semi-sweet chocolate chips, 10-12 oz, or your favorite mix-ins!
Equipment
-
8×8 inch baking pan
-
Large mixing bowl
-
Whisk and Rubber Spatula
Instructions
-
Preheat your oven to 350° F (175° C). Prepare an 8×8 inch baking pan by spraying it with baking spray or lining it with parchment paper, leaving an overhang on two sides for easy removal.
-
 In a large, microwave-safe bowl, melt the 1 cup of unsalted butter. Let it cool for 2 minutes to ensure it’s still warm but not hot. Add the 1 1/2 cups granulated sugar, 2 large room temperature eggs, and 1 tablespoon vanilla extract. Whisk vigorously for about 1 minute until the mixture is frothy, well combined, and slightly lightened in color.
 -
 To the wet ingredients, add the 2 cups all-purpose flour, ½ teaspoon baking powder, and a pinch of kosher salt. Switch to a rubber spatula or wooden spoon and mix until the batter is thick, smooth, and just combined. Be careful not to overmix to maintain tenderness.
 -
 Add the entire bag of chocolate chips (10-12 oz) or your preferred mix-ins and stir gently with the spatula until they are evenly distributed throughout the blondie batter.
 -
 Pour the finished batter into the prepared 8×8 inch pan and spread evenly. Bake for 35-40 minutes until the edges are golden brown and the top has crinkled beautifully. The center should still be slightly soft when lightly pressed. Allow to cool completely before cutting for best results.
Notes
For a 9×13 inch pan: Reduce baking time to 25 minutes for chewy blondies, and up to 35 minutes for those who prefer them more cakey. Always test for doneness by pressing the center gently.
Remember to use room temperature eggs for the best batter consistency and texture.
