Easy Phyllo Dough Napoleon: Caramel Mascarpone & Caramelized Apple Mille Feuille Recipe
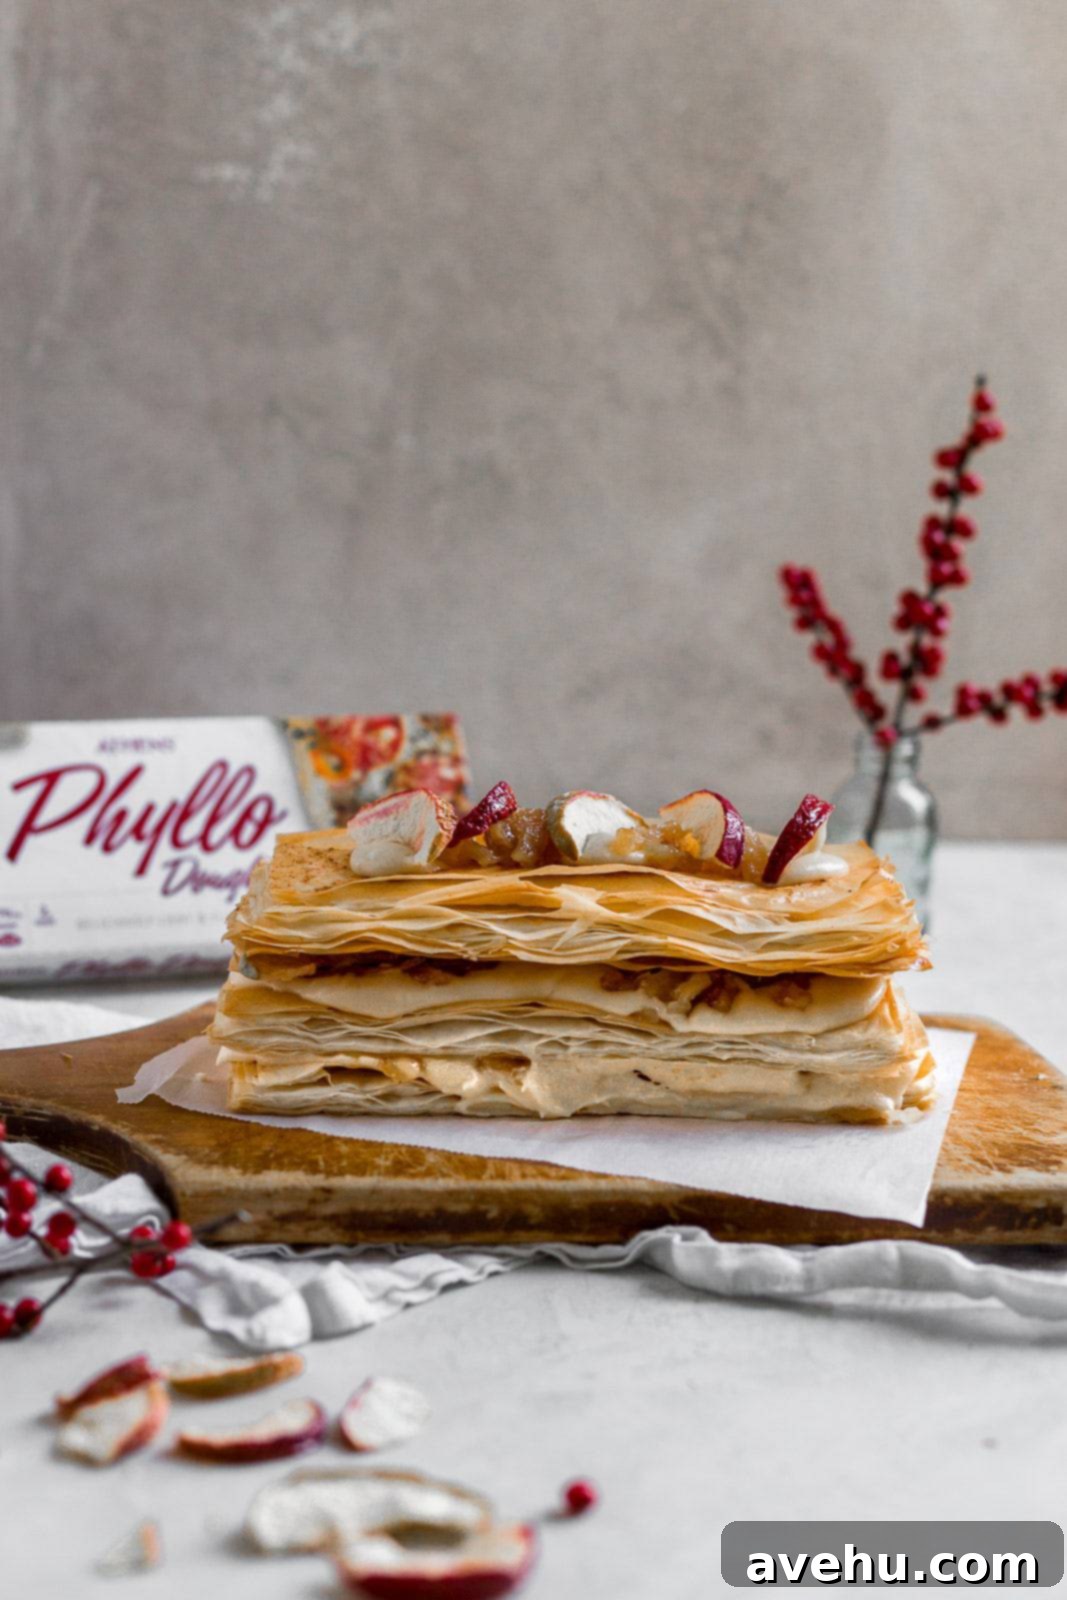
A Napoleon, also elegantly known as a Mille Feuille (French for “a thousand leaves”), is a truly iconic French dessert renowned for its delicate, flaky layers and rich, creamy filling. Traditionally crafted with puff pastry, this classic treat receives an exciting and approachable twist in our recipe. Instead of the conventional puff pastry, we’re using layers of delightfully crisp phyllo dough, creating an even lighter and more ethereal experience. These golden-baked phyllo sheets are then generously layered with a luscious caramel mascarpone cream and sweet, tender caramelized apples, culminating in a dessert that’s both visually stunning and incredibly delicious. This recipe brings the elegance of a French patisserie right to your kitchen, proving that impressive desserts don’t have to be complicated.
We are incredibly grateful to Athens Foods for sponsoring this post. Their premium phyllo dough is the secret to achieving those perfectly flaky layers that make this Napoleon truly unforgettable.

What is a Napoleon Dessert, or Mille Feuille?
A Napoleon dessert, or Mille Feuille, is a beloved French pastry, celebrated for its intricate layers and harmonious blend of textures and flavors. The name “Mille Feuille” literally translates to “a thousand leaves,” a poetic description of the many delicate, crisp layers of dough that form its foundation. Historically, this dessert is constructed from three layers of puff pastry, baked until golden and airy, then sandwiched together with a rich, often vanilla-flavored, pastry cream. The top is typically glazed with fondant or powdered sugar, sometimes decorated with a feathering pattern. The beauty of a Mille Feuille lies in the contrast between the shattering crispness of the pastry and the smooth, decadent cream. It’s a dessert that speaks of sophistication and refined taste, yet our version makes it entirely accessible for home bakers.
While puff pastry is the traditional choice, we’re embracing innovation by partnering with Athens Foods to showcase their exceptional phyllo dough. This substitution not only simplifies the process but also introduces a slightly different, wonderfully delicate crispness that you’ll absolutely adore. Our phyllo Napoleon offers a lighter, yet equally satisfying, experience, making it a fantastic alternative for those who might find working with puff pastry intimidating or desire a quicker preparation time. We’re elevating this classic further by pairing the flaky phyllo with a rich caramel mascarpone cream and sweet, buttery caramelized apples, creating a symphony of fall-inspired flavors that are perfect for any occasion, from a casual gathering to a festive holiday meal. Prepare to be amazed by the exquisite layers and irresistible taste of this modern French dessert!

How to Make This Easy Phyllo Dough Napoleon
Crafting this phyllo Napoleon may appear complex, but it’s surprisingly straightforward. The key is in thoughtful preparation and handling of the ingredients. Let’s walk through the steps to create those magnificent, flaky layers that are the hallmark of any great Napoleon.
Getting Started with Phyllo Dough
Your first step is crucial for success: completely defrosting one package of Athens Foods Phyllo Dough. Each package typically contains two rolls of phyllo. For this specific recipe, one roll will suffice to create a generously sized dessert. However, if you’re planning to double the recipe, make individual Napoleons, or simply want extra crispy layers, feel free to utilize both rolls.
Important Tip for Phyllo: The absolute golden rule when working with phyllo dough is to ensure it is completely defrosted. If the dough is still even slightly frozen, it will be brittle and prone to cracking and tearing when you attempt to separate the sheets. For best results, transfer the phyllo package from the freezer to the refrigerator the night before you plan to bake, allowing it to thaw slowly and thoroughly. Once defrosted, let it sit at room temperature for about 30-60 minutes before unwrapping to make it more pliable.
Preparing the Phyllo Layers for Baking
Once your phyllo is perfectly defrosted and at room temperature, prepare your workspace. Lightly spray a large cookie sheet or a half-sheet tray with baking spray. Have a slightly dampened paper towel ready. This will be your phyllo’s best friend! As you work with the ultra-thin sheets, keep the remaining stack of phyllo covered with the damp paper towel to prevent it from drying out. Phyllo dries very quickly when exposed to air, becoming fragile and difficult to handle.
Don’t be disheartened if a sheet tears a little – it’s completely normal and practically unavoidable with such delicate dough. Remember, you’ll be layering many sheets on top of each other, so minor imperfections will be hidden and contribute to the rustic charm of your homemade Napoleon.
To begin layering, gently separate one thin sheet of phyllo dough and carefully place it onto your prepared sheet tray. Now, you have a choice: brush it lightly with melted unsalted butter or give it a quick spray with baking spray. The butter adds a rich, golden flavor and helps achieve that classic crispiness, while baking spray is a faster option that still yields excellent results. I personally love the flavor that melted butter imparts, but for speed, baking spray is a fantastic alternative. Continue this process, layering one sheet of phyllo after another, brushing or spraying each successive layer until you have used the entire package (or one roll). This careful layering and greasing between each sheet are what create the “thousand leaves” effect, ensuring every bite is wonderfully flaky and crisp.
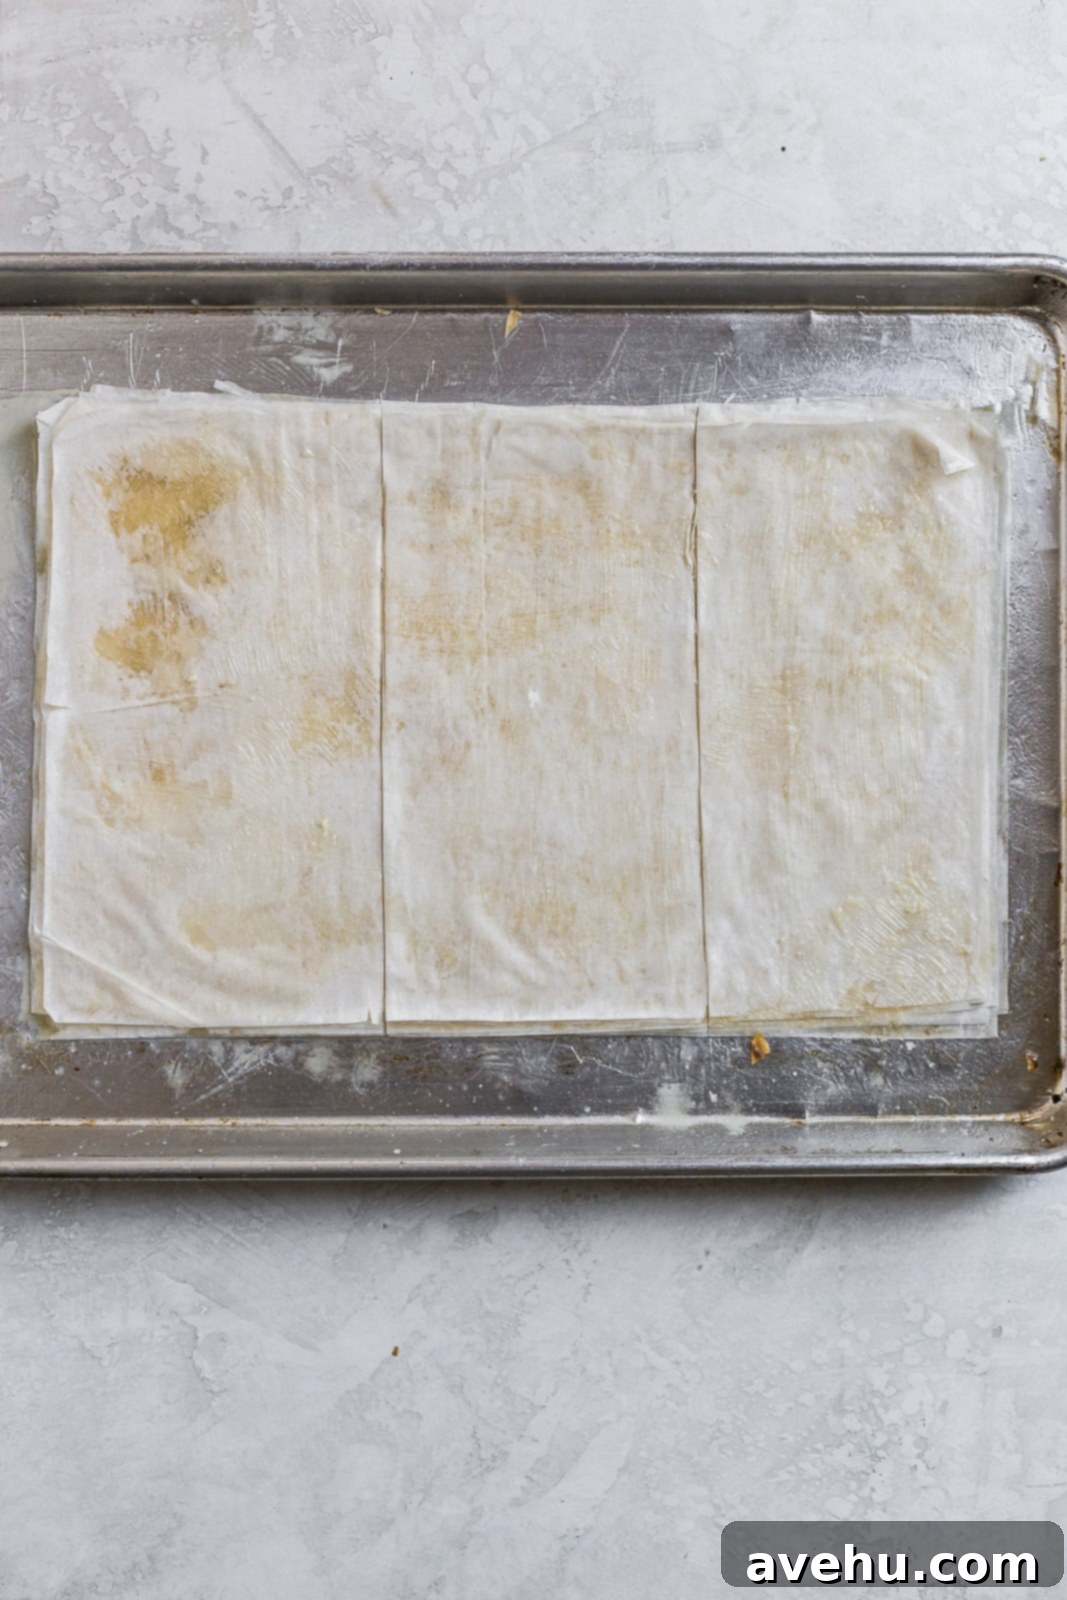
After all your phyllo sheets are stacked and brushed, it’s time to create the sections for your Napoleon. Using a sharp knife or a pizza cutter, carefully cut the entire stack of phyllo dough into three equal thirds across its shorter side. You’ll now have three distinct stacks of beautifully layered phyllo dough, ready for baking.

Baking the Phyllo to Golden Perfection
The baking process for phyllo is incredibly quick! Preheat your oven to 375°F (190°C). Place the sheet tray with your phyllo stacks into the preheated oven and bake for approximately 8-10 minutes, or until the layers are beautifully golden brown and delightfully crispy. Keep a close eye on them, as phyllo can brown quickly due to its thinness. Once baked, remove them from the oven and let them cool completely on the sheet tray before handling. This cooling time allows them to crisp up further and become sturdy enough for assembly.
While your phyllo layers are baking and cooling, you can efficiently move on to preparing the decadent caramel mascarpone cream and the aromatic caramelized apples. This parallel preparation helps streamline the entire dessert-making process.
How to Make the Caramel Mascarpone Cream Filling
The heart of this Napoleon is its exquisite caramel mascarpone cream, a filling that’s rich, luxurious, and incredibly flavorful. This component brings a delightful creaminess that perfectly balances the crisp phyllo and tender apples.
Ingredients for the Cream Filling:
- Mascarpone cheese: This Italian cream cheese is thicker and richer than regular cream cheese, offering a velvety texture and a subtle sweetness that forms the ideal base. Ensure it’s softened slightly for easier mixing.
- Confectioners’ sugar (powdered sugar): Provides sweetness and helps achieve a smooth, lump-free consistency.
- Homemade or store-bought caramel sauce: You can use your favorite store-bought brand for convenience, or for an extra touch of homemade goodness, prepare your own. A good quality caramel sauce will significantly enhance the overall flavor profile.
- Heavy cream: Added to lighten the mascarpone and sugar mixture, giving it a whipped, airy texture that’s still rich enough to hold its shape.
Mixing the Cream Filling:
The easiest and most efficient way to prepare this filling is by using either a stand mixer fitted with a paddle attachment or a hand mixer.
- Begin by placing the mascarpone cheese into the mixing bowl. Beat the mascarpone on medium speed until it becomes light, smooth, and fluffy. This usually takes a couple of minutes.
- Gradually add the confectioners’ sugar to the mascarpone, mixing on low speed until it is fully incorporated and the mixture is smooth. Scrape down the sides of the bowl as needed to ensure everything is well combined.
- Next, pour in the caramel sauce. Continue mixing on low speed until the caramel is evenly distributed throughout the mascarpone mixture.
- Finally, slowly drizzle in the heavy cream while the mixer is running on medium-low speed. Continue to beat until the mixture is thick, creamy, and holds soft peaks. Be careful not to overmix, as mascarpone can sometimes separate if beaten too aggressively or for too long once the cream is added. The goal is a lush, pipeable consistency.
Make-Ahead Advantage: One of the best features of this caramel mascarpone cream is its stability. You can absolutely prepare this cream filling a day or two in advance. Store it in an airtight container in the refrigerator until you’re ready to assemble your Napoleon. This simple step can significantly reduce your dessert-making stress on the day of serving, making the entire recipe even more manageable and enjoyable. Just give it a quick whisk by hand or on low speed in the mixer before using if it seems a little firm from refrigeration.
How to Make the Delicious Caramelized Apples
No Napoleon with apples would be complete without perfectly caramelized apples, adding a soft, sweet, and slightly tart counterpoint to the crisp phyllo and rich cream. These apples are quick to prepare and infuse the dessert with a wonderful warmth.
Ingredients for Caramelized Apples:
- Butter: Provides richness and helps in browning the apples.
- Fuji apples: The recipe specifies Fuji apples, which are known for their crispness and sweet-tart flavor, holding their shape well when cooked. Other firm, slightly tart apples like Honeycrisp, Granny Smith (if you prefer more tartness), or Gala can also work beautifully. Make sure they are peeled and diced into small, uniform pieces to ensure even cooking and easy layering in the dessert.
- Granulated sugar: Aids in the caramelization process, drawing out moisture and enhancing the sweetness of the apples.
- Heavy cream: Used to create a light, silky sauce.
- Cornstarch: A thickening agent that helps to create a luscious, syrupy consistency for the apple mixture, preventing it from being watery and ensuring it stays put between the layers.
Cooking the Caramelized Apples:
- In a medium-sized pan or skillet, melt the specified amount of butter over medium heat.
- Once the butter is melted and slightly foaming, add the diced apples and granulated sugar to the pan.
- Stir the apples frequently to ensure they are evenly coated with butter and sugar. Continue to cook on medium heat. It’s crucial to stir regularly and keep a watchful eye on the pan to prevent the apples from sticking or burning. The sugar will dissolve and start to caramelize, coating the apples in a golden, syrupy glaze.
- Cook the apples for about 15-20 minutes, or until they are golden brown, tender-crisp (they should still have a slight bite but be soft enough to easily pierce with a fork), and beautifully caramelized.
- While the apples are caramelizing, prepare your cornstarch slurry. In a small separate cup or bowl, dissolve the cornstarch in a tablespoon of heavy cream. Whisk it well until no lumps remain.
- Once the apples have reached the desired tenderness and color, pour the cornstarch slurry into the pan with the apples.
- Stir continuously and simmer the mixture for another 2-3 minutes. The cornstarch will activate and thicken the liquid, transforming it into a rich, glossy sauce that clings perfectly to the apples.
- Once thickened, remove the pan from the heat and allow the caramelized apples to cool completely before using them in the assembly. As they cool, the sauce will thicken further.
Serving Tip: For the absolute best flavor and texture, these caramelized apples are ideally made on the day you plan to serve the Napoleon. While they can be made slightly ahead, their peak freshness and slight warmth when combined with the other elements truly elevate the dessert.
How to Assemble This Impressive Napoleon Dessert
The assembly is where the magic happens, and you transform your prepared components into a show-stopping dessert that will undoubtedly impress your guests! This part is truly enjoyable and allows your culinary artistry to shine.
Assembling Your Masterpiece:
- First Layer of Phyllo: Begin by carefully placing one of your baked, cooled, and crispy phyllo dough stacks onto your chosen serving tray or plate. Ensure your serving surface is sturdy enough to hold the assembled dessert.
- First Layer of Cream: Now, it’s time for the star filling! You have two main options for applying the mascarpone cream:
- Piping (for elegance): For a professional and neat finish, transfer the caramel mascarpone filling into a piping bag fitted with a large round or star tip. Pipe the cream evenly over the entire surface of the first phyllo stack. This creates beautiful dollops or ribbons of cream that are both visually appealing and ensure an even distribution of flavor.
- Spreading (for simplicity): If you don’t have a piping bag, or prefer a more rustic look, simply spoon generous dollops of the cream onto the phyllo and gently spread it with a knife or an offset spatula. Aim for an even layer that covers the phyllo completely.
- Caramelized Apples: Carefully spoon about half of your cooled caramelized apples over the layer of mascarpone cream. Spread them out gently, ensuring the apple pieces and their rich sauce are distributed evenly.
- Second Layer of Phyllo & Cream: Carefully place the second stack of baked phyllo dough directly on top of the apple layer. Repeat the process: pipe or spread another generous layer of the caramel mascarpone cream over this phyllo sheet.
- Remaining Apples & Final Phyllo Layer: Spoon the remaining caramelized apples over the second cream layer. Finally, carefully place the third and final stack of phyllo dough on top.
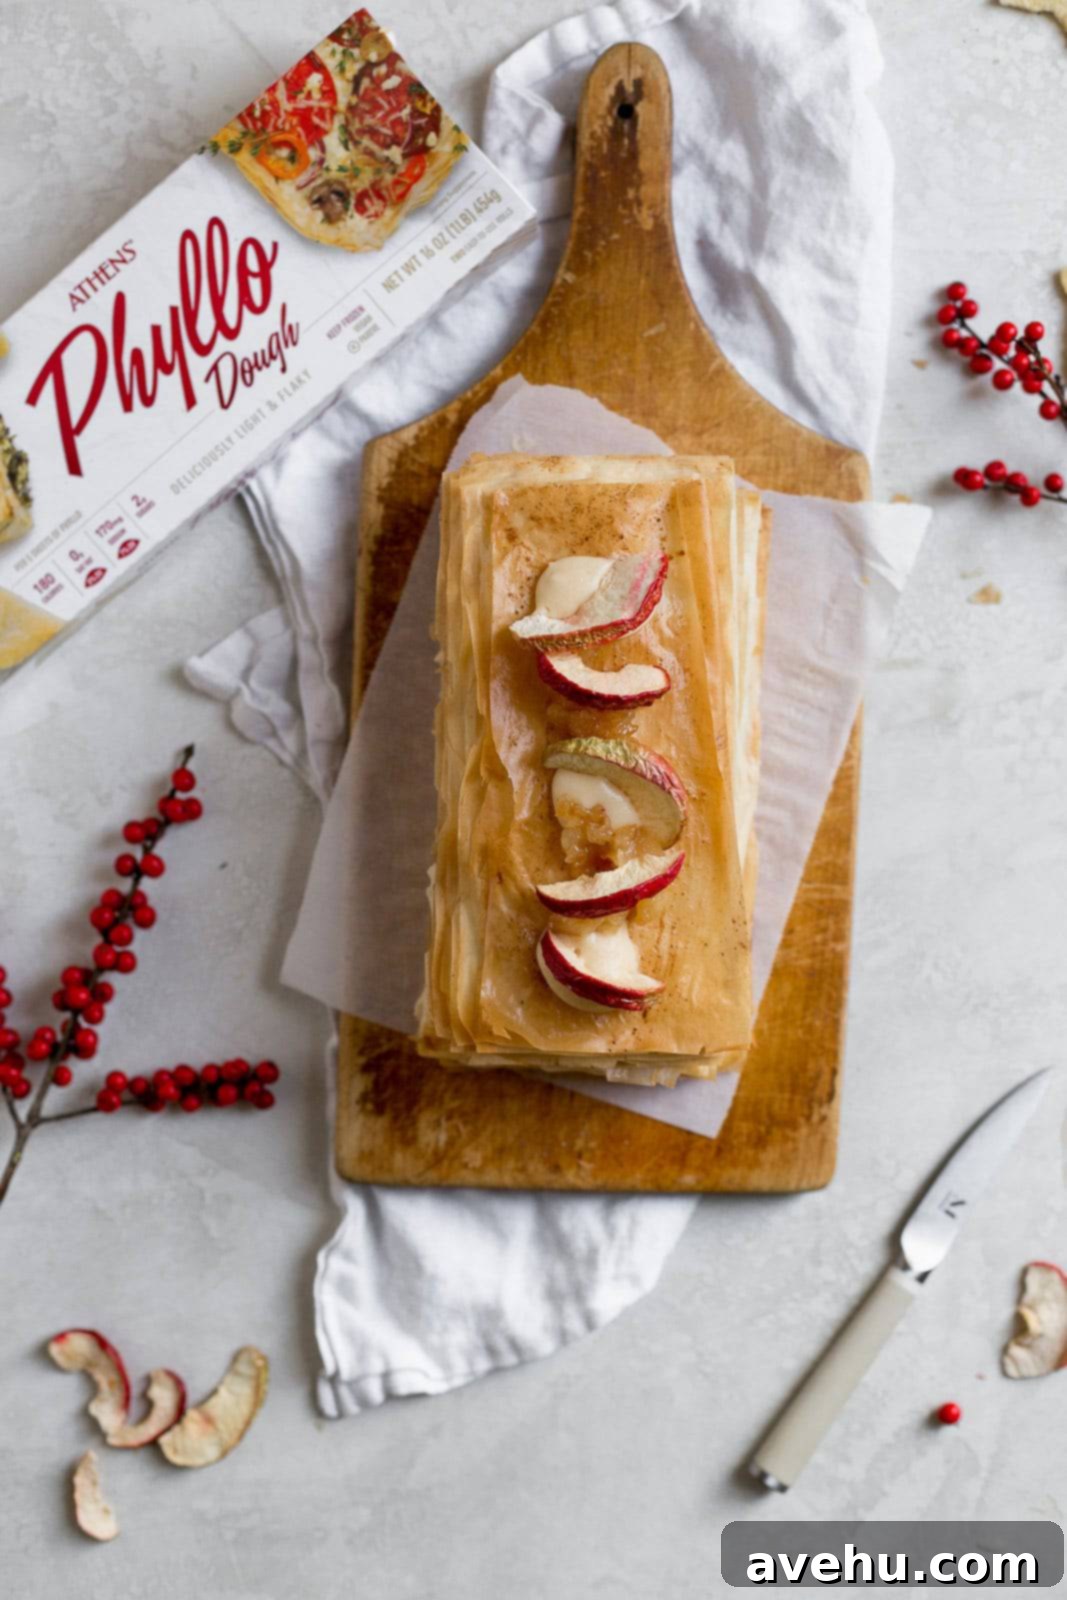
- Finishing Touch: For the very top layer, apply a final, elegant layer of the caramel mascarpone cream. You can pipe decorative swirls, create a smooth surface, or spoon on a few more caramelized apples for an irresistible garnish.
Garnish and Presentation:
To add an extra layer of visual appeal and textural contrast, consider these garnishes:
- Freeze-dried apples: As suggested, these add a delightful crunch and concentrated apple flavor. Crush them lightly or sprinkle them whole.
- Dusting of powdered sugar: A classic touch for a Mille Feuille, adding a delicate sweetness and elegant finish.
- Drizzle of extra caramel sauce: If you have any leftover caramel, a light drizzle over the top layer adds another layer of decadent flavor.
- Toasted nuts: A sprinkle of finely chopped toasted pecans or walnuts could complement the apple and caramel flavors beautifully.
And there you have it! Your guests are about to be absolutely wowed by this magnificent creation. They don’t have to know how genuinely easy it was to assemble such a sophisticated-looking dessert. The applause is well-deserved!
How to Store Your Phyllo Napoleon and Make it Ahead
One of the most appealing aspects of this Napoleon dessert is its flexibility in preparation and storage, allowing you to manage your time effectively, especially when entertaining.
Storing Your Assembled Napoleon Dessert:
Ideally, this Napoleon is best enjoyed shortly after assembly when the phyllo layers are at their crispest. The moisture from the cream and apples will eventually soften the phyllo over time. However, if you find yourself with leftovers (which is unlikely given how delicious it is!), or if you simply need to make it a few hours in advance, it can be stored.
- Assembled Napoleon: Once assembled, cover the Napoleon loosely with plastic wrap or place it in an airtight container. Store it in the refrigerator for up to 3 days. While the phyllo may lose some of its initial crispness, the flavors will meld beautifully, and the dessert will still be incredibly enjoyable. For best results, consider assembling it just 1-2 hours before serving.
Individual Components (Make-Ahead Strategy):
This recipe shines with its make-ahead potential for individual elements, ensuring peak freshness upon assembly:
- Phyllo Layers: You can bake the phyllo dough layers up to 1 day in advance. Once baked and completely cooled, store them in an airtight container at room temperature to maintain their crispness. This is a huge time-saver!
- Caramel Mascarpone Cream: The cream filling can be prepared up to 3 days ahead of time and stored in an airtight container in the refrigerator. Before assembly, give it a quick whisk to restore its smooth consistency.
- Caramelized Apples: While the apples are best made fresh on the day of serving, they can be prepared a day in advance and stored in the refrigerator in an airtight container. Reheat them gently on the stovetop if you prefer them slightly warm, or use them chilled.
By utilizing these make-ahead tips, you can spread out the preparation, making the entire process stress-free and enjoyable. Imagine the satisfaction of simply assembling a few components right before your guests arrive, presenting a freshly made, impressive dessert with minimal last-minute fuss.
Indeed, hear that sound? It’s not just the crisp snap of phyllo, it’s the delighted murmurs and applause of your guests, thoroughly impressed by your amazing, seemingly elaborate Napoleon phyllo dessert. BRAVO! Let’s keep our little secret about how truly easy it was to create such a culinary triumph.

Napoleon Dessert with Caramel Mascarpone Filling
Pin
Review
SaveSaved!
Ingredients
- ¾ cup unsalted butter, separated
- Baking spray
- 1 package Athens Foods Phyllo dough, defrosted completely
- 3 large Fuji apples, peeled and diced small
- ½ cup granulated sugar
- 1 (8 oz) tub of mascarpone cheese
- 1 tablespoon plus 1 teaspoon heavy cream, separated
- 1 teaspoon cornstarch
- 2 ½ cups confectioners’ sugar
- ⅓ cup homemade or store-bought caramel sauce
- Freeze-dried apples for garnish (optional)
Instructions
-
Prep the phyllo dough:
 Preheat your oven to 375°F (190°C). In a small pot, melt ½ cup of unsalted butter. Carefully unroll one package of Athens Foods phyllo dough, making sure to keep it covered with a damp paper towel while you work to prevent it from drying out.
 -
Lightly spray a half-sheet tray or cookie sheet with baking spray. Place the first thin sheet of phyllo dough onto the prepared tray. Brush this sheet evenly with melted butter. Continue layering the phyllo sheets, brushing each successive layer generously with melted butter or spraying with baking spray before adding the next. Ensure the top layer is also brushed with butter.
-
Once all the sheets from one roll of phyllo are stacked, use a sharp knife or pizza cutter to carefully cut the entire stack into three equal thirds across its shorter side. This will yield three separate, multi-layered phyllo stacks.
-
Bake the phyllo stacks for 8-10 minutes, or until they are puffed, golden brown, and super crispy. Watch carefully as phyllo can brown quickly. Remove from oven and let cool completely on the baking sheet.
-
Meanwhile, make the caramelized apples:
In a medium-sized pot or skillet, melt the remaining ¼ cup of unsalted butter over medium heat. Add the peeled and diced Fuji apples and ½ cup of granulated sugar. Stir continuously until the sugar dissolves and the apples are well coated. Bring the mixture to a gentle boil, then reduce heat to simmer. Cook for about 15-20 minutes, stirring occasionally, until the apples are golden brown and tender, yet still hold their shape. -
In a small cup, dissolve 1 teaspoon of cornstarch in 1 tablespoon of heavy cream (from the separated amount), whisking until smooth and lump-free. Add this cornstarch slurry to the pot with the apples. Mix well and continue to simmer for an additional 2-3 minutes, or until the apple mixture thickens into a glossy sauce. Remove from heat and allow the caramelized apples to cool completely.
-
Make the caramel mascarpone cream filling:
In the bowl of a stand mixer fitted with the paddle attachment (or using a hand mixer), cream the 8 oz tub of mascarpone cheese until it is light, smooth, and fluffy, about 2-3 minutes. Gradually add 2 ½ cups of confectioners’ sugar and mix on low speed until fully combined and smooth. Scrape down the sides of the bowl as needed. -
Pour in ⅓ cup of caramel sauce and the remaining 1 teaspoon of heavy cream. Beat on medium-low speed until the mixture is well incorporated, thick, and holds its shape. Be careful not to overmix.
-
Assemble the Napoleon:
 Place one stack of the cooled, baked phyllo dough onto your desired serving plate. Transfer the caramel mascarpone filling to a piping bag (for a fancy presentation) or use a spoon and offset spatula. Pipe or spoon an even layer of cream over the first phyllo stack.
 -
Gently spoon about half of the cooled caramelized apples over the cream layer, spreading them out evenly. Place the second phyllo stack on top of the apples, and then add another layer of caramel mascarpone cream.
-
Top with the remaining caramelized apples, then carefully place the third and final phyllo stack. Finish with a final layer of mascarpone cream. For garnish, sprinkle with freeze-dried apples, a dusting of powdered sugar, or an extra drizzle of caramel sauce. Serve immediately or chill briefly before serving for optimal crispness. Enjoy this impressive and delicious dessert!
Notes
You can make the cream filling 3 days in advance.
The apples filling is best made day of.
Did you make this recipe?Please leave a star rating and review in the form below. I read them all!


