The Ultimate One-Bowl Fudgy Brownies: Quick, Easy & Irresistibly Chewy
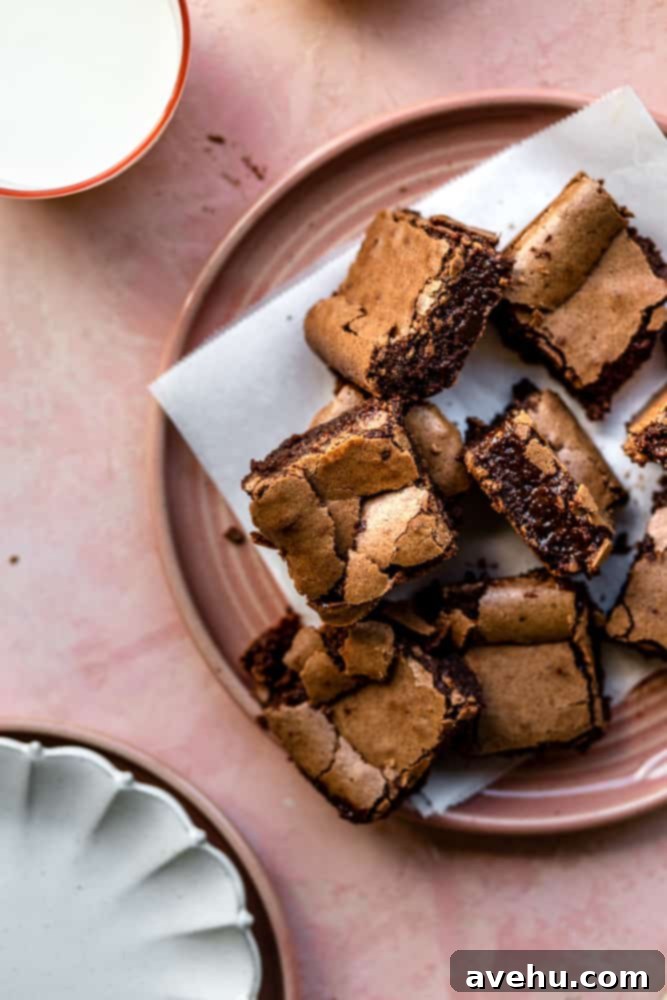
Craving a rich, chocolatey dessert but short on time (and patience for endless dishes)? Look no further! These ultimate one-bowl brownies are your new go-to recipe for a swift, satisfying chocolate fix. Imagine biting into a perfectly fudgy brownie with that coveted shiny, crinkly top, bursting with intense chocolate flavor, all while knowing you only used a single bowl to make them. Yes, it’s possible! This recipe masterfully combines melted chocolate and cocoa powder, ensuring every bite is deeply decadent and truly unforgettable. Get ready for a dessert experience that’s as easy to clean up as it is delicious to devour.
There’s an undeniable magic in a warm, gooey brownie, and these SUPER fudgy one-bowl wonders deliver that comforting experience every single time. With their signature crinkled tops, lusciously warm and soft interiors, and just the right amount of chewiness, they embody everything you love about homemade brownies. What makes them even better? They’re incredibly quick, taking just 30 minutes from start to finish, and simplify your baking process by requiring only one bowl. This minimalist approach to baking means less mess and more time to enjoy your delicious creation, much like our popular red velvet brownies or brownies with cream cheese frosting.
As a trained professional baker, I’ve spent countless hours perfecting brownie recipes. This particular batter proved so versatile and robust that it became the foundation for my homemade brookies – a delightful hybrid of cookies and brownies! But don’t stop there; elevate this already fantastic quick brownie recipe with a scoop of vanilla ice cream, a dollop of fresh whipped cream, or a generous layer of this decadent brownie frosting. Honestly, sometimes the best way to enjoy them is straight out of the pan, warm and utterly irresistible!
For those with dietary considerations, don’t worry, we’ve got you covered! If you’re seeking a dairy-free option that doesn’t compromise on flavor or texture, be sure to try our fantastic dairy-free brownies. Everyone deserves to experience the joy of a perfect brownie.
Why This is The Best One-Bowl Brownie Recipe
When I set out to develop this recipe, my primary goal was simplicity without sacrificing quality. I wanted to eliminate the hassle of multiple bowls, separating wet and dry ingredients, and unnecessary steps that often deter home bakers. My vision was clear: to create the best one-bowl brownie recipe imaginable, a recipe so foolproof and delicious that it would become a staple in any kitchen. Achieving this meant rigorous testing – I personally tested this recipe no less than six times, tweaking ratios and techniques until these brownies were absolutely perfect. Each iteration brought me closer to that ideal balance of fudginess, chewiness, and that characteristic shiny, crinkled top. The result is a recipe that’s not only incredibly easy but also consistently delivers bakery-quality brownies every single time.
Seriously, it’s time to ditch those generic box mixes! Once you try these homemade one-bowl brownies, you’ll wonder why you ever settled for anything less. They are SO much better in terms of flavor, texture, and overall satisfaction, yet surprisingly simple to make. All you need is a single bowl and a spatula, and you’re well on your way to baking bliss. So, grab your bowl, gather your ingredients, and let’s embark on this delightful baking journey together!
Essential Ingredients for Perfect One-Bowl Brownies
Crafting these exceptional fudgy brownies requires a few pantry staples, but it’s the thoughtful combination and specific techniques that elevate them. We’ve designed this recipe to use both melted chocolate and unsweetened cocoa powder, a powerful duo that guarantees an incredibly intense, deep chocolate flavor that box mixes simply can’t replicate. While the ingredients themselves are common, paying close attention to *how* they are used and their individual roles is key to achieving brownie perfection.
- Unsalted Butter: This forms the rich base of our brownies. It’s melted alongside the chocolate, creating a smooth, luscious foundation for the batter. Using unsalted butter gives you control over the overall saltiness of the final product.
- Semi-Sweet Chocolate Chips: The star of the show! Melting semi-sweet chocolate chips (or a chopped bar) adds a luxurious, velvety texture and deep chocolate flavor that cocoa powder alone cannot achieve. While milk or bittersweet chocolate can be used, semi-sweet provides the ideal balance, delivering richness without being overly sweet or bitter.
- Granulated Sugar: Beyond just sweetness, granulated sugar plays a crucial role in the brownie’s texture and appearance. When vigorously whipped with the eggs, it helps create those desirable shiny, crinkled tops by dissolving and forming a stable foam that traps air.
- Eggs: Essential for structure and moisture. For best results and to ensure proper emulsification with the melted chocolate mixture, make sure your eggs are at room temperature. This helps them incorporate smoothly, contributing to a lighter texture and more consistent crinkly top.
- Vanilla Extract: A crucial flavor enhancer. Good quality vanilla extract doesn’t just add its own delightful aroma; it deepens and rounds out the chocolate flavor, making the brownies taste even more indulgent.
- All-Purpose Flour: Used sparingly in this recipe to ensure the brownies remain wonderfully fudgy and chewy, rather than becoming cake-like. The minimal amount of flour focuses on structure without drying out the dessert.
- Unsweetened Cocoa Powder: The second punch of intense chocolate flavor! Combining cocoa powder with melted chocolate creates a multi-layered chocolate profile, giving these brownies their exceptional depth and richness.
- Kosher Salt: A pinch of salt is vital in any baking recipe. It doesn’t just season; it brilliantly enhances and balances the sweetness and deep chocolate notes, making every flavor pop.
As mentioned, this recipe strategically uses both melted chocolate and unsweetened cocoa powder for a truly intense chocolatey flavor. This dual-chocolate approach ensures a complex and satisfying taste that stands out. The remaining ingredients are standard baking pantry staples, readily available and easy to work with. Remember, while the ingredients are simple, the magic happens in the method – particularly in how these ingredients are combined and treated.
How to Make Perfect Fudgy Brownies in One Bowl
The beauty of this recipe lies in its simplicity. You can choose to mix by hand with a sturdy whisk, or use a hand mixer or stand mixer for even quicker results and a more pronounced crinkly top. Whichever method you choose, the key is mindful mixing.
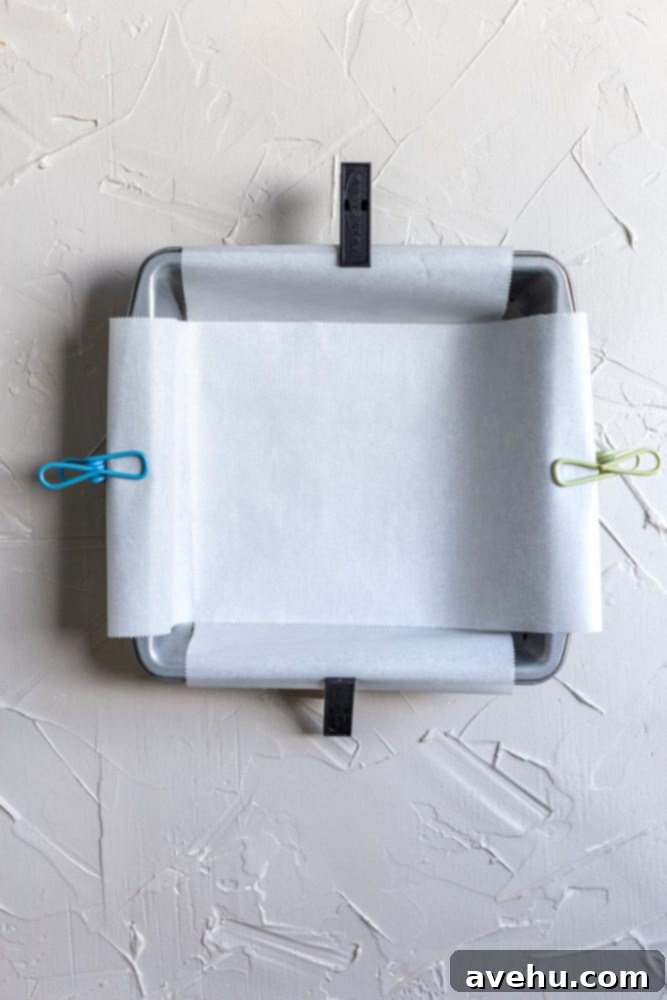
- Prepare Your Pan and Oven: First, preheat your oven to 350°F (175°C). Line an 8×8 inch baking pan with parchment paper, leaving an overhang on two sides to create “handles” for easy removal. Alternatively, you can generously spray the pan with a nonstick baking spray. For parchment paper, securing the overhang with clips to the sides of the pan (remember to remove them before baking!) helps keep it in place when pouring the batter.
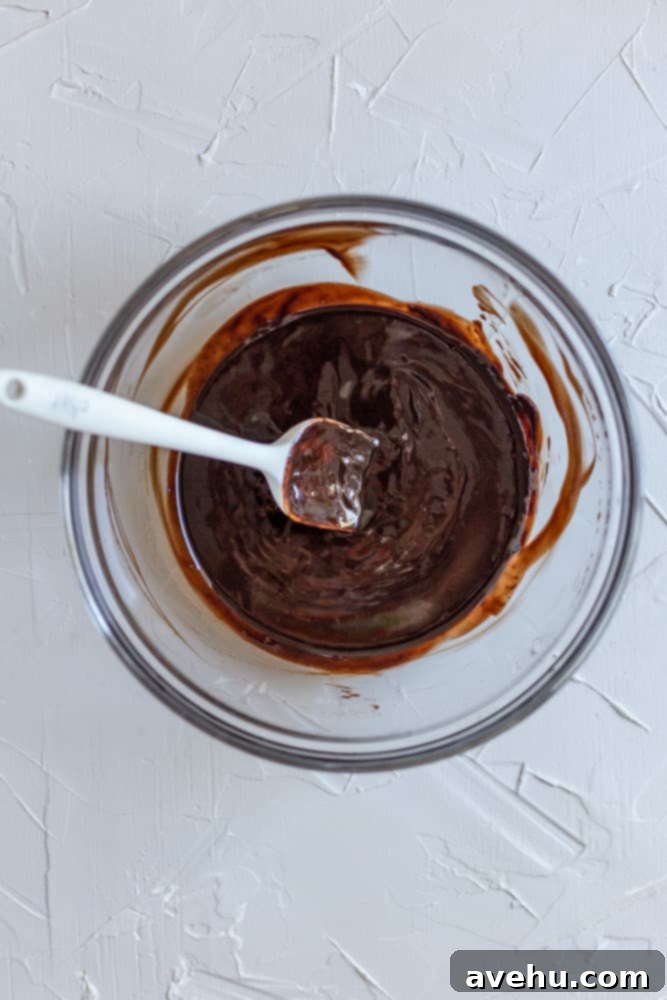
- Melt Chocolate and Butter: In your single, microwave-safe bowl, combine the unsalted butter and semi-sweet chocolate chips. Microwave in short bursts, typically 30-second increments, stirring well after each interval until the chocolate is completely melted and smooth. Be careful not to exceed 90 seconds in total to prevent burning the chocolate. Once melted, allow the chocolate mixture to cool for about 5 minutes. This crucial step prevents the eggs from scrambling when added – we definitely don’t want chocolate scrambled eggs!
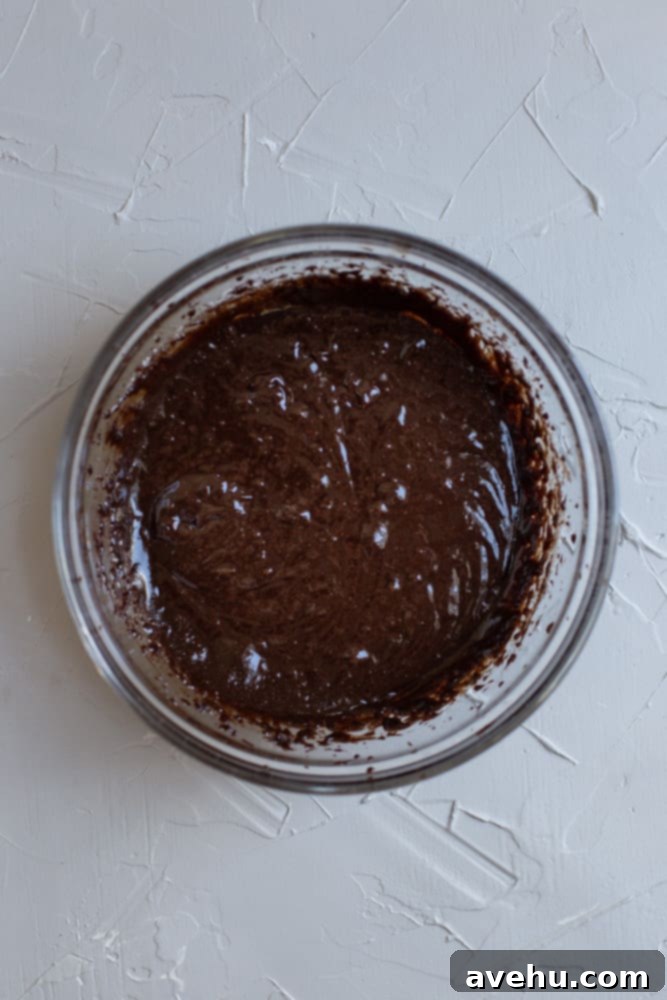
- Whip Eggs and Sugar for Crinkly Tops: Add the granulated sugar and room temperature eggs to the cooled chocolate mixture. Now for the secret to those coveted crinkly tops: using a whisk (either by hand or with a mixer), whip this mixture on high speed for a full 3 minutes. This vigorous whipping incorporates air bubbles and fully dissolves the sugar, which is essential for developing that signature shiny, crackled surface. If you skip this step or just stir with a spatula, your brownies will still be delicious but might lack that classic top.
- Incorporate Dry Ingredients: Switch from a whisk to a rubber spatula. Stir in the vanilla extract until just combined. Then, add the all-purpose flour, cocoa powder, and kosher salt to the wet mixture. Gently fold these dry ingredients into the batter until just combined. The key here is to mix until there are no longer any visible dry streaks of flour. Be very careful not to overmix, as this can develop the gluten in the flour, leading to tougher, more cake-like brownies rather than the desired fudgy texture.
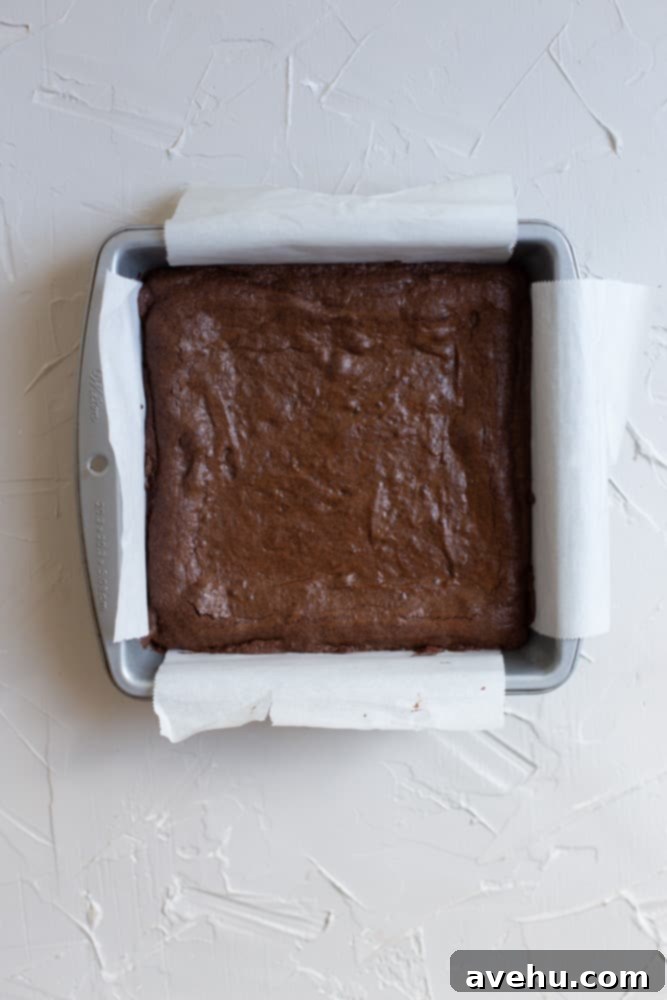
- Bake to Perfection: Pour the luscious brownie batter evenly into your prepared 8×8 inch pan. Bake for 25-28 minutes. For intensely fudgy brownies, aim for the 25-minute mark; for a slightly more cakey but still moist brownie, bake closer to 28 minutes. A good test is when a toothpick inserted into the center comes out with moist crumbs attached, but not wet batter. Crucially, allow the brownies to cool completely in the pan before attempting to cut them. Cooling allows them to set properly, resulting in much cleaner, perfectly shaped squares. Patience is a virtue here!
Choosing the Best Pan for Baking Brownies
The type of baking pan you use can significantly impact the final texture and doneness of your brownies. For achieving consistent, evenly baked brownies, I highly recommend using either a glass baking dish or a light-colored metal baking tray. Both materials are excellent conductors of heat, distributing it evenly throughout the batter. This prevents hot spots that can lead to uneven baking or burnt edges while the center remains undercooked.
What you absolutely want to avoid is baking your brownies in a dark-colored metal pan. Dark pans absorb more heat, causing the edges and bottom of your brownies to bake much faster and often burn before the center is fully cooked. This results in a chewy, dry perimeter and potentially raw middle – far from the desired fudgy perfection. Stick to lighter-colored pans for superior heat distribution and consistently delicious results.
Selecting the Perfect Chocolate for Your Brownies
The quality and type of chocolate you choose are paramount to the flavor profile of your brownies. I personally favor using a high-quality semi-sweet dark chocolate for these brownies because it imparts a wonderfully rich, deep chocolate flavor that isn’t overly sweet. This creates a more sophisticated and indulgent taste experience. Bittersweet chocolate is another excellent option if you prefer a less sweet, more intense cocoa punch. However, using milk chocolate would make the recipe significantly sweeter, potentially altering the balance and richness we aim for. While delicious in other contexts, it might make these particular brownies a bit too sugary.
Traditionally, the best kind of chocolate to use for baking is from a solid bar that you chop yourself. This allows for better melting and often results in a smoother, more integrated chocolate flavor. That being said, for this particular one-bowl brownie recipe, I’ve successfully used semi-sweet chocolate chips because they are convenient and readily available. Even with chips, the brownies came out incredibly delicious and fudgy, proving that while a chopped bar is ideal, quality chocolate chips are a fantastic and convenient alternative for a quick bake. The key is to use chocolate you genuinely enjoy eating on its own.
Expert Recipe TIPS for Brownie Perfection
Achieving bakery-quality brownies at home is entirely possible with a few insider tips. Pay attention to these details, and you’ll be consistently turning out perfect fudgy squares with beautiful crinkly tops.
- For the Coveted Crinkled Shiny Tops: This is a non-negotiable step for classic brownies! Ensure you are vigorously whipping the eggs and granulated sugar into the melted chocolate mixture. The longer you whisk (using a hand mixer or stand mixer is highly recommended here), the more air you incorporate and the more sugar dissolves. This creates a lighter, airier batter that rises beautifully and develops that iconic thin, crackly, shiny crust on top. Aim for a full 3 minutes of high-speed whipping; the mixture should become noticeably lighter in color and slightly thickened.
- Ensuring Even Baking: To guarantee that your brownies bake uniformly, line your pan with parchment paper. Not only does this make for incredibly easy removal and cleanup, but it also helps prevent edges from overbaking. Use metal clips to hold the parchment paper snugly against the sides of the pan while you pour in the batter. Just remember to remove these clips before placing the pan in the hot oven! Distribute the batter evenly in the pan to ensure consistent thickness across the entire batch.
- The Best Way to Cut Brownies: Patience is key for clean cuts. Always allow your brownies to cool completely – ideally for at least an hour, or even chill them for 30 minutes in the fridge – before attempting to slice them. A warm brownie is prone to crumbling and sticking. Once cooled, lift the parchment paper “handles” to remove the entire slab of brownies from the pan. For perfectly square pieces, first, cut the brownie slab vertically in half, then cut each half in half again. Repeat this process horizontally. This method will yield 16 uniformly sized, neat brownie squares. For extra clean cuts, wipe your knife with a warm, damp cloth between each slice.
Delicious Toppings and Serving Suggestions
While these fudgy one-bowl brownies are absolutely divine on their own, they also serve as an excellent canvas for customization and added deliciousness. Here are some ideas to elevate your brownie experience:
- Classic Frosting: A layer of my luscious brownie frosting is always a winner. It adds an extra layer of chocolate indulgence and a smooth, creamy contrast to the chewy brownie.
- Candy Mix-ins (before baking): Before baking, sprinkle your favorite candies over the top of the batter. Popular choices include mini m&ms for a colorful crunch, chopped up Oreos for a cookies-and-cream twist, or even crushed pretzels for a delightful salty-sweet combination.
- Nuts: Toasted walnuts or pecans add a lovely crunch and earthy flavor that pairs wonderfully with rich chocolate. Simply sprinkle them over the batter before baking.
- Caramel Drizzle: A swirl of warm salted caramel sauce over cooled brownies adds a sophisticated touch and incredible flavor.
- Ice Cream Sundae: Serve warm brownies with a scoop of vanilla bean ice cream, a generous drizzle of chocolate syrup, whipped cream, and a cherry on top for an epic brownie sundae.
- Fresh Fruit: Berries like raspberries or strawberries offer a tart contrast to the sweetness of the brownies, adding freshness and a pop of color.
- Dusting of Powdered Sugar or Cocoa: For a simple yet elegant finish, dust cooled brownies with powdered sugar or a light sifting of cocoa powder.

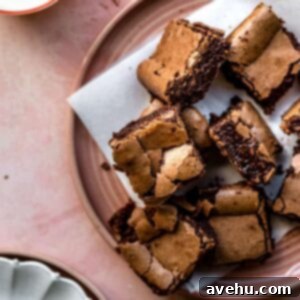
30 Minute Fudgy One-Bowl Brownies
5 mins
25 mins
30 mins
12 brownies
Pin Recipe
Review Recipe
Save Recipe
Ingredients
- 1/2 cup (113.5 g) unsalted butter
- 6 oz (170.1 g) semi-sweet chocolate chips (about 1 heaping cup)
- 1 cup (200 g) granulated sugar
- 3 large eggs (at room temperature)
- 1 tsp vanilla extract
- 1/2 cup (62.5 g) all-purpose flour
- 1/4 cup (21.5 g) cocoa powder (unsweetened)
- 1/2 tsp kosher salt
Instructions
-
Preheat oven to 350°F (175°C). Line an 8×8 inch pan with parchment paper, leaving an overhang on two sides for easy removal. Secure with clips if needed (remove before baking) or spray with nonstick baking spray.
-
 In the microwave-safe bowl, combine 1/2 cup butter and 6 oz chocolate chips. Microwave in 30-second intervals, stirring between each, until completely melted and smooth (up to 90 seconds total). Let cool for 5 minutes before adding eggs.
 -
 Add 3 room temperature eggs and 1 cup granulated sugar to the cooled chocolate mixture. Using a whisk (or whisk attachment on a mixer), whip on high speed for 3 minutes until lightened in color and slightly thickened – this creates the crinkly tops.
 -
Switch to a rubber spatula. Stir in 1 tsp vanilla extract until combined. Next, gently fold in 1/2 cup all-purpose flour, 1/4 cup cocoa powder, and 1/2 tsp kosher salt. Mix until just combined and no dry streaks remain, being careful not to overmix.
-
 Pour the batter into the prepared pan and bake for 25 minutes for super fudgy brownies, or 28 minutes for slightly more cakey. Allow to cool completely before cutting for the cleanest slices.
Notes
I like to use a hand or stand mixer because the longer you whip the eggs in the chocolate the lighter and more crackly the tops of the brownies will be. Whip the egg and chocolate mixture for 3 minutes and the brownies will be lighter and so fudgy.
To line the baking pan, I cut 2 small strips of parchment paper and line them across the pan. Use clips attached to the pan to help the parchment stay in place when pouring the batter.
Make sure the brownie batter is evenly distributed so that it bakes evenly.
You can add various toppings or mix-ins to the batter or on top of the brownies before baking, such as M&Ms, pretzels, Oreos, or walnuts.
Serving:
1 brownie
,
Calories:
245 kcal
,
Carbohydrates:
32 g
,
Protein:
3 g
,
Fat:
12 g
,
Saturated Fat:
7 g
,
Cholesterol:
69 mg
,
Sodium:
192 mg
,
Potassium:
50 mg
,
Fiber:
1 g
,
Sugar:
26 g
,
Vitamin A:
336 IU
,
Vitamin C:
1 mg
,
Calcium:
28 mg
,
Iron:
1 mg
Dessert
Sam Adler
American
Did you make this recipe?
Please leave a star rating and review in the form below. I read them all!
Storing Your Homemade Brownies
Proper storage is essential to keep your fudgy brownies fresh and delicious for as long as possible. Once completely cooled (this is critical!), store them in an airtight container at room temperature. They will remain wonderfully moist and chewy for up to 3-4 days. If you want to extend their freshness, you can also store them in the refrigerator, where they’ll last for about a week. Just be aware that refrigeration can alter the texture slightly, making them a bit firmer. For that fresh-baked warmth, you can gently microwave a refrigerated brownie for 10-15 seconds.
These brownies also freeze exceptionally well! Wrap individual brownies or the entire cooled slab tightly in plastic wrap, then place them in a freezer-safe bag or container. They can be frozen for up to 3 months. Thaw them at room temperature or warm gently in the microwave when a chocolate craving strikes.
Frequently Asked Questions About One-Bowl Brownies
Even with an easy recipe, questions can arise. Here are answers to some common queries about making these delicious one-bowl brownies:
- Why didn’t my brownies get that crinkly top? The crinkly top comes from properly whipping the eggs and sugar into the melted chocolate mixture. Ensure you whisk (preferably with a mixer) for the full 3 minutes until the mixture lightens and thickens. This incorporates air and dissolves sugar, both crucial for that signature finish.
- My brownies turned out more cakey than fudgy, what went wrong? This usually happens for a few reasons:
- Overmixing the flour: Once you add the dry ingredients, mix only until just combined to avoid developing too much gluten.
- Too much flour: Ensure accurate measurement, preferably by weight with a kitchen scale.
- Overbaking: Even a few extra minutes in the oven can dry out brownies. Watch them closely and remove when a toothpick comes out with moist crumbs, not wet batter, but also not completely clean.
- Can I double the recipe? Yes, you can double the recipe. You’ll need a larger pan, typically a 9×13 inch baking pan. The baking time will also increase, likely to 30-35 minutes, so keep a close eye on them.
- Do I really need to let them cool completely before cutting? Yes, absolutely! Cooling allows the brownies to finish setting and firm up. Cutting them warm will result in gooey, messy squares that are prone to crumbling. For the neatest slices, patience is truly a virtue here.
- Can I make these dairy-free? While this specific recipe uses butter and chocolate chips, you can adapt it. For dairy-free brownies, try my dedicated dairy-free brownie recipe.
Conclusion: Your New Favorite Easy Brownie Recipe
You now have all the tools and knowledge to create the most incredible, fudgy one-bowl brownies with a perfect crinkly top, all with minimal effort and cleanup. This recipe is a testament to the fact that homemade deliciousness doesn’t have to be complicated. Whether you’re making them for a quick weeknight treat, a special occasion, or just because, these easy brownies are sure to impress. So go ahead, whip up a batch, savor the intense chocolate flavor, and share the joy with friends and family. Don’t forget to come back and leave a star rating and review – I love hearing about your baking successes!
