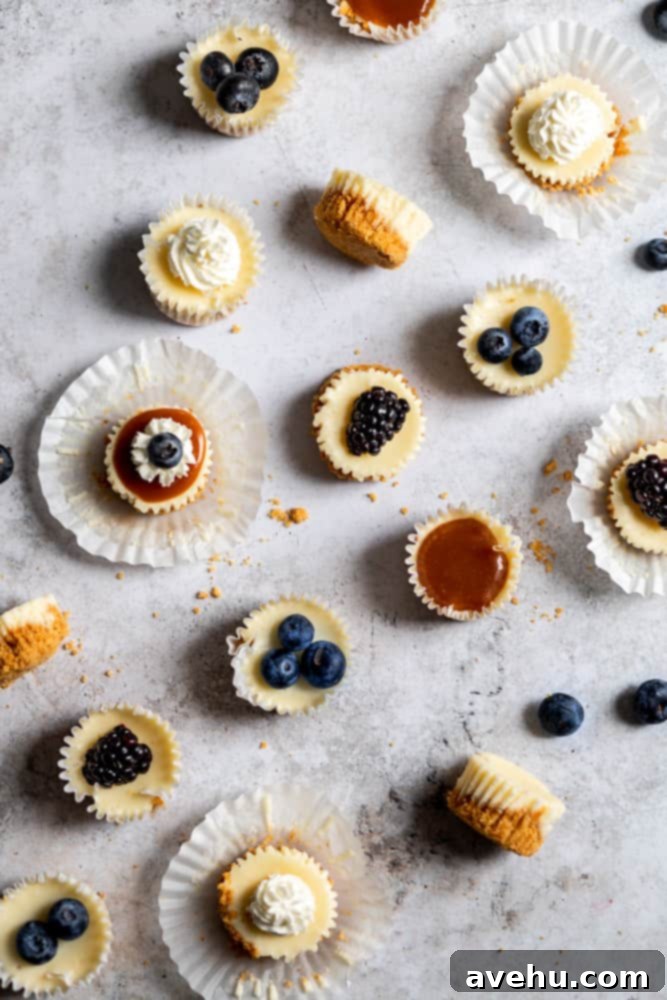
Indulge in Perfection: Easy Baked Mini Cheesecakes with Graham Cracker Crust – The Ultimate Party Dessert
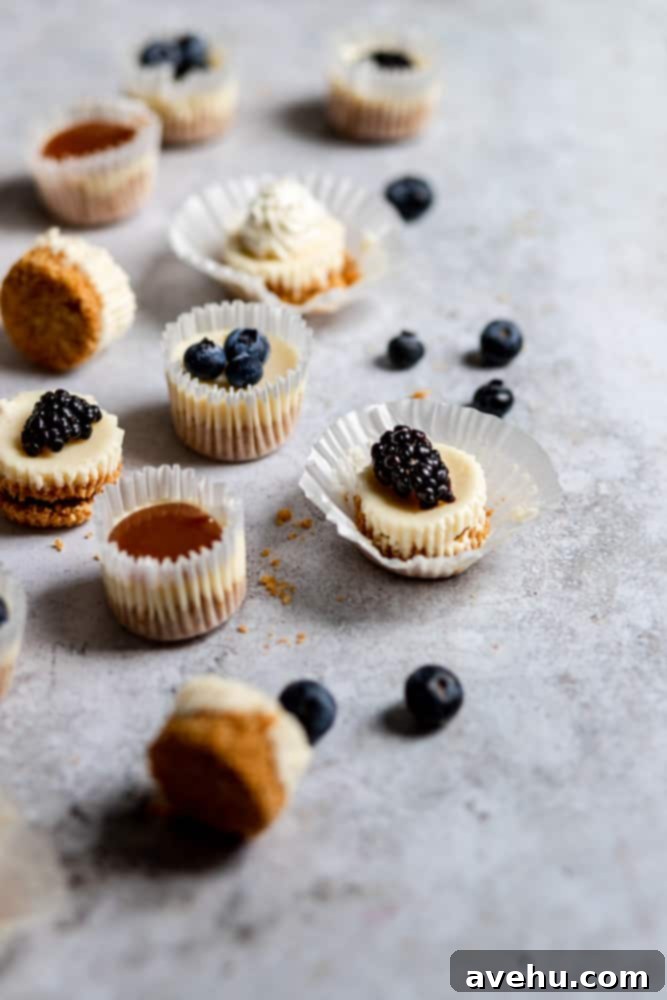
Prepare to delight your guests with these exquisite baked mini cheesecakes! Featuring a delectable simple graham cracker crust and a lusciously smooth, creamy cheesecake filling, these treats are the quintessential bite-size desserts for any gathering. This meticulously crafted recipe is designed to yield an impressive 48 individual cheesecakes, ensuring there’s plenty to go around for even the largest crowds. What truly sets them apart is their incredible versatility; you can effortlessly customize each one with your favorite toppings. Imagine a vibrant spread featuring fresh blueberries, decadent caramel drizzles, a hint of warm cinnamon sugar, a cloud of whipped cream, or any other creative garnish your heart desires. These mini cheesecakes offer a sophisticated yet approachable dessert option that promises to be a memorable highlight of your event.
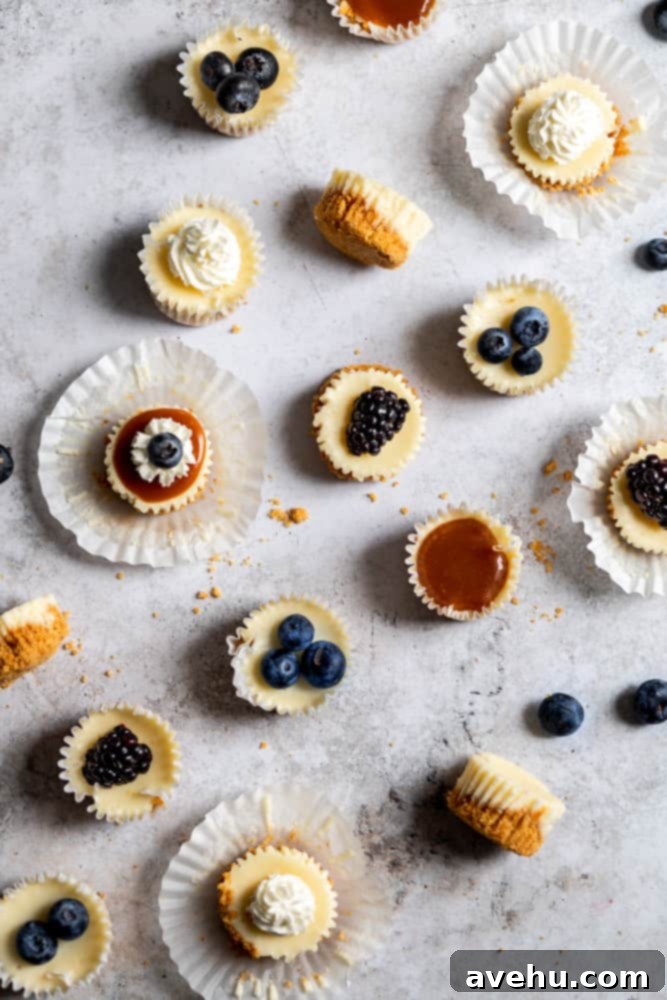
While a homemade cheesecake is always a magnificent dessert choice, celebrated for its balanced sweetness and its ability to complement other culinary delights, serving a traditional full-sized cake to a large assembly can often prove challenging. The logistics of cutting, plating, and ensuring everyone gets an equal, elegant slice can quickly become a messy affair, and sometimes, a single cake just isn’t enough to satisfy a hungry crowd. This is especially true for bustling events where guests are mingling and may prefer a handheld, fuss-free treat.
This is precisely why I developed this recipe for miniature cheesecakes, complete with their delightful graham cracker crusts. They represent an ingenious and convenient mini dessert solution, perfect for effortlessly catering to a large number of guests at any celebration, from casual gatherings to elegant parties!
These exquisitely bite-sized treats offer unparalleled convenience, whether artfully arranged on a dessert table or elegantly passed around on serving trays. Each miniature cheesecake provides a perfect, indulgent bite of silky-smooth filling nestled atop a crisp crust, allowing your guests to savor its rich flavor without feeling overly full. This leaves ample room to explore and enjoy other delicious desserts you might offer! As a professionally trained baker, I have a deep appreciation for individual dessert ideas like these. They streamline serving, reduce waste, and add a touch of charming elegance to any event. Much like my popular mini vanilla cupcakes or the irresistible mini chocolate cupcakes, these cheesecakes are designed for maximum impact with minimum fuss, offering a delightful and manageable sweet experience.
Hot tip for a velvety smooth batter: The key to achieving a perfectly smooth and lump-free cheesecake batter lies in using room temperature cream cheese. If your cream cheese is too cold, it will resist blending evenly with sugar and other ingredients, resulting in an undesirable lumpy texture that can impact the final consistency of your cheesecake. Don’t fret if you forgot to take it out in advance! You can easily learn how to soften cream cheese quickly with a few simple tricks, like unwrapping it and microwaving it in short bursts or placing the sealed package in warm water.
This recipe is a perfectly scaled-down iteration of my acclaimed perfect cheesecake recipe, a trusted favorite I’ve been perfecting and making for many years. It translates all the rich flavor and creamy texture into a convenient mini format. If you’re eager to explore more adventurous flavor profiles in a baked cheesecake, you might also enjoy experimenting with this aromatic baked coffee cheesecake or the strikingly beautiful and rich baked red velvet cheesecake for another delightful baking adventure.
Why You’ll Fall in Love with These Easy Mini Cheesecakes
There are countless reasons to adore these adorable miniature cheesecakes, making them a consistently crowd-pleasing dessert choice for any occasion. For starters, who can honestly resist the undeniable charm of mini things? They possess an inherent cuteness factor that simply makes them irresistible! Beyond their charming appearance, these mini delights offer several practical advantages that will make them your go-to recipe:
- Irresistibly Cute & Perfectly Portioned: Mini desserts are inherently delightful, and these cheesecakes are no exception. Their small size makes them incredibly appealing and perfectly portioned, allowing everyone to enjoy a taste without feeling overly full. This means guests can easily sample other desserts or even come back for a second (or third!) mini cheesecake without any guilt.
- Effortless Entertaining with Make-Ahead Convenience: One of the biggest advantages is that these cheesecakes can be prepared well ahead of time, typically up to 3 days in advance. This frees you up to enjoy your guests and the event, rather than being stuck in the kitchen on the day of your gathering. Simply bake, chill thoroughly, and add toppings just before serving!
- No Water Bath Required: Unlike many traditional, full-sized cheesecake recipes that often demand a tedious water bath to prevent cracks and ensure a creamy texture, these mini versions bake beautifully and achieve a perfect consistency without one. This significantly simplifies the baking process, making them more accessible and less intimidating for home bakers of all skill levels.
- Perfect for Any Occasion: From casual family get-togethers, summer barbecues, and holiday feasts to elegant dinner parties and bridal showers, these mini cheesecakes fit seamlessly into any event. Their individual nature makes serving and enjoying them a breeze, eliminating the mess and effort associated with slicing and plating a large cake.
- Guilt-Free Indulgence: Because they are individual, perfectly bite-sized portions, it’s perfectly acceptable (and often encouraged!) to enjoy a selection of these delectable treats. Guests appreciate the flexibility and the perception of a lighter indulgence, making them feel less overwhelmed by a large slice of cake.
- Customization Dream: Their small size makes them ideal for offering a variety of toppings, catering to different preferences in one go. Each guest can pick their favorite or try several different flavor combinations.
Essential Ingredients You’ll Need for Perfect Mini Cheesecakes
Crafting these perfect mini cheesecakes requires a selection of fresh, quality ingredients for both the rich, creamy filling and the crisp, buttery crust. Using good quality ingredients will always translate into superior flavor and texture in your final dessert. Here’s a detailed look at what you’ll need to gather:
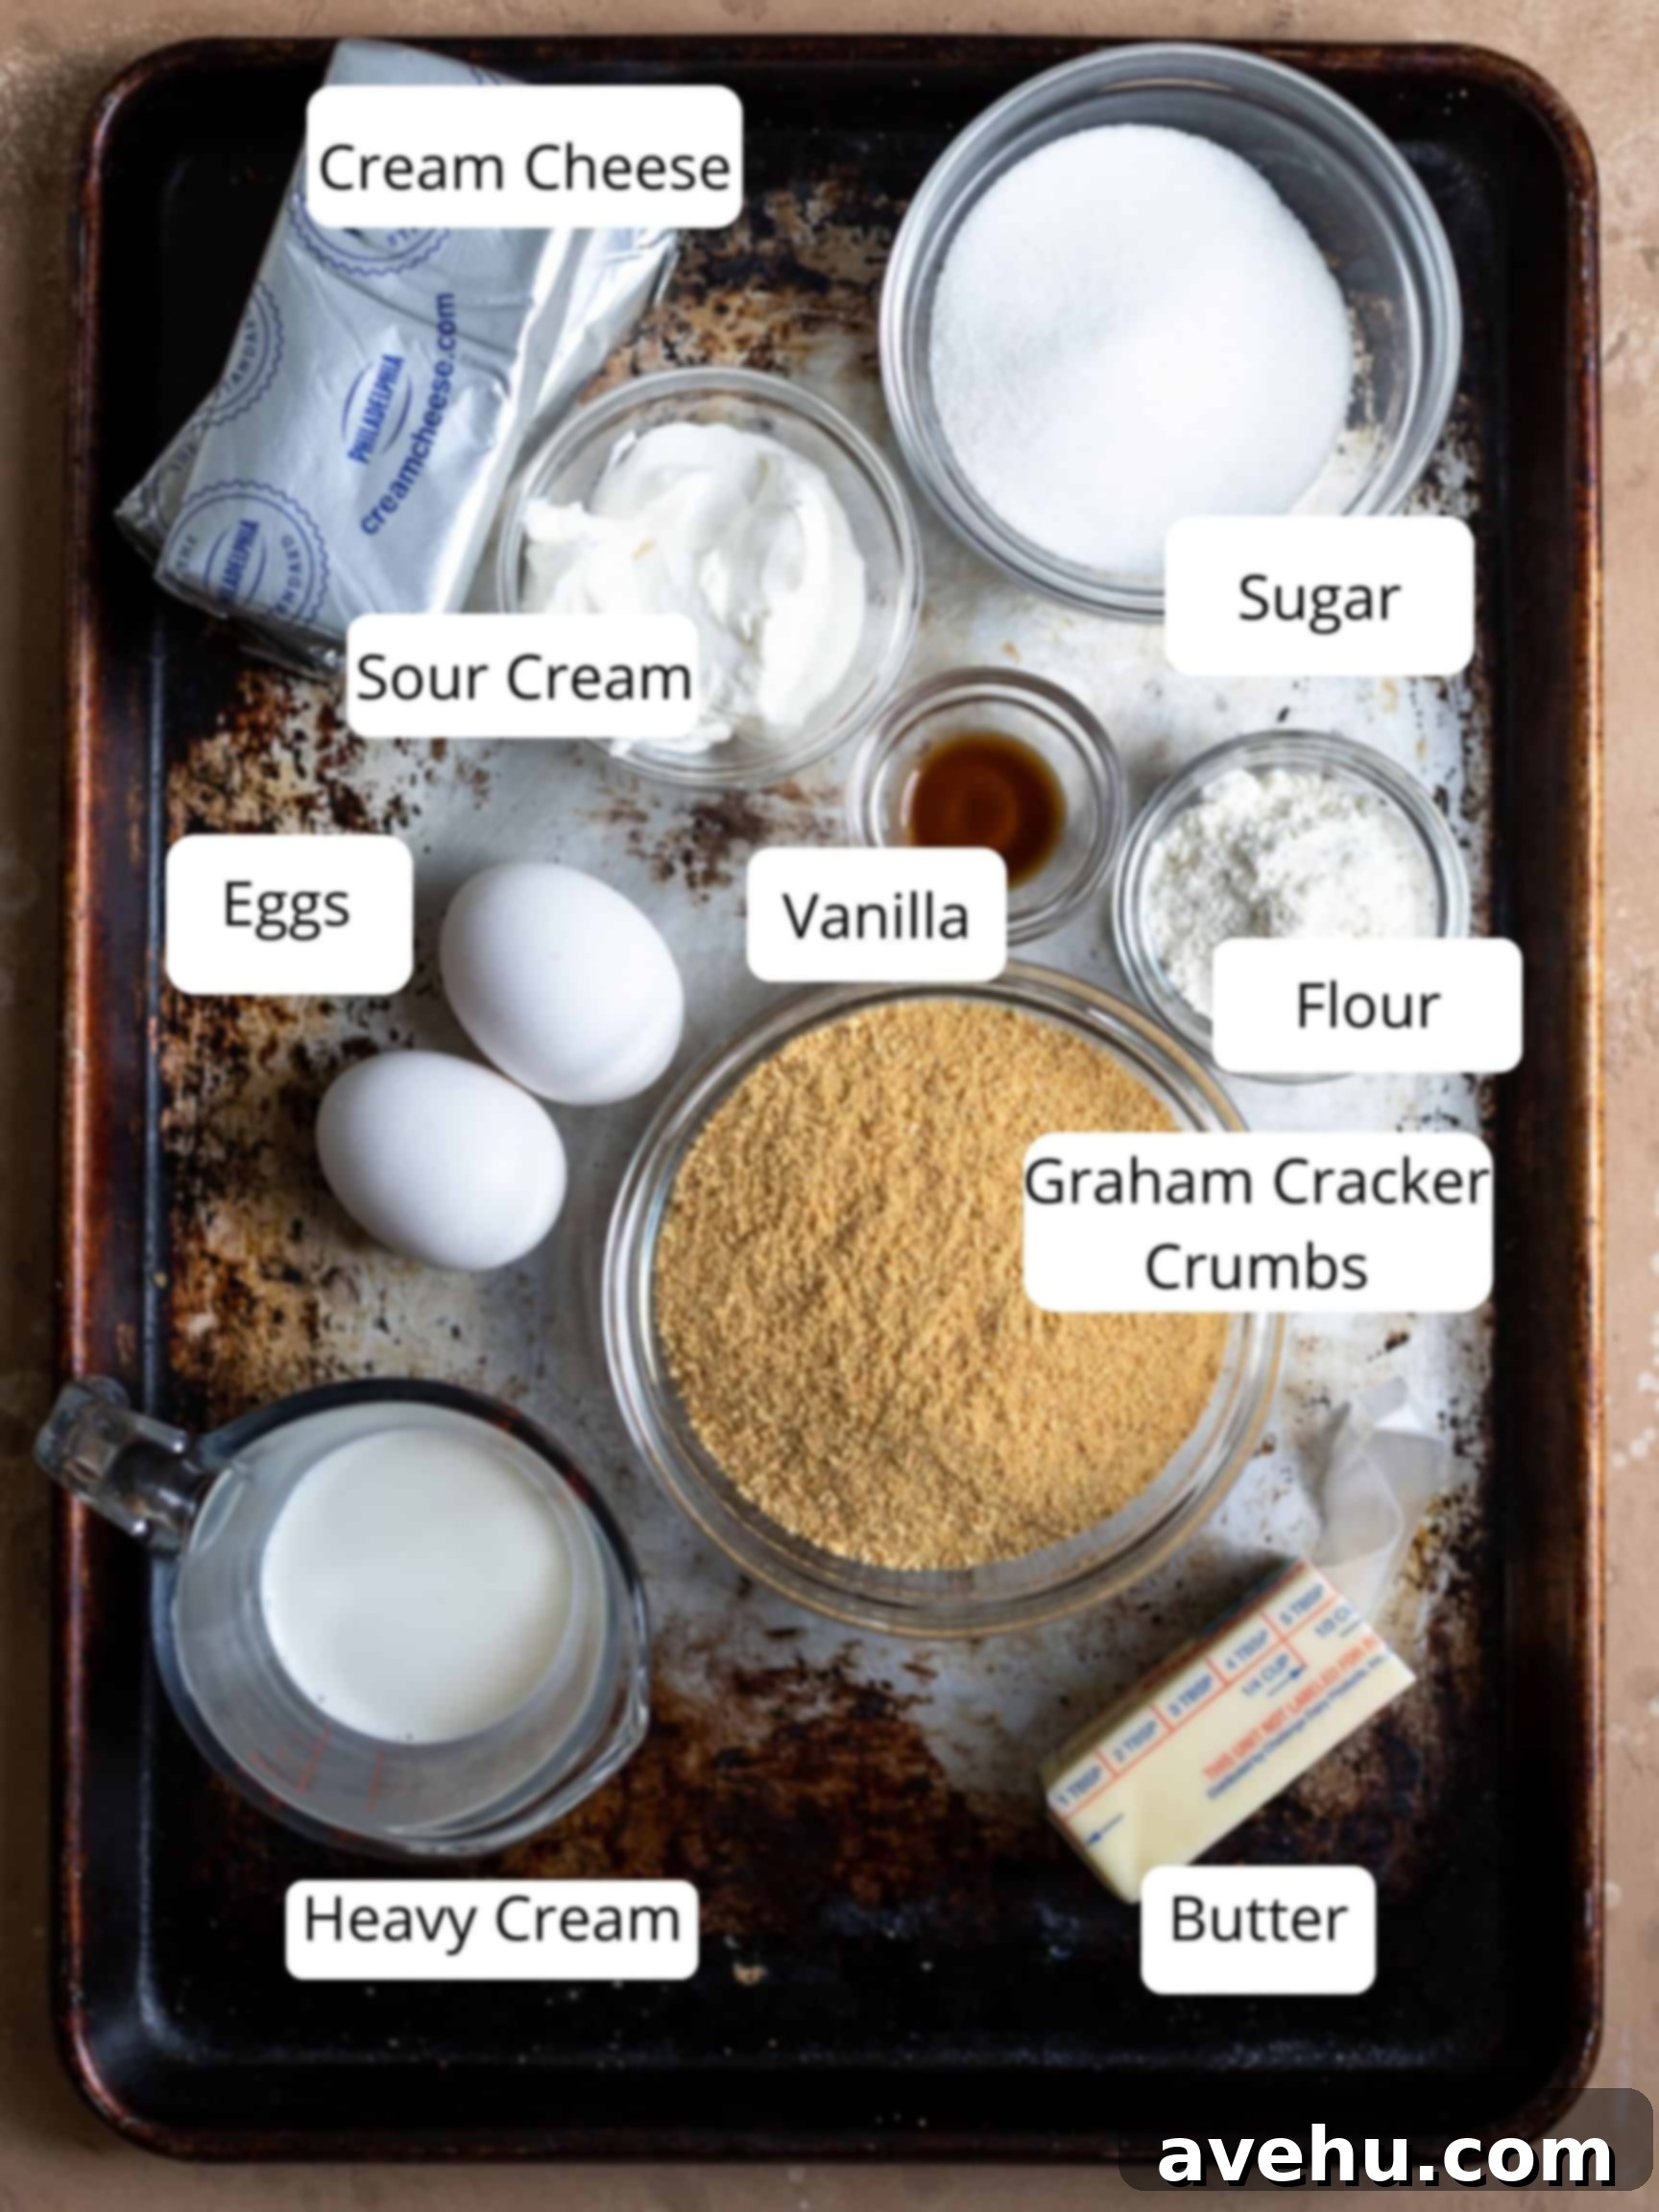
For the Creamy Cheesecake Batter
- Cream Cheese (8 oz block, full-fat): This is the undeniable star of our show, the foundational ingredient that gives cheesecake its signature rich, tangy, and incredibly smooth texture. Ensure it’s at true room temperature for optimal mixing and a lump-free batter. Full-fat cream cheese provides the best flavor and creamy consistency.
- Granulated Sugar (¼ cup): Essential for sweetening the cheesecake, sugar expertly balances the natural tanginess of the cream cheese and sour cream, creating that irresistible classic cheesecake flavor profile.
- Sour Cream (2.5 tbsp): Beyond simply thinning the thick cream cheese, sour cream introduces a delightful layer of tangy flavor that beautifully balances the sweetness and richness of the cheesecake, creating a more complex and well-rounded taste. It also contributes to the cheesecake’s moistness.
- All-Purpose Flour (1 ½ tbsp): A small amount of flour is crucial in this recipe as it acts as a binder and stabilizer. It helps to hold the cheesecake structure together during baking, preventing cracks, and ensuring a beautifully smooth, tender finish.
- Vanilla Extract (½ tsp): A classic flavor enhancer, vanilla extract wonderfully complements and elevates the rich flavors of both the creamy cheesecake filling and the crisp graham cracker crust. Opt for a good quality pure vanilla extract for the most authentic and aromatic taste.
- Large Egg (1): The egg is vital for binding all the ingredients together, providing essential structure and richness. It helps the cheesecake batter bake up into a beautifully cohesive and tender consistency, preventing it from being too crumbly or too runny.
- Heavy Cream (2 tbsp): This ingredient adds a luxurious, slightly sweet creaminess to the batter, contributing to the overall velvety texture and rich mouthfeel of the finished mini cheesecakes. It enhances the indulgence factor significantly.
For the Crisp Graham Cracker Crust
- Graham Cracker Crumbs (1 ½ cups, about 9 crackers): You’ll need approximately 9 full graham cracker sheets, finely crushed, to create the perfect buttery base for these mini delights. Feel free to choose between plain or cinnamon-flavored graham crackers, depending on the subtle flavor profile you wish to achieve.
- Melted Unsalted Butter (⅓ cup): This essential ingredient is what binds the graham cracker crumbs together, forming a sturdy and cohesive crust that won’t fall apart. It also infuses the crust with a rich, buttery flavor that perfectly complements the creamy cheesecake filling.
- Granulated Sugar (2 tbsp): A touch of white granulated sugar is incorporated into the crust layer to add an extra hint of sweetness, ensuring the base is just as delicious and balanced as the creamy filling above it.
Essential Equipment for Effortless Mini Cheesecakes
Having the right tools makes the baking process smoother and more enjoyable. Here’s a list of the equipment you’ll need:
- 2 Inch Mini Cupcake Tray (or Mini Muffin Pan): This specialized pan is crucial for achieving the perfect mini size for your cheesecakes. A pan with 48 cups is ideal for this recipe to handle the yield efficiently.
- Mini Cupcake Liners: These liners are indispensable for easy removal of the baked cheesecakes from the pan and help to maintain their delicate structure. They also come in a variety of fun colors and patterns, offering a fantastic way to add a personalized touch or thematic element to your party presentation!
- Hand Mixer or Stand Mixer: While not explicitly listed in the original, a mixer is implied in the instructions. It’s essential for achieving that smooth, lump-free cheesecake batter, efficiently combining the cream cheese and sugar.
- Medium Mixing Bowls: You’ll need at least two – one for preparing the crust mixture and another for the cheesecake batter.
- Measuring Cups and Spoons: For accurately measuring all your ingredients, ensuring precise proportions and consistent results.
- Tablespoon Measure: Specifically useful for portioning the crust mixture and the cheesecake batter evenly into each mini cupcake liner.
- Wire Rack: For cooling the cheesecakes completely after baking before they go into the refrigerator.
Step-by-Step Guide: How to Make These Irresistible Mini Cheesecake Bites
Follow these simple, clear instructions to create perfect, crowd-pleasing mini cheesecakes from scratch. Each step is designed to be straightforward, ensuring delicious results every time and making the baking process a joy.
- Prepare Your Pan: Begin by preheating your oven to 350°F (175°C). While the oven heats, carefully line a 48-cup mini cupcake pan with mini cupcake liners. This crucial step ensures easy removal of your delicate cheesecakes and makes for a clean, professional presentation.
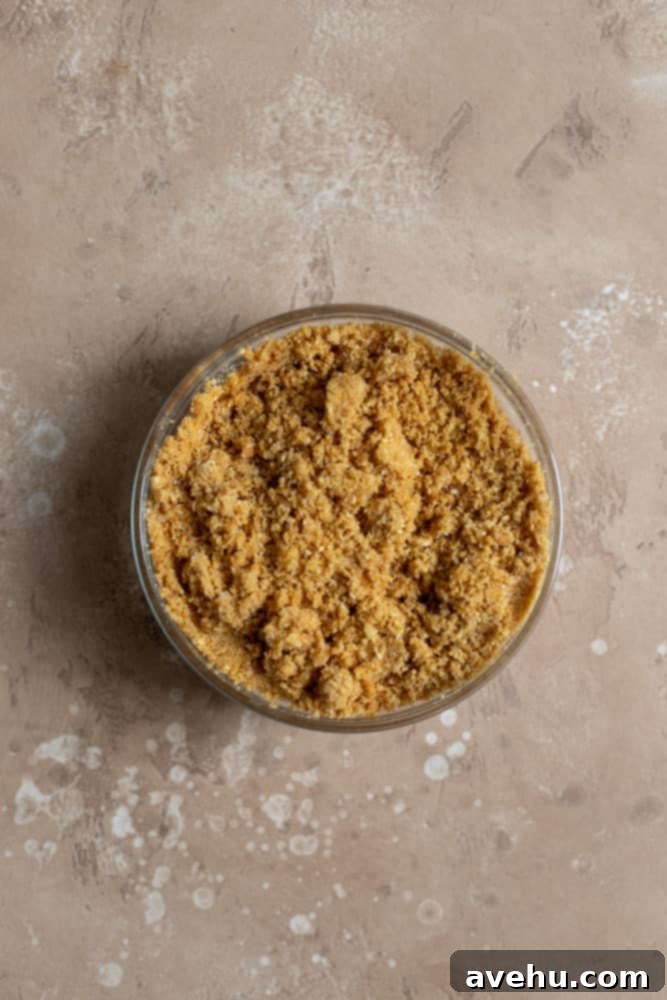
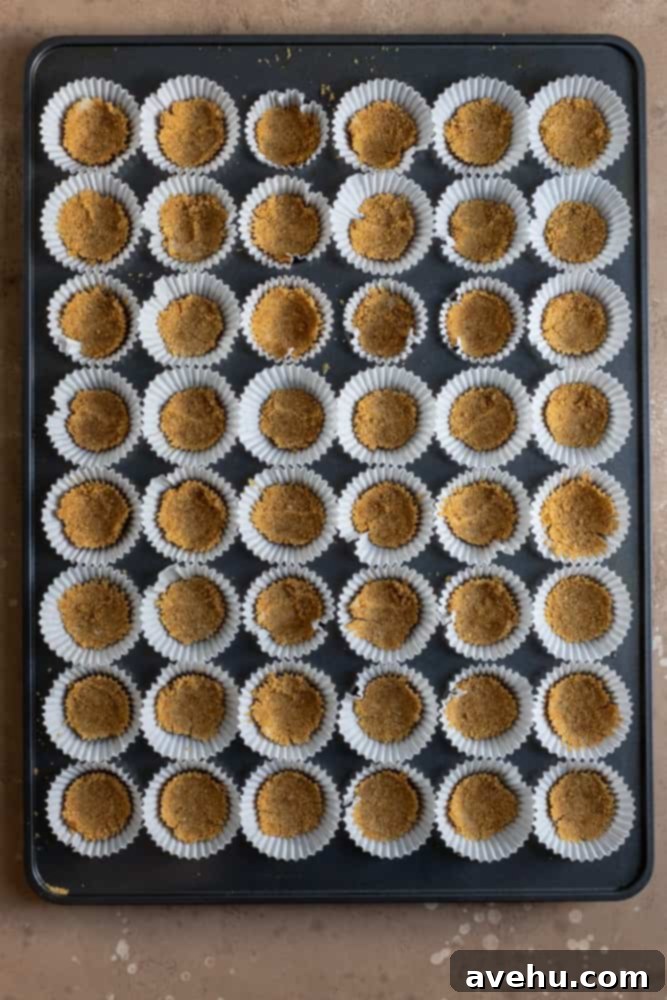
- Craft the Graham Cracker Crust: In a medium-sized mixing bowl, melt the unsalted butter. Add the graham cracker crumbs and granulated sugar to the melted butter. Mix these ingredients thoroughly using a fork or your fingers until the mixture takes on the consistency of wet sand – moist enough to hold its shape when pressed. Evenly press approximately 2 teaspoons of this mixture into the bottom of each prepared mini cupcake liner. Use the back of a spoon or a small tamper to compact it firmly. Bake these crusts in the preheated oven for just 5 minutes. This brief bake sets the crust, preventing it from becoming soggy or crumbling. Once baked, remove the pan from the oven and allow the crusts to cool completely on a wire rack. Reduce your oven temperature to 325°F (160°C) in preparation for the cheesecake filling.
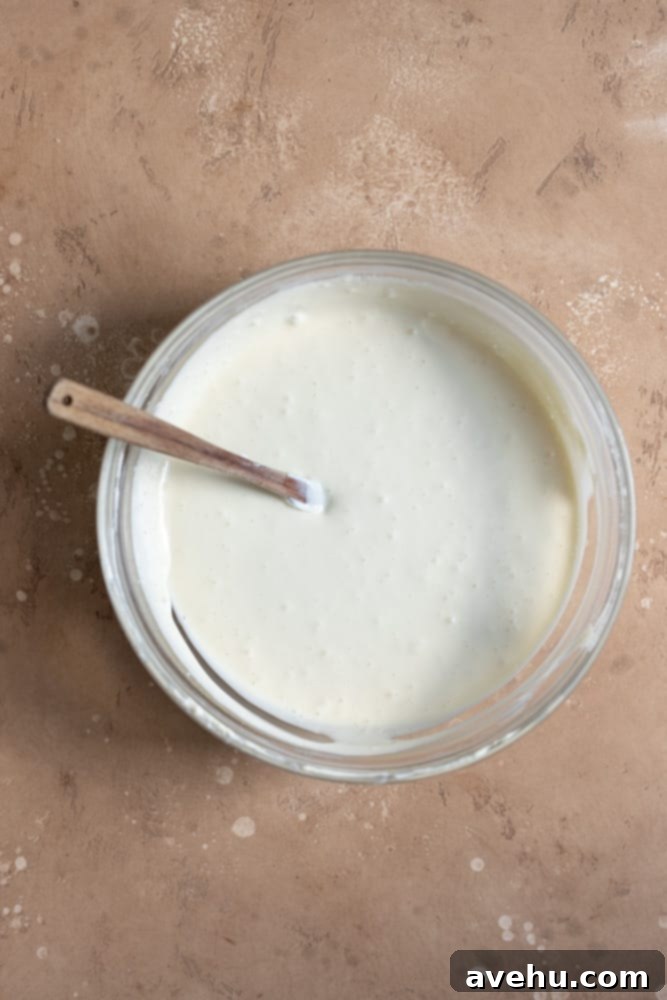
- Whip Up the Silky Cheesecake Batter: In a separate medium mixing bowl, combine the softened, room temperature cream cheese and granulated sugar. Using a hand mixer on low speed, beat the mixture until it becomes completely smooth, light, and free of any lumps, typically about 2 minutes. Avoid high speeds initially to prevent incorporating too much air. You can also achieve this by hand with a sturdy whisk and some elbow grease, or by using a stand mixer with the paddle attachment. Next, add the sour cream, all-purpose flour, and vanilla extract. Mix again on a low-medium speed until all these new additions are just combined, being careful not to overmix. Finally, incorporate the egg and heavy cream, mixing gently until all ingredients in the batter are fully and smoothly integrated. Stop mixing as soon as the batter is cohesive.
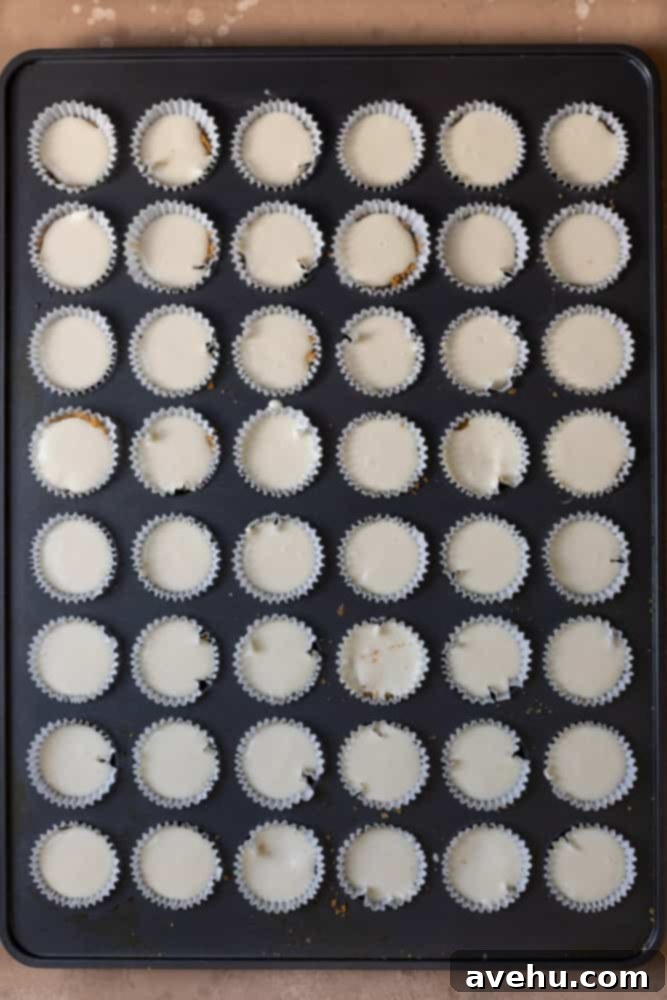
- Fill the Crusts Evenly: Once your luscious batter is ready, use a tablespoon measure to carefully pour the cheesecake batter into each mini cupcake liner, filling it evenly over the cooled graham cracker crust. The batter should fill the liner almost to the top, completely covering the crust. Even filling ensures consistent baking and uniform appearance.
- Bake to Perfection: Place the pan back into the oven, now set at 325°F (160°C). Bake the mini cheesecakes for 12 to 15 minutes. The edges should appear set and slightly firm, but the very centers may still have a slight jiggle when gently shaken. This is perfectly normal for cheesecakes and indicates they are cooked through but still moist. Avoid overbaking, as this can lead to a dry, cracked texture.
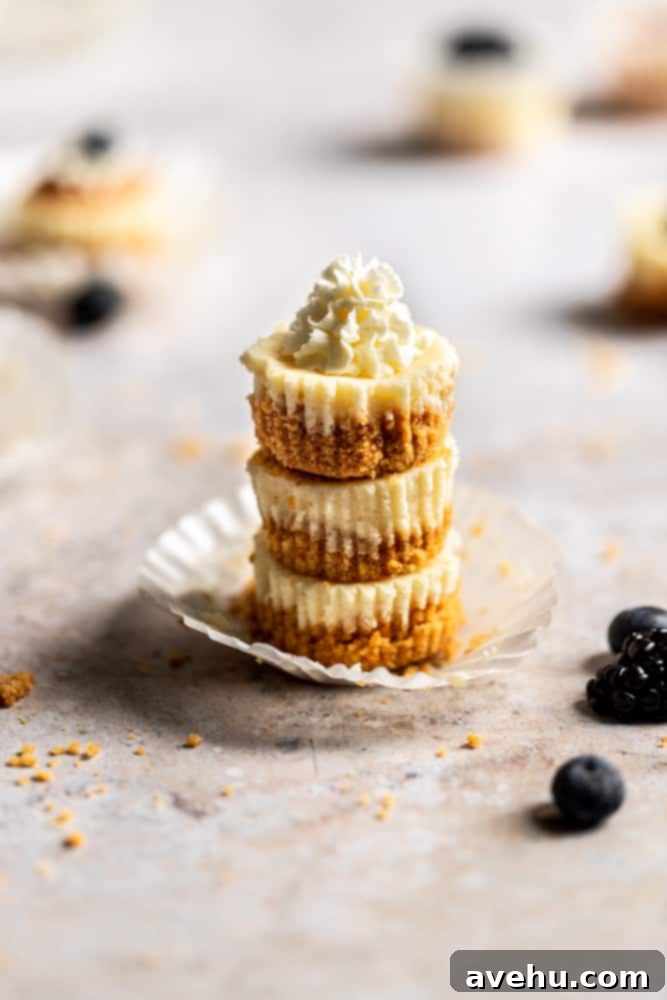
- Chill and Serve: After baking, promptly remove the mini cheesecakes from the oven and let them cool completely on a wire rack at room temperature. This gradual cooling helps prevent cracking. Once cooled, transfer them to the refrigerator and chill for a minimum of 2 hours, or ideally 4-6 hours (or even overnight). This chilling period is absolutely crucial for the cheesecakes to firm up, for their flavors to fully meld, and to achieve that signature creamy cheesecake texture. Serve them delightfully cold, garnished generously with fresh berries, a rich caramel drizzle, or any of your favorite toppings. Enjoy your perfectly crafted, bite-sized indulgences!
Delightful Variations to Personalize Your Mini Cheesecakes
One of the most exciting aspects of these mini cheesecakes is their incredible adaptability! They serve as a perfect blank canvas for a myriad of flavors and textures, allowing you to tailor them to any palate or occasion. Get creative with these inspiring variations to truly make them your own:
- Fresh Berry Burst: Adorn each cheesecake with a vibrant medley of fresh berries such as luscious strawberries, plump raspberries, sweet blueberries, or tart blackberries for a burst of natural sweetness, a hint of acidity, and a truly beautiful presentation.
- Decadent Caramel Drizzle: Elevate your mini cheesecakes with a generous drizzle of rich, buttery caramel sauce. For an extra layer of gourmet flavor, try our homemade bourbon caramel sauce. The sweet and slightly salty notes of caramel pair exquisitely with the creamy cheesecake.
- Warm Cinnamon Sugar Sprinkle: For a cozy and comforting twist, sprinkle a delicate dusting of cinnamon sugar over the tops of your cooled cheesecakes just before serving. This simple addition adds a lovely aromatic warmth and a touch of spiced sweetness.
- Zesty Lemon Brightness: Introduce a refreshing citrusy zing by adding 2-3 tablespoons of fresh lemon juice and the zest of one lemon directly into the cheesecake batter. This variation offers a lighter, brighter flavor profile, perfect for spring and summer gatherings.
- Cloud of Whipped Cream or Mascarpone Frosting: Top each mini cheesecake with a generous dollop of freshly made whipped cream for an airy and light finish, or for a richer, slightly tangy counterpoint, try our exquisite mascarpone frosting. Both options add an elegant touch.
- Oreo Cookie Crust Extravaganza: For the ultimate chocolate lovers, replace the traditional graham cracker crumbs with finely crushed Oreo cookies (including the cream filling) mixed with melted butter. This creates a rich, chocolatey base that’s truly irresistible and pairs wonderfully with the creamy filling.
- Mini Chocolate Cheesecake Indulgence: Transform these into rich chocolate mini cheesecakes by incorporating 2-3 tablespoons of unsweetened cocoa powder (sifted to avoid lumps) into the cheesecake batter. This yields a decadent chocolate flavor that’s sure to satisfy any chocoholic.
- Nutty Crunch: Add finely chopped nuts like pecans, walnuts, or almonds to your graham cracker crust mixture for an added layer of texture and nutty flavor. You can also sprinkle them on top of the finished cheesecakes for garnish.
- Tropical Flair: Mix finely shredded coconut into the batter or sprinkle toasted coconut flakes on top for an exotic, tropical twist. A small amount of passion fruit or mango curd as a topping would also be divine for a truly summery dessert.
- Coffee Lover’s Dream: Stir 1-2 teaspoons of instant espresso powder (dissolved in a tiny bit of hot water) into the cheesecake batter for a subtle coffee flavor that enhances the richness of the cheese.
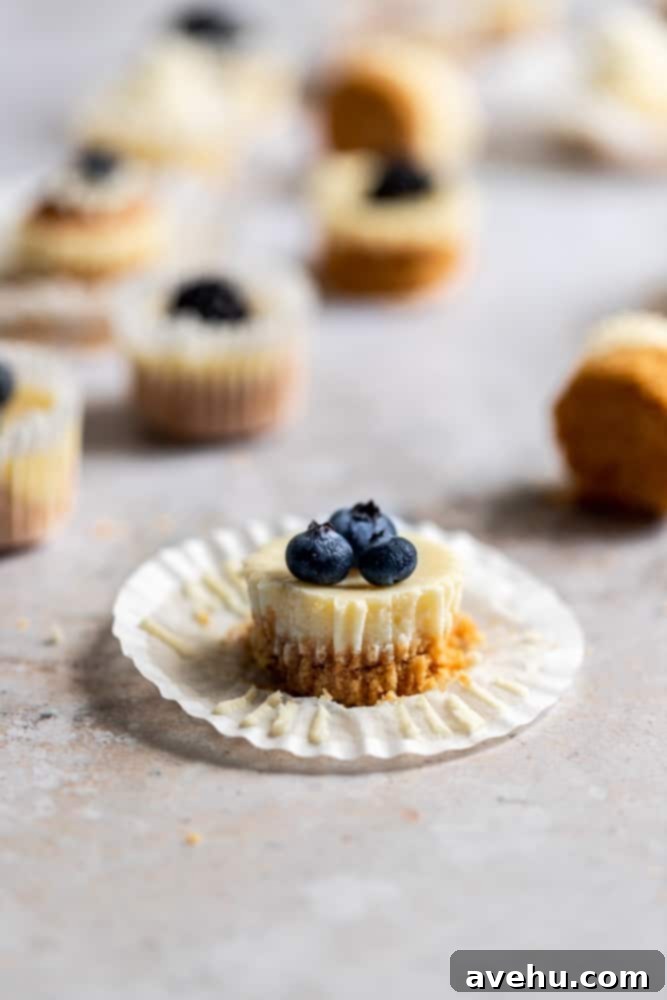
Expert Tips for Guaranteed Mini Cheesecake Success
Achieving perfectly baked, delightful mini cheesecakes is easy when you follow a few key best practices. These expert tips will help ensure your cheesecakes turn out beautifully smooth, firm, and utterly delicious every single time, minimizing common baking frustrations:
- Pre-Bake the Crust for Stability: It is absolutely essential to bake the graham cracker crusts for 5 minutes before adding the cheesecake batter. This crucial step prevents the crust from becoming soggy or falling apart when saturated with the wet filling. It also creates a barrier, ensuring the batter doesn’t seep underneath and compromise the crust’s integrity, resulting in a perfectly crisp and stable foundation for your mini cheesecakes.
- Cool the Crust Completely: Once the crusts are pre-baked, allow them to cool down entirely, preferably to room temperature, before you introduce the cheesecake filling. Pouring cold batter onto a warm crust can prematurely heat the batter, affecting the texture of both layers and potentially causing the crust to become soft and soggy. Patience here pays off!
- Room Temperature Cream Cheese is a Must: As highlighted earlier, starting with cream cheese that is at true room temperature is non-negotiable for a silky-smooth batter. Cold cream cheese will inevitably lead to stubborn lumps and an uneven texture, no matter how much you mix. Make sure it’s soft enough to yield easily when pressed, allowing it to incorporate smoothly with the sugar and other ingredients.
- Utilize Mini Cupcake Liners: Given the inherently soft, creamy, and delicate nature of cheesecake, especially in its mini form, I strongly recommend using mini cupcake liners. They provide essential structural support, making it incredibly easy to remove the cheesecakes from the pan and handle them without damage. They also make serving hygienic and mess-free for your guests.
- Avoid Overmixing the Batter: While you want a smooth, lump-free batter, overmixing cheesecake batter can incorporate too much air. This excess air can cause the cheesecakes to puff up excessively in the oven and then tragically fall, crack, or deflate significantly as they cool. Mix only until the ingredients are just combined and smooth.
- Don’t Overbake: Mini cheesecakes bake quickly due to their small size. Watch them closely towards the end of the baking time. They are done when the edges appear set and slightly firm, but the very center still has a slight, subtle jiggle when the pan is gently nudged. They will continue to set and firm up as they cool and chill. Overbaking will result in a dry, dense, and potentially cracked cheesecake.
- For Regular-Sized Cheesecakes: If you prefer to make this recipe in a standard cupcake size (yielding fewer but larger individual cheesecakes), simply divide the crust mixture and cheesecake batter evenly into a regular 12-cup muffin pan lined with standard cupcake liners. Adjust the baking time to approximately 22-25 minutes, or until the centers are just set with a slight jiggle.
- Chill Thoroughly: The chilling step is just as important as the baking. Allow the cheesecakes to cool completely at room temperature, then chill them in the refrigerator for at least 2 hours, or ideally 4-6 hours or overnight. This allows them to firm up fully, develop their flavors, and achieve that perfect creamy texture.
Storing & Freezing Your Mini Cheesecake Creations
Proper storage is key to maintaining the freshness and deliciousness of your mini cheesecakes, ensuring they taste as good as the day they were baked. Here’s how to keep them at their absolute best:
- Storing in the Refrigerator: These delightful mini cheesecakes can be stored in an airtight container in your refrigerator for up to 5 days. For optimal freshness and to prevent them from absorbing other food odors present in the fridge, ensure they are fully cooled to room temperature before placing them in the container. Layering them with parchment paper can help prevent sticking if stacking.
- Freezing Recommendations: Due to the soft, creamy, and delicate structure of these baked mini cheesecakes, they unfortunately do not hold up well to freezing. The freezing and subsequent thawing process can significantly alter their texture, often leading to a crumbly, grainy, or watery consistency, which detracts from their luxurious creaminess. Therefore, freezing these mini cheesecakes is not recommended if you wish to preserve their original, high-quality texture and taste. It’s best to enjoy them fresh or within the recommended refrigerated storage period.
More Decadent Cheesecake Recipes You’ll Absolutely Adore
If you’ve enjoyed making and tasting these delectable mini cheesecakes and are eager to explore more rich, creamy, and utterly satisfying cheesecake creations, you’re in for a treat! Our culinary collection features a variety of unique and classic cheesecake recipes, each designed to impress with its distinct flavors and textures. Whether you’re a seasoned baker or just starting, you’ll find something new to love. Here are a few other favorites from my kitchen that you’ll undoubtedly enjoy:
- Cherry Cheesecake With Chocolate: A luxurious combination of sweet, tart cherries and rich, decadent chocolate, creating a dessert that’s both elegant in appearance and deeply satisfying to the palate.
- Cheesecake Bars with Cranberry Swirl: Perfect for holidays or any time you crave a festive and flavorful treat, these convenient bars feature a vibrant and tangy cranberry swirl cutting beautifully through the creamy cheesecake filling.
- Red Velvet Cheesecake Cupcakes: Experience all the beloved, iconic flavors of moist red velvet cake combined with the creamy, rich decadence of cheesecake, all conveniently presented in charming cupcake form.
- 5 Tips To Make The Perfect Cheesecake: This invaluable and comprehensive guide offers essential techniques and insider secrets for mastering full-sized cheesecakes, including a revolutionary water bath hack that I highly recommend checking out for flawlessly smooth, crack-free results every time you bake a whole cheesecake.

Baked Mini Cheesecake Bites (Yields 48)
20 minutes
15 minutes
35 minutes
48
Mini Cheesecakes
Pin
Review
Save
Saved!
Prevent your screen from going dark
Ingredients
Graham Cracker Crust
-
1 ½
cups
Graham Cracker Crumbs,
about 9 crackers -
⅓
cup
unsalted butter,
melted -
2
tbsp
granulated Sugar
Cheesecake Batter
-
8
oz
Cream Cheese -
¼
cup
Sugar -
2.5
tbsp
Sour Cream -
1 ½
tbsp
Flour -
½
tsp
Vanilla Extract -
1
Egg -
2
tbsp
Heavy Cream
Equipment
-
2 inch Mini Cupcake Trays -
2 inch Mini Cupcake Liners -
Hand Mixer or Stand Mixer -
Medium Mixing Bowls -
Measuring Cups and Spoons
Instructions
-
Preheat the oven to 350°F (175°C) and line a 48-cup mini cupcake pan with mini cupcake liners.
-
To make the crust, melt the butter, and add the graham cracker crumbs and sugar. Mix until it resembles wet sand. Press about 2 tsp of the mixture into each liner. Bake for 5 minutes. Take the prepared crusts out of the oven to cool completely and lower the oven temp to 325°F (160°C).
-
In a medium sized bowl combine the room temperature cream cheese and sugar and mix on low speed using a hand mixer until smooth, about 2 minutes. You can make this by hand or in a stand mixer too. Add in the sour cream, flour, and vanilla extract and mix again on low-medium speed until just combined. Add in the egg and heavy cream and mix gently until all ingredients in the batter are fully combined and smooth. Avoid overmixing to prevent excess air.
-
Using a tablespoon measure, carefully pour the cheesecake batter into each mold evenly, ensuring the batter completely covers the graham cracker crust and fills the liner almost to the top.
-
Bake at 325°F (160°C) for 12-15 minutes, or until the edges are set and the center has a slight jiggle. Do not overbake.
-
Remove from oven, let cool completely on a wire rack at room temperature. Then, chill in the refrigerator for at least 2 hours (ideally 4-6 hours or overnight) before serving with fresh berries or your favorite toppings!
Notes
Don’t forget the golden rule for perfect cheesecake: always use room temperature cream cheese for a smooth, lump-free batter. If you’re short on time, learn how to soften cream cheese quickly with our helpful guide!
For an extra rich crust, try substituting a portion of the graham cracker crumbs with finely crushed shortbread cookies or digestive biscuits.
Serving:
2
pieces
,
Calories:
47
kcal
,
Carbohydrates:
4
g
,
Protein:
1
g
,
Fat:
3
g
,
Saturated Fat:
2
g
,
Trans Fat:
1
g
,
Cholesterol:
12
mg
,
Sodium:
35
mg
,
Potassium:
15
mg
,
Fiber:
1
g
,
Sugar:
2
g
,
Vitamin A:
110
IU
,
Vitamin C:
1
mg
,
Calcium:
9
mg
,
Iron:
1
mg
Cakes, cheesecake, Dessert
Sam Adler
American
Did you make this recipe?
Please leave a star rating and review in the form below. I read them all!
