Irresistibly Smooth & Easy Homemade Salted Caramel Cheesecake Recipe
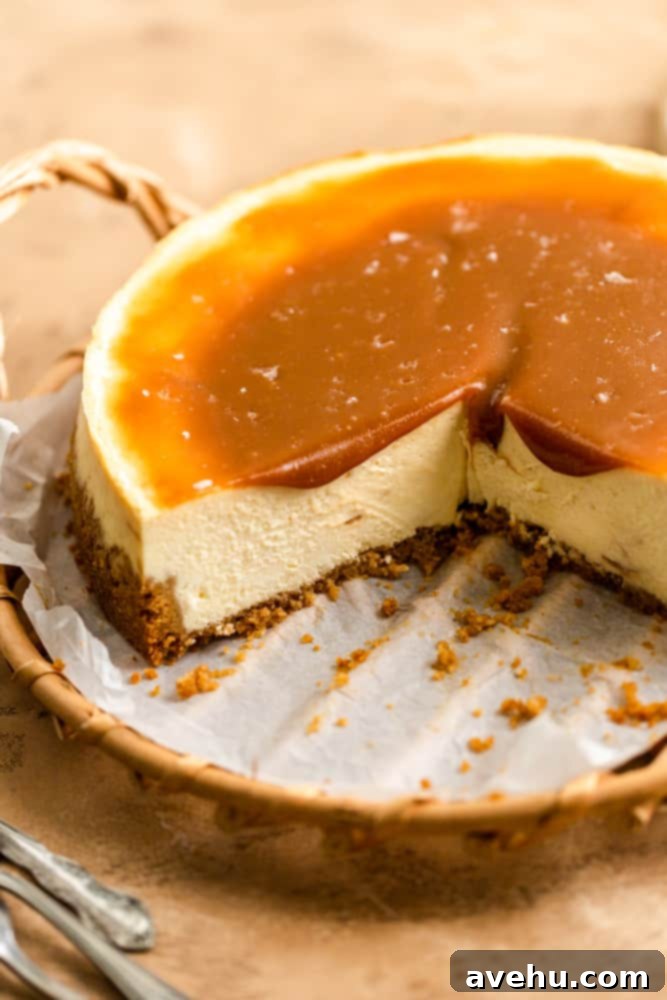
Prepare to indulge in a truly spectacular dessert: this incredible salted caramel cheesecake. Featuring a luxurious golden caramel sauce baked directly into its creamy core and then generously drizzled on top, it creates a silky smooth, rich experience that will captivate every palate. This recipe simplifies the art of cheesecake making, allowing you to use either homemade or store-bought caramel, making it perfect for impressing guests at a party or simply savoring a decadent treat right at home. Get ready to discover your new favorite dessert!
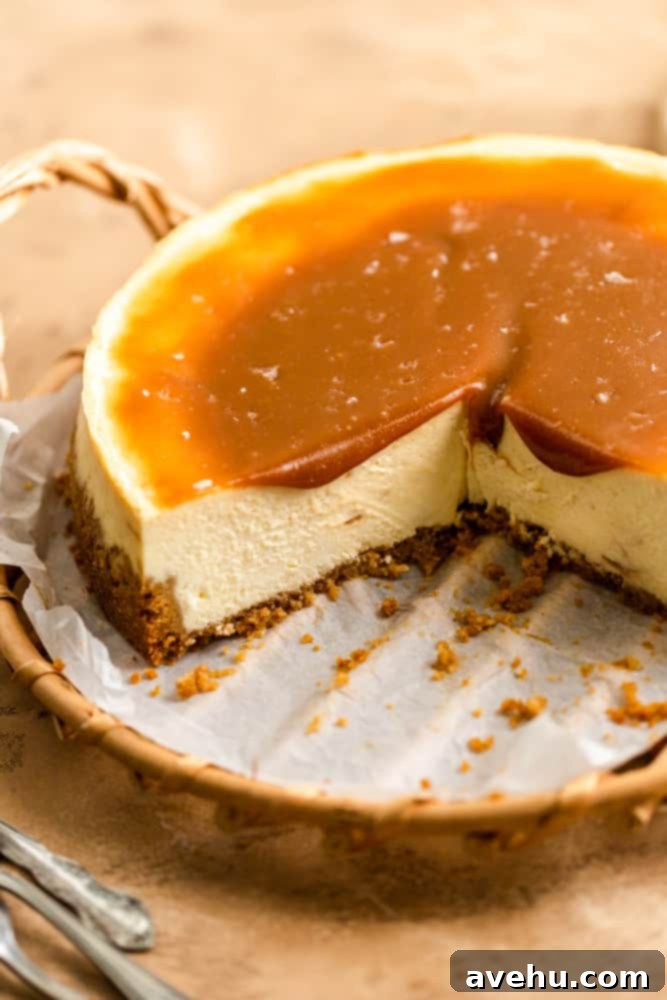
There is genuinely nothing quite as satisfying and delicious as a homemade cheesecake! As a trained pastry chef, I can confidently tell you that making a cheesecake from scratch is far easier than you might imagine. Forget the intimidation; with a few simple techniques and this foundational recipe, you’ll be creating stunning, customized cheesecakes with your favorite flavors in no time. This classic base recipe is an essential tool for any home baker looking to elevate their dessert game, and it’s particularly perfect for showcasing the incredible flavor of caramel.
The journey to a perfect caramel cheesecake begins with a simple, buttery graham cracker crust. This golden base is pressed firmly into a springform pan and pre-baked to achieve that ideal crunch and flavor. Following this, you’ll whip together the rich and velvety cheesecake batter, incorporating that luscious caramel sauce directly into the mix. This exquisite batter is then poured over the prepared crust and baked until it reaches that perfect, gently jiggly stage. The final touch, once chilled, is another generous drizzle of golden caramel sauce, creating a truly unforgettable dessert that looks as good as it tastes. You can opt for high-quality store-bought caramel or take it up a notch with a homemade bourbon caramel sauce – either way, pure bliss awaits!
Hot Tip for Silky Smooth Cheesecake: Always remember to use softened cream cheese for this and virtually any cheesecake recipe. This crucial step ensures that your batter creams beautifully, mixes smoothly, and results in a lump-free, impeccably smooth cheesecake texture. If you happen to forget to leave your cream cheese out to soften ahead of time, don’t worry! You can quickly learn how to soften cream cheese quickly to keep your baking plans on track.
Beyond this sensational caramel creation, I absolutely adore experimenting with diverse cheesecake recipes. My website features a delightful array of options, such as the vibrant Red Velvet Cheesecake, or the invigorating Coffee Cheesecake, perfect for coffee lovers. For those looking for smaller, bite-sized treats, these Mini Cheesecake Bites are always a hit. And if you find yourself in the glorious apple season, my Apple Pie Cheesecake offers a comforting and delicious twist that truly captures the essence of autumn.
Why You’ll Fall in Love with This Caramel Cheesecake
This salted caramel cheesecake isn’t just a dessert; it’s an experience, and you’ll quickly understand why it becomes a recurring favorite. Firstly, the base cheesecake recipe is remarkably straightforward to master, even for novice bakers. What truly sets this recipe apart, however, is the ingenious integration of sweet and savory caramel flavor. We’re talking about a double dose of caramel goodness here: a generous portion of luscious caramel sauce is folded directly into the cheesecake batter, infusing every bite with its rich, buttery notes. Then, to elevate the indulgence, more silky caramel is drizzled lavishly over the top once the cheesecake is perfectly chilled. This dual application ensures an intense, unforgettable caramel profile that delights the senses. The result is a cheesecake that boasts an incredibly smooth, melt-in-your-mouth texture complemented by the irresistible depth of caramel, making it a showstopper for any occasion.
Essential Ingredients & Equipment for Your Caramel Cheesecake
For the Flavorful Graham Cracker Crust:
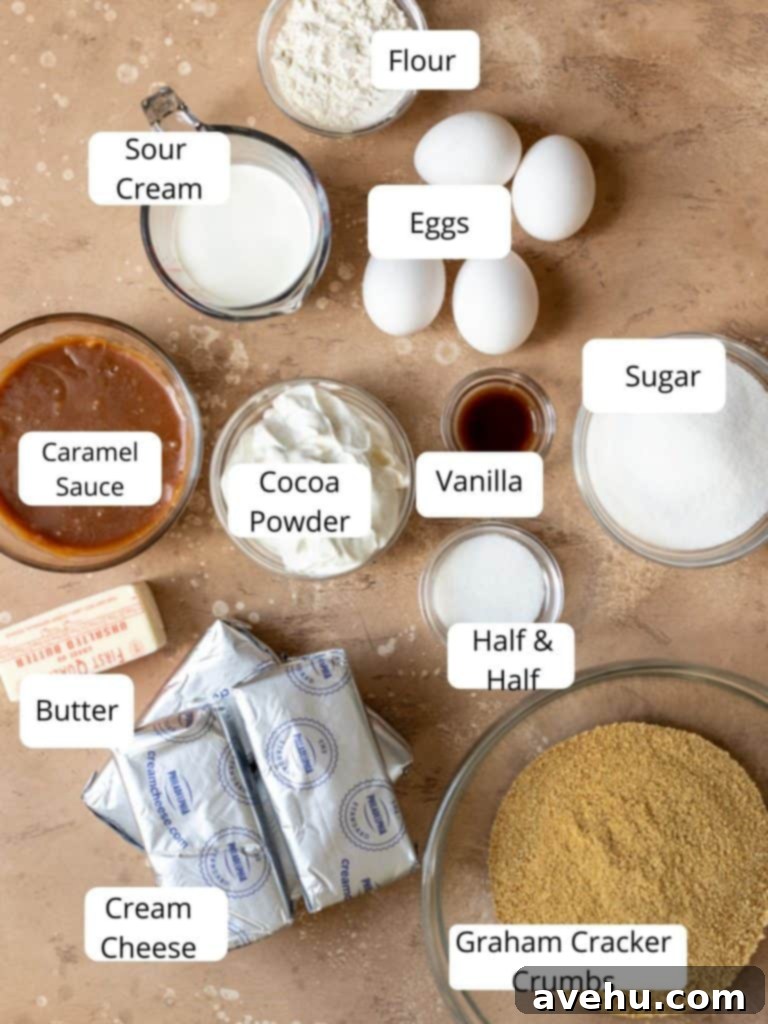
- Graham Crackers: Approximately 9 full sheets, finely crushed, will give you about 1 ½ cups of crumbs. The subtle sweetness and wholesome texture of graham crackers provide the perfect complementary foundation for the rich, tangy cheesecake filling and sweet caramel.
- Unsalted Butter: Melted butter acts as the binding agent, moistening the graham cracker crumbs and allowing them to compact into a sturdy, flavorful crust. It also imparts a delicious, rich buttery flavor.
- Granulated Sugar: A small amount of sugar enhances the sweetness of the crust and further aids in binding the crumbs together when baked, ensuring a cohesive and delightful base.
For the Luxuriously Creamy Cheesecake Filling:
- Full-Fat Cream Cheese: This is the cornerstone of your cheesecake, providing its characteristic dense, rich, and tangy texture. Ensure it’s at room temperature for the smoothest batter.
- Granulated Sugar: Essential for sweetening the creamy filling, balancing the tanginess of the cream cheese and sour cream.
- Sour Cream: A secret weapon for cheesecake! Sour cream contributes to the filling’s incredibly smooth consistency, adds a subtle tangy depth, and helps prevent the cheesecake from becoming too dense.
- Large Eggs: Eggs are critical for binding the cheesecake ingredients together during baking, giving it structure and a beautifully set texture. They also contribute to the overall richness.
- Half & Half: This adds an extra layer of decadence, contributing to the filling’s luxurious creaminess and rich flavor profile.
- Pure Vanilla Extract: A touch of vanilla extract provides a warm, aromatic note that perfectly complements and enhances the classic cheesecake flavor and pairs beautifully with caramel.
- All-Purpose Flour: A small amount of flour gives the cheesecake a slightly denser, more stable texture and plays a vital role in preventing cracks on the surface during baking and cooling.
- Golden Caramel Sauce: The star of the show! This is what infuses the cheesecake with its signature sweet, buttery, and slightly salty (if using salted caramel) flavor. We’ll use it both in the batter and as a lavish topping.
Indispensable Equipment for Success:
9-inch Springform Pan: This specialized two-piece baking pan is absolutely essential for cheesecakes. Its removable sides allow for effortless release of the delicate baked cheesecake, ensuring it remains perfectly intact and beautifully presented. It’s an indispensable tool for any serious home baker, and my go-to for all my cheesecake creations!
How To Master This Decadent Caramel Cheesecake
Building the Perfect Crust:
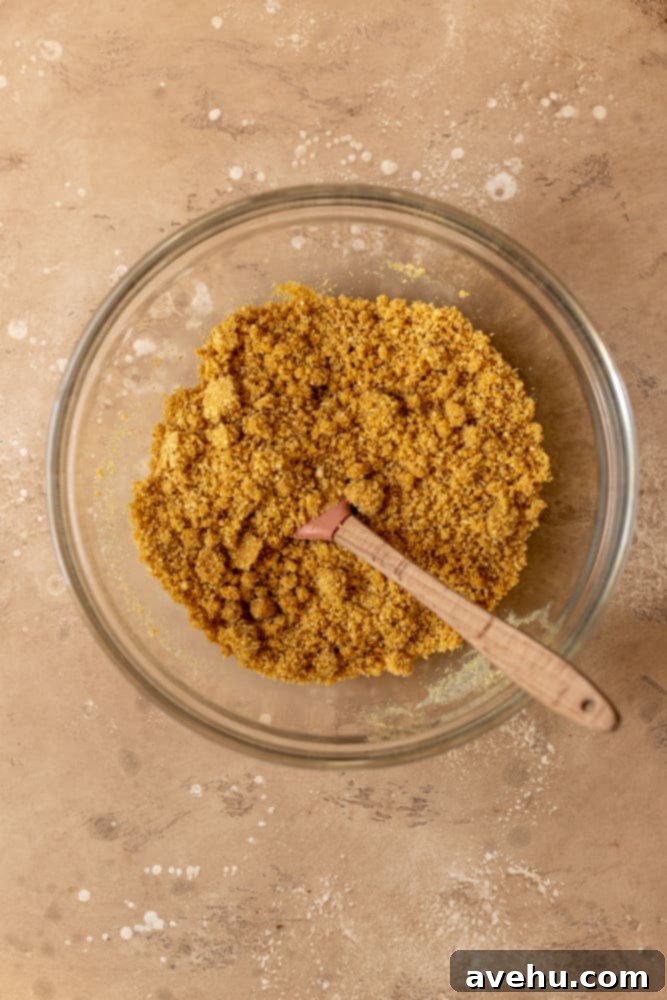
- Begin by preheating your oven to 375° F (190° C). In a medium-sized mixing bowl, combine the 1 ½ cups of finely crushed graham cracker crumbs with 2 tablespoons of granulated sugar. Pour in 1/3 cup of melted unsalted butter and stir thoroughly until all ingredients are well combined and the mixture has the consistency of moist sand.
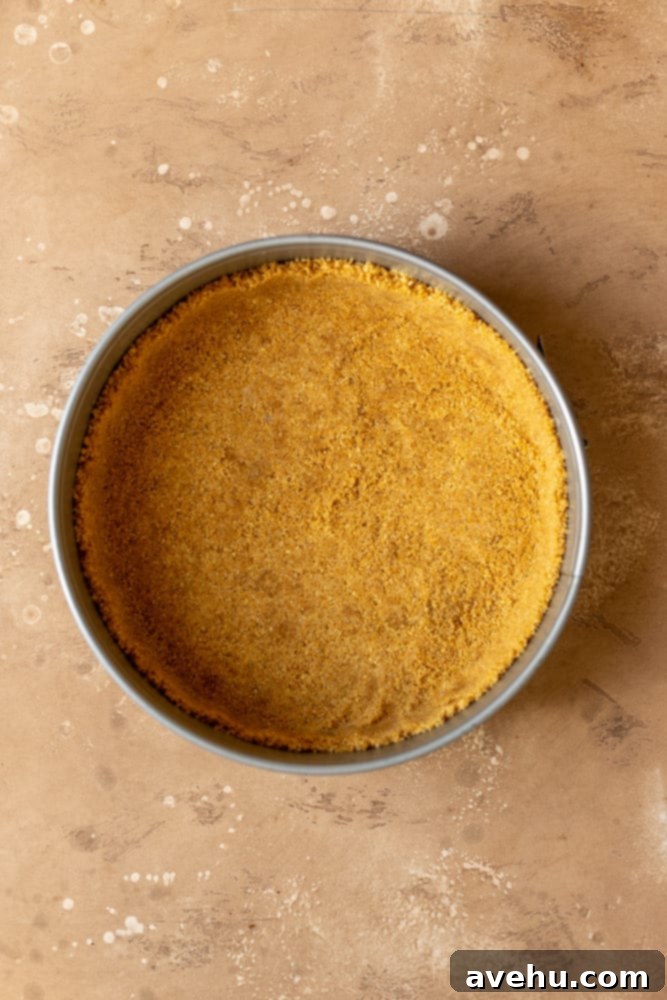
- Lightly spray the interior of your 9-inch springform pan with baking spray. Carefully press the graham cracker mixture evenly into the bottom and slightly up the sides of the pan. For a perfectly uniform and firm crust, use the bottom of a flat measuring cup or a glass to press the crumbs down hard and consistently.
- Bake the crust for 8-10 minutes, or until it becomes fragrant and achieves a beautiful golden-brown color around the edges. This pre-baking step is crucial for a crisp crust that won’t get soggy.
- Once the crust is pre-baked, remove it from the oven and immediately lower the oven temperature to 350° F (175° C).
Crafting the Silky Cheesecake Filling:
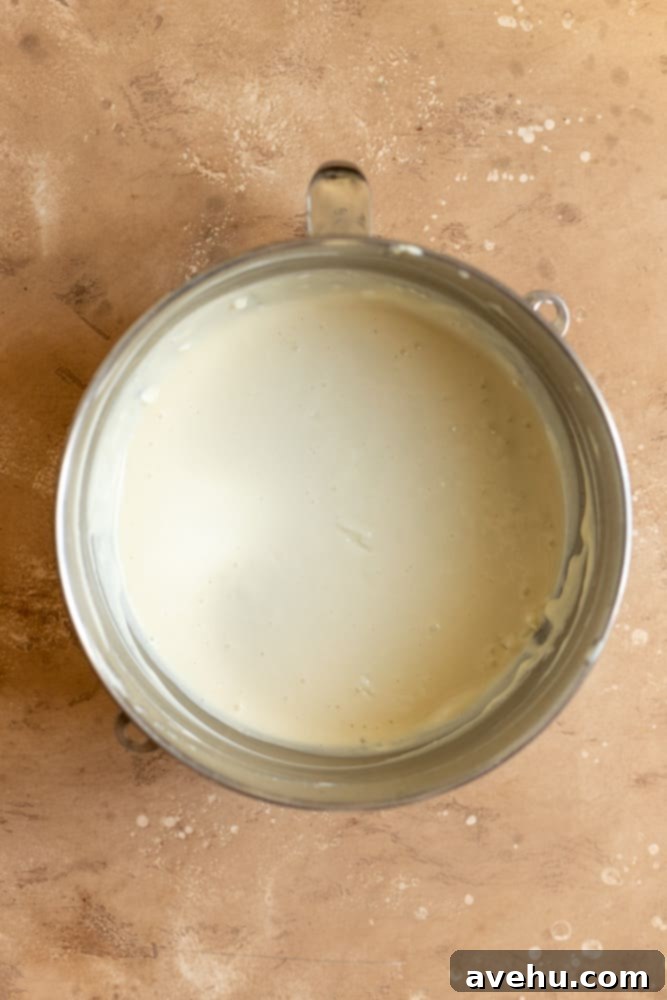
- In the bowl of a stand mixer, fitted with the paddle attachment, add the four 8-ounce blocks of room-temperature cream cheese. Mix on low-medium speed for about 1 minute until it’s smooth and creamy. Then, gradually add in the 1 cup of granulated sugar and 1 cup of room-temperature sour cream, mixing until just combined.
- Continue mixing on low speed, adding the large eggs one at a time, allowing a few seconds of mixing in between each addition. Be careful not to overmix the eggs. Stop the mixer frequently to scrape down the sides and bottom of the bowl with a rubber spatula, ensuring all ingredients are fully incorporated.
- Resume mixing on low speed, then pour in the ½ cup of half & half and 2 teaspoons of vanilla extract. Mix for about 30 seconds until just combined.
- Slowly add the ⅓ cup of all-purpose flour, mixing on low speed initially. Once incorporated, increase the speed to medium and mix for another 2-3 minutes, ensuring a smooth, uniform batter. Again, scrape down the bowl as needed.
- Once your velvety batter is ready, scrape down the sides and bottom of the bowl one last time to ensure everything is perfectly blended. Pour the entire cheesecake batter evenly into the prepared graham cracker crust in the springform pan.
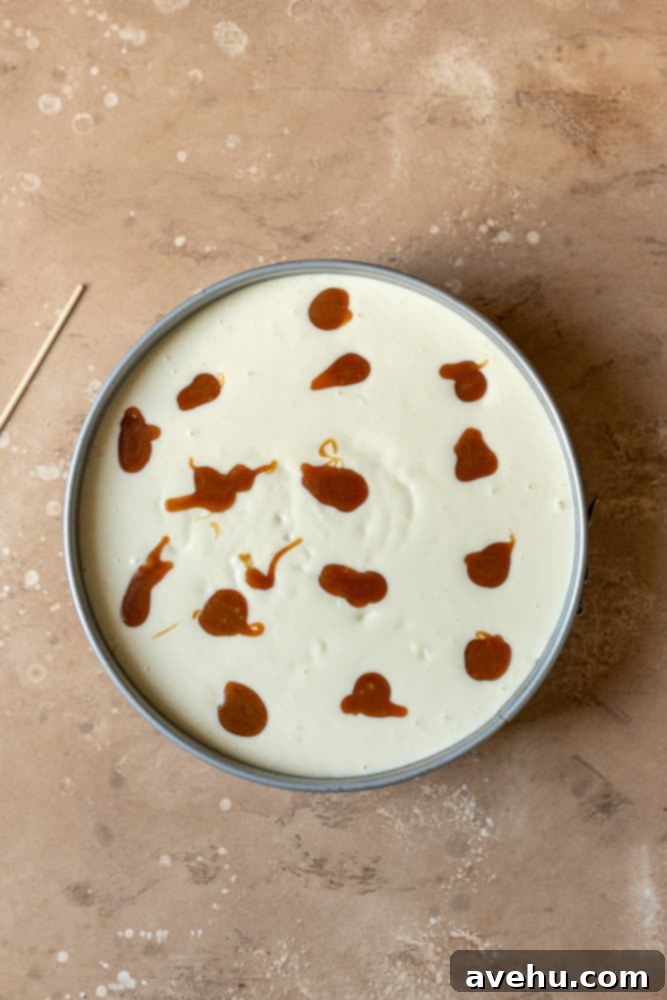
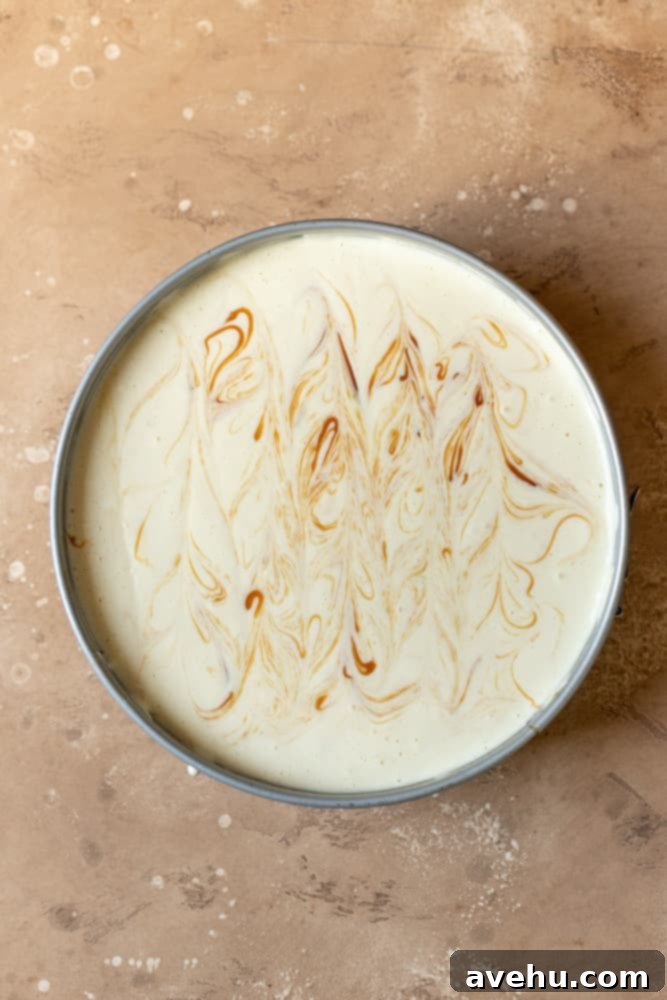
- Take ¼ cup of your chosen caramel sauce (homemade or store-bought) and dollop spoonfuls all over the surface of the cheesecake batter. Using a knife or a skewer, gently swirl the caramel through the batter to create beautiful marbling. Be careful not to overmix the swirl.
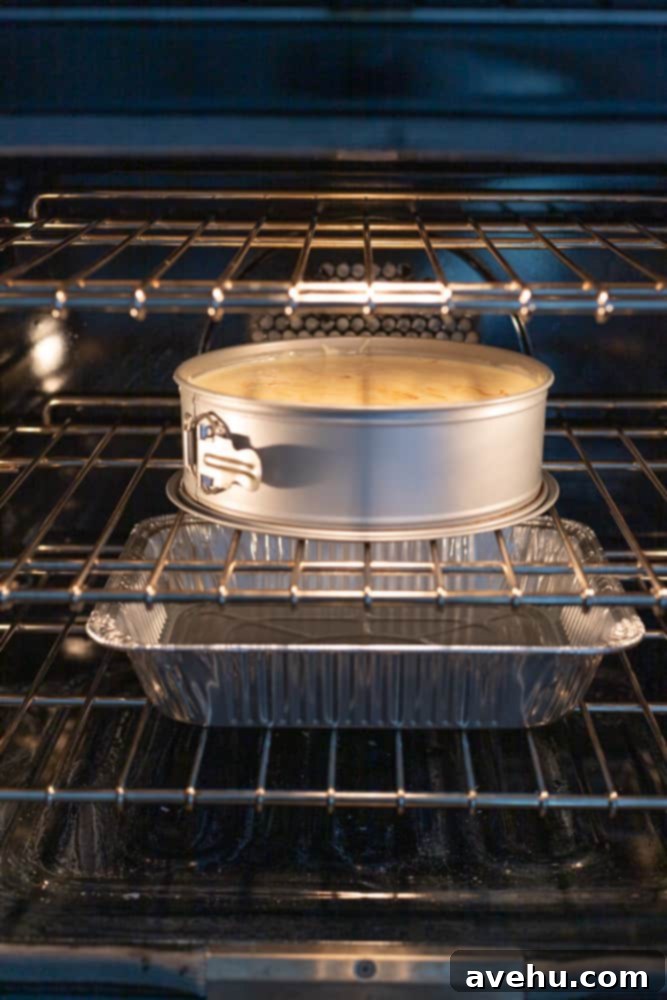
- Now, prepare your water bath for the oven. Place a large sheet tray or a 9×13 inch baking pan on the lower rack of your preheated oven (now at 350° F). Carefully fill this pan with about an inch of hot water. This will create a steamy environment essential for a smooth, crack-free cheesecake.
- Carefully place your springform pan containing the cheesecake on the upper rack of the oven, above the water bath. Bake for approximately 45-55 minutes. The cheesecake is ready when the edges appear set and slightly puffed, but the very center will still have a slight “jiggle” when gently shaken – this is exactly what you want!
- Once baked, turn off the oven but leave the cheesecake inside with the oven door propped open slightly (a wooden spoon works well). Let it cool gradually in the cooling oven for one full hour. This slow cooling prevents drastic temperature changes that can lead to cracks. After one hour, remove it from the oven and let it finish cooling completely on a wire rack at room temperature.
- Finally, and most importantly, chill the cheesecake in the refrigerator for at least 4 hours, or ideally, overnight. This chilling period is crucial for the cheesecake to fully set and achieve its perfect texture. Once thoroughly chilled, pour the remaining ½ cup of caramel sauce generously over the top before slicing and serving. Enjoy every blissful bite!
Expert Tips for Making the Perfect Crack-Free Cheesecake Every Time
- Achieving Room Temperature Ingredients: This is arguably the most crucial step for a smooth, lump-free cheesecake. Ensure your cream cheese, eggs, and sour cream are all at room temperature. Cold ingredients will lead to a lumpy batter and overmixing.
- Don’t Overmix the Batter: Once you add the eggs, mix them in gently, one at a time, just until combined. Overmixing incorporates too much air into the batter, which can cause the cheesecake to puff up excessively in the oven and then fall dramatically, leading to cracks.
- The Gentle Water Bath Technique: For an incredibly smooth, creamy texture and to prevent cracking, a water bath is key. My method is wonderfully simple: there’s no need to fuss with wrapping your pan. Instead, simply place your cheesecake on the top rack of the oven. On the lower rack, place a 9×13 inch pan filled with about an inch of hot water. The steam generated will keep your cheesecake moist and prevent the surface from drying out and cracking. Don’t skip this step for truly perfect results!
- Utilizing a Touch of Flour: You’ll notice this recipe includes a small amount of all-purpose flour in the batter. This isn’t just for binding; it helps to stabilize the cheesecake’s structure, contributing to a denser, more consistent texture, and significantly reduces the likelihood of cracks forming on the surface during baking and cooling.
- Preventing Cracks During Cooling: After baking, resist the urge to immediately remove the cheesecake from the oven. Instead, turn off the oven and prop the door open slightly (a wooden spoon works perfectly). Allow the cheesecake to cool gradually in the warm oven for at least one hour. This gentle, slow cooling prevents sudden temperature changes that cause cracking. After this, move it to your counter to cool completely to room temperature before chilling.
- Thorough Chilling is Non-Negotiable: Patience is a virtue when it comes to cheesecake! You absolutely must chill your cheesecake for a minimum of 4 hours, or ideally, overnight, in the refrigerator. Cutting into it prematurely will result in a soft, ooey-gooey mess that won’t hold its shape. Proper chilling allows the cheesecake to fully set, firm up, and develop its optimal flavor and texture.
- Effortless Cheesecake Removal: Once thoroughly chilled, run a thin, sharp knife or an offset spatula carefully along the inner edges of the springform pan to loosen any stuck parts. Then, gently release the spring mechanism and lift the ring away. This ensures your beautifully baked cheesecake comes out perfectly intact.
- Gifting Your Cheesecake: If you’re planning to give your delicious creation as a gift, consider placing a cardboard cake board inside your springform pan before pressing in the crust. Once the cheesecake is baked, cooled, and chilled, you can easily slide it onto the board and then into a charming box for baked goods. You’ll instantly become everyone’s favorite friend!
Knowing When Your Cheesecake is Perfectly Baked
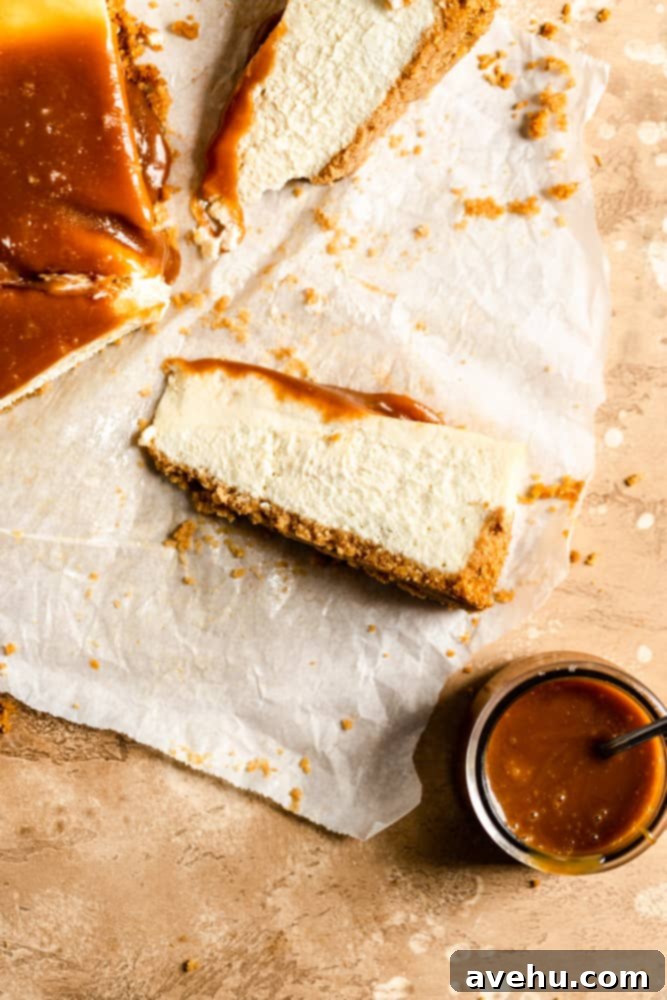
Determining the exact moment your cheesecake is done baking is a crucial step for achieving that ideal, creamy texture. Start checking your cheesecake after about 45 minutes in the oven. Gently give the springform pan a slight shake. What you’re looking for is a subtle “jiggle” only in the very center of the cheesecake, while the outer edges appear more set and stable. If the entire cheesecake still jiggles freely, it needs a bit more time. However, if it’s only a small, confined jiggle in the middle, it’s done! Don’t be alarmed by this slight movement; the cheesecake will continue to set and firm up beautifully as it cools and chills in the refrigerator.
Store-Bought or Homemade Caramel Sauce? The Choice is Yours!
For this luscious caramel cheesecake, you have the flexibility to use either a high-quality store-bought caramel sauce or craft your own from scratch. Both options will yield a delicious result, but homemade caramel often offers a depth of flavor that’s hard to beat. If you’re in the mood to spend a little extra time in the kitchen, I highly recommend trying my easy homemade caramel recipe. You can easily make it with or without the bourbon, depending on your preference. To ensure your caramel sauce is perfectly pourable for drizzling, whether homemade or store-bought, simply reheat it gently in the microwave in 15-second intervals, stirring after each, until it reaches your desired consistency.
Elevate Your Cheesecake: Delicious Topping Ideas
While this caramel cheesecake is phenomenal on its own, especially with that double dose of caramel, these additional toppings can add extra flair and flavor! Many of these pair wonderfully with or without the primary caramel drizzle.
- Fresh Berries: A vibrant contrast! A handful of fresh raspberries, blueberries, or sliced strawberries, perhaps lightly dusted with powdered sugar, adds a refreshing tartness.
- Homemade Whipped Cream: A cloud of light, airy homemade whipped cream provides a lovely, delicate counterpoint to the rich cheesecake.
- Your Favorite Ice Cream: Serve a slice warm with a scoop of vanilla bean, coffee, or even a complementary caramel swirl ice cream for an ultimate indulgence.
- Chopped Candied Nuts: Add a delightful crunch and nutty flavor with candied pecans, walnuts, or even roasted almonds.
- Classic Vanilla Buttercream: For those who love extra sweetness and a smooth, creamy texture, a dollop of Vanilla Buttercream can be surprisingly delicious.
- Chocolate Sauce Drizzle: The classic pairing of chocolate and caramel is undeniable. A delicate drizzle of rich chocolate sauce will beautifully complement the caramel notes.
- Funfetti Sprinkles: For a festive and playful touch, a scattering of colorful funfetti sprinkles is always a crowd-pleaser, especially for birthdays.
- A Layer of Chocolate Ganache: For true chocolate lovers, a thin, glossy layer of chocolate ganache over the top, set before serving, will make this cheesecake even more luxurious.
Storing & Freezing Your Caramel Cheesecake
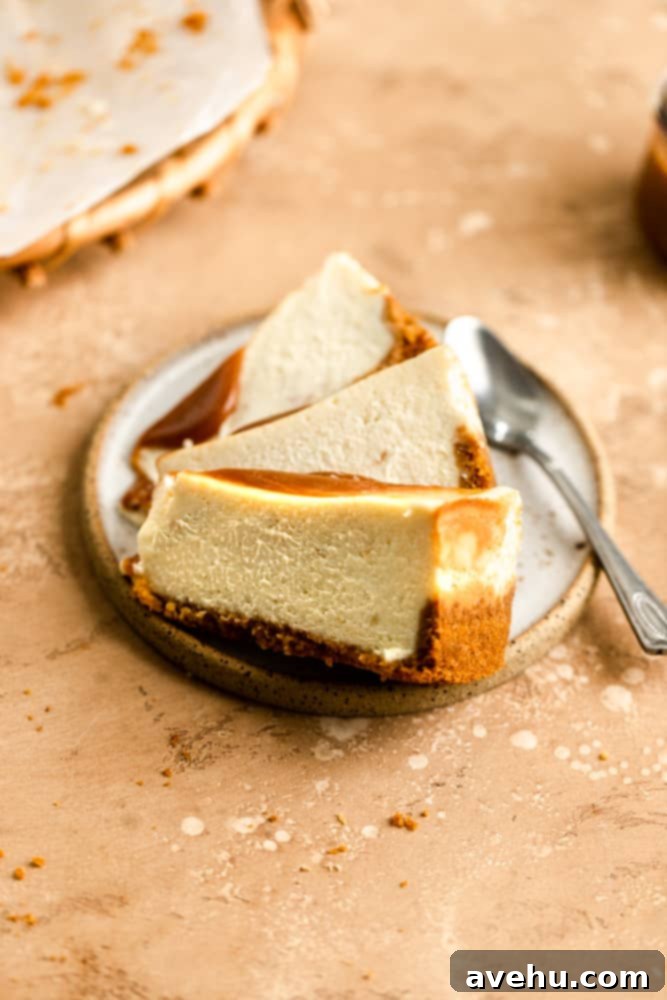
- Storing Your Cheesecake: To maintain its freshness and delightful texture, this caramel cheesecake should be stored in the refrigerator. Place it on a cake plate with a tight-fitting lid or cover it securely with plastic wrap to retain as much moisture as possible. It will stay wonderfully fresh and delicious for 4-5 days.
- Freezing for Later: Cheesecake freezes exceptionally well, making it perfect for preparing ahead or saving leftovers. Ensure the cheesecake is fully chilled before freezing. Carefully wrap the entire cheesecake or individual slices tightly in several layers of plastic wrap, then place it into an airtight freezer-safe container or bag. It can be stored in the freezer for up to 3 months. Thaw frozen cheesecake in the refrigerator overnight before serving.
More Delicious Cheesecake Recipes You’ll Love
If you’ve enjoyed mastering this caramel cheesecake, you’ll be thrilled to explore other fantastic cheesecake creations from my collection. Each recipe offers a unique flavor profile and an opportunity to expand your baking repertoire:
- Cherry Cheesecake with Chocolate: A classic combination of tart cherries and rich chocolate.
- Easy Mini Cheesecake Bites: Perfect for parties or portion control, these adorable bites are always a hit.
- Red Velvet Cheesecake Cupcakes: All the indulgent flavor of red velvet cake in a fun, portable cheesecake form.
- Cheesecake Bars with Cranberry Swirl: A festive and easy-to-serve dessert, especially during the holidays.
Heads up! This post contains affiliate links, which means if you purchase something off one of these links, I make a small commission at no extra cost to you. Thanks for supporting my blog!

Caramel Cheesecake
Pin
Review
SaveSaved!
Ingredients
For The Crust
- 9 Graham Crackers, 1 package crushed or about 1 1/2 cup crumbs
- ⅓ cup Butter, Melted
- 2 tablespoons Granulated Sugar
For The Cheesecake Filling
- 4 8 oz. Cream Cheese, room temperature
- 1 cup Granulated Sugar
- 1 cup Sour Cream, room temperature
- 4 Eggs, large
- 1/2 cup Half & Half
- 2 teaspoons Vanilla Extract
- 1/3 cups All Purpose Flour
- 3/4 cup Caramel Sauce, divided (homemade or store bought)
Equipment
-
9” Springform Pan
Instructions
For The Crust
-
Preheat your oven to 375° F.
-
Place the 1 ½ cups graham cracker crumbs in a medium sized bowl. Add the 2 tbsp sugar and 1/3rd cup melted butter and stir to combine. The mixture should resemble wet sand.
-
Spray the 9″ springform pan with baking spray and press the graham cracker mixture into the bottom and sides. You can use the bottom of a measuring cup to help press it down hard and evenly.
-
Bake for 8-10 mins until it smells like heaven from your oven and the crust is golden brown.
For The Cheesecake Filling
-
Lower the oven temperature to 350° F after pre-baking the crust.
-
In the bowl of a stand mixer fitted with the paddle attachment, add the 4 blocks of cream cheese. Mix on low-medium speed for 1 minute, then add in the 1 cup sugar and 1 cup sour cream.
-
Continue mixing on low-medium speed, then add 1 egg at a time, mixing for a few seconds in between additions. Stop the mixer and scrape down the sides of the bowl.
-
Start the mixer again on low speed and add in the ½ cup half n half and 2 tsp vanilla. Mix for 30 seconds. Add in the ⅓ cup flour slowly then move your speed up to medium and mix for 2-3 minutes.
-
Scrape down the sides and bottom of the bowl to make sure everything is mixed evenly and pour the batter into the graham cracker crust.
-
Take 1/4 cup caramel sauce and dollop it all over the cheesecake. Swirl the batter with a knife to distribute.
-
Take a sheet tray or a 9×13 inch pan and put it on the lower rack of your oven, fill it with an inch of water to create the steam in the oven.
-
Place the cheesecake on the upper rack of the oven. Bake for 45-55 minutes.
-
The cheesecake is done when the edges start to brown and break away from the sides of the pan. It will still be jiggly in the middle- you want that! Turn the oven off and crack the oven door open a little bit. Leave the cheesecake to cool for one hour, then remove to finish cooling on the counter.
-
Chill in the refrigerator at least 4 hours or overnight. Once chilled pour the remaining ½ cup caramel over the cheesecake and serve!
Notes
Tips On Making The Perfect Cheesecake
- Removing the cheesecake: It is extremely important to make sure the cheesecake cools fully before removing it from the pan. To help with this, take a knife or an offset spatula and run it along the edges of your pan to loosen the cake up then release the edges of the springform pan.
- If you’re giving the cheesecake as a gift: Put a cardboard cake board in your springform pan before making the crust. Once the cheesecake is cooled you can slide it into a cute box for baked goods and become someone’s best friend.
- To prevent the cheesecake from cracking: Turn the oven off when it is done baking and leave the oven door slightly open. Do not take the cheesecake out. Cool it like this for at least an hour and then move it to your counter to continue cooling. Then move it to your fridge to chill. You want to chill it for at least 4 hours or overnight. If you cut into it before it’s completely chilled, you will have an ooey gooey mess.
- Use a water bath: Don’t skip this step in making the perfect cheesecake! The steam from the water will rise and make sure your cheesecake is extra smooth and creamy.
- Use flour in the batter: You may see cheesecake recipes that have a bit of flour in the batter. The reason for this is that it helps to firm up the batter a little and will also help keep it from cracking.
