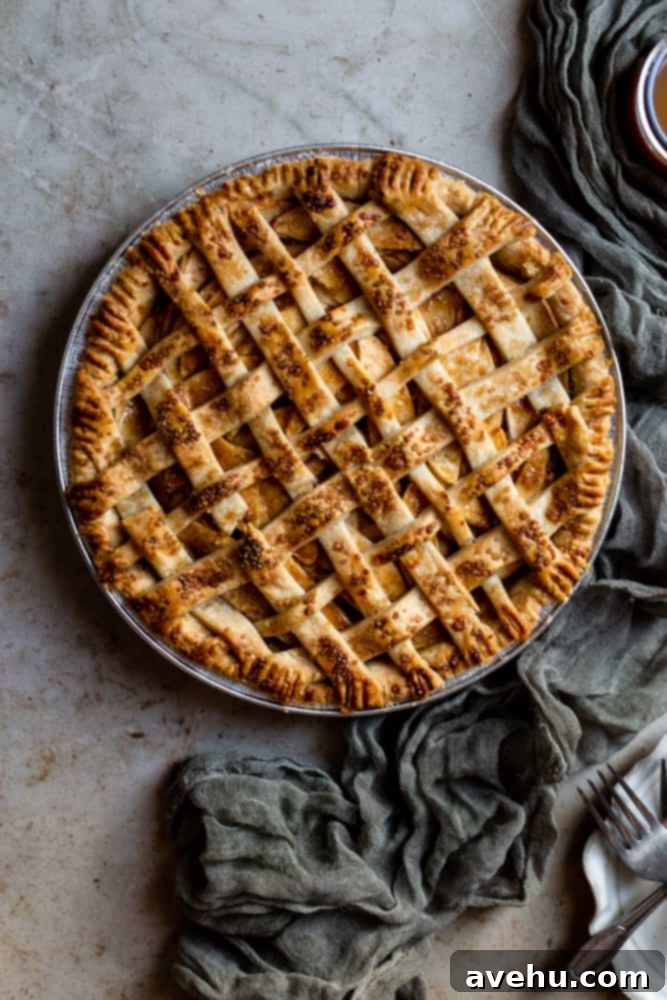
Decadent Salted Caramel Apple Pie: An Easy Recipe with Lattice Crust Tutorial
Prepare to bake a truly unforgettable dessert with this incredible Caramel Apple Pie. This cherished classic receives a luxurious upgrade with a generous filling of sweet, tender sliced apples, all enrobed in a rich, buttery salted caramel sauce. Whether enjoyed warm straight from the oven or crowned with a scoop of creamy vanilla ice cream, this pie promises a delightful experience. Many home bakers find the idea of crafting a pie, especially one with an intricate lattice top, a bit daunting. However, as a trained pastry chef, I’m here to assure you that creating a show-stopping pie is more accessible than you think! This comprehensive guide includes a step-by-step lattice crust tutorial, empowering you to become a confident pie-making pro in no time.
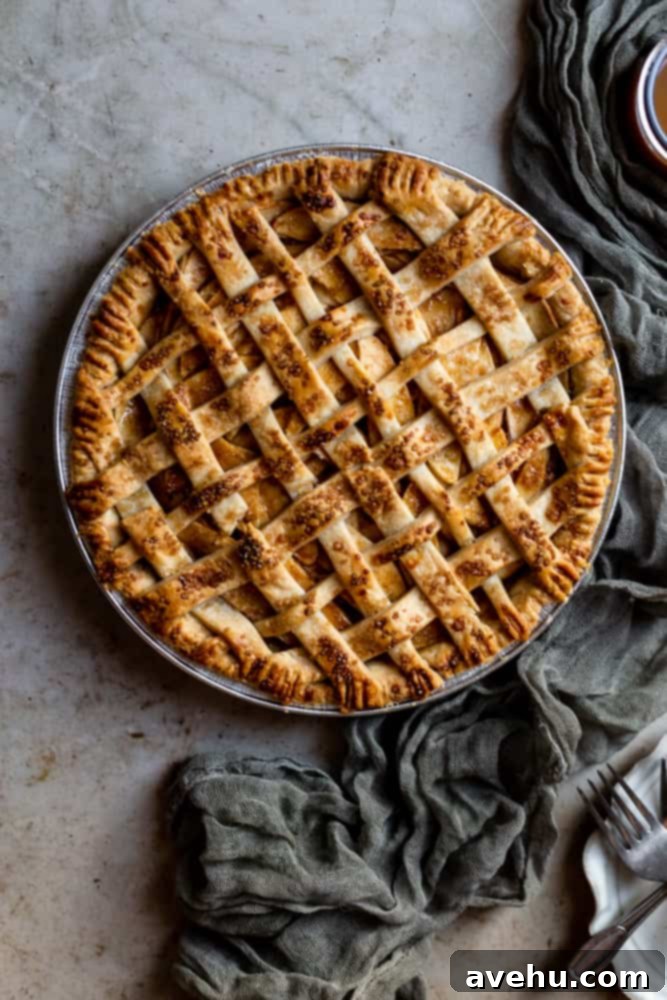
A slice of perfectly baked Caramel Apple Pie is a dessert that captures hearts and satisfies cravings, a true culinary delight that’s rarely turned down. It’s a versatile treat, equally fantastic for a sun-drenched summer gathering or as a comforting, warm indulgence on a crisp, cozy fall day. The aroma alone, a blend of sweet apples, warm cinnamon, and rich caramel, is enough to transport you to a state of pure bliss.
The thought of baking a pie, especially one adorned with elegant lattice work, can often intimidate even seasoned home cooks. Many imagine hours of complicated steps and potential pitfalls. But fear not! As a trained pastry chef with years of experience, I’m here to demystify the process and assure you that it’s far less daunting than it appears. With a little guidance and patience, you absolutely can create a stunning and delicious pie that will impress everyone.
This particular salted caramel apple pie recipe features an abundance of sweet, thinly sliced apples, each coated in a wonderfully gooey, rich caramel sauce. This delectable filling is then encased in a beautifully flaky pie crust, baked to golden perfection. You have the flexibility to choose your crust: embark on the rewarding journey of making your own by following my detailed guide on how to make a flaky pie crust, or opt for the convenience of a high-quality store-bought crust. There’s absolutely no judgment here – delicious pie is the ultimate goal, no matter its origin!
If you adore the flavors of apple pie but are seeking a simpler dessert format, you might enjoy these apple pie bars. They offer all the beloved taste of apple pie but come with a delightful crumb topping instead of a traditional crust, making them wonderfully easy to serve and enjoy.
Even if you find yourself without traditional pie crust, don’t despair! This versatile recipe can be adapted. Transform it into an apple pie with a graham cracker crust for a unique twist, or create a puff pastry apple pie for a lighter, flakier experience. Simply incorporate the salted caramel sauce into either of these fantastic alternatives for that signature sweet and savory depth!
For fellow apple enthusiasts eager to explore more delightful baked goods, I highly recommend trying this moist and flavorful apple coffee cake or this elegant and aromatic apple bundt cake. Each recipe celebrates the wonderful versatility of apples in baking.
Why You Absolutely Must Make This Caramel Apple Pie Recipe
- A Universal Favorite: This isn’t just a pie; it’s a culinary icon. Caramel apple pie is a timeless dessert that consistently ranks high on everyone’s list of comfort foods. Its combination of sweet apples, warm spices, and gooey caramel ensures it’s a crowd-pleaser for any occasion, from casual family dinners to festive holiday gatherings.
- Impressive Yet Achievable: The lattice top, while looking incredibly sophisticated and challenging, is surprisingly simple to master with our detailed tutorial. You’ll gain instant “baking guru” status among your friends and family, making them believe you’ve spent hours perfecting this art, when in reality, it’s quite straightforward and fun!
- The Epitome of Fall Flavors: Caramel and apple are an iconic duo, especially as the leaves begin to change. This pie encapsulates the essence of autumn, offering warmth, coziness, and the vibrant taste of fresh apples blended with the rich sweetness of caramel. It’s the perfect treat to welcome cooler weather.
- Flexible for All Bakers: Whether you’re a purist who loves the challenge of a homemade flaky pie crust or prefer the convenience of a store-bought option, this recipe accommodates all skill levels and time constraints. The focus remains on the incredible flavor, ensuring a delicious outcome regardless of your crust choice.
Essential Ingredients for Your Salted Caramel Apple Pie:
- Pie Crusts: You’ll need two 9-inch pie crusts for this recipe – one for the base and one for the top. You have the choice to create your own with my incredibly easy flaky pie crust recipe, which I highly recommend for a superior texture and flavor. Alternatively, readily available store-bought crusts work perfectly well and save time. Many professional bakers, myself included, started with store-bought crusts before diving into homemade!
- Apples: The choice of apple is crucial for a great pie. I personally prefer using Honeycrisp or Braeburn apples for their excellent balance of sweetness and tartness, and their ability to hold shape during baking. For a tarter pie, Granny Smith is an excellent option.
- Lemon Juice: A splash of fresh or bottled lemon juice is essential. It prevents the apples from browning too quickly and adds a bright, tangy counterpoint that elevates the overall flavor of the pie, balancing the sweetness of the caramel.
- All-Purpose Flour: This acts as a thickening agent for the apple juices released during baking. It creates that perfectly gooey, rather than watery, filling that we all love in a good apple pie. Remember, a small amount is also used with sugar to prepare the bottom crust.
- Granulated Sugar: Provides additional sweetness to the apple filling, complementing the natural sugars in the apples and enhancing the caramel flavor.
- Cinnamon: The quintessential spice for apple pie. Ground cinnamon adds warmth, depth, and that unmistakable comforting aroma that pairs so beautifully with apples and caramel.
- Salted Caramel Sauce: This is the star ingredient that transforms a classic apple pie into something extraordinary. You can use your favorite store-bought brand for convenience, or for an extra special touch, try making your own. My Bourbon Caramel Sauce (simply omit the bourbon for this recipe) is a fantastic homemade option.
- Egg: A single whisked egg is used to create an egg wash, which is brushed over the top crust before baking. This gives the pie a beautiful golden-brown color and a lovely sheen.
- Sugar in the Raw (Turbinado Sugar): An optional but highly recommended ingredient for garnish. Sprinkled over the egg-washed crust, it provides an extra layer of crunch, sparkle, and a subtle sweetness, enhancing the pie’s rustic charm.
Selecting the Perfect Apples for Baking Pie
The secret to a successful apple pie often lies in the apples themselves. For baking, you want varieties that maintain their structure and texture when subjected to heat, preventing a mushy filling. My top recommendations are Honeycrisp and Braeburn apples, which offer a delightful balance of sweet-tart flavor and firm flesh. If you prefer a distinctly tart pie, Granny Smith apples are your best bet. These varieties are known for their ability to hold their shape, ensuring your pie filling remains pleasantly chunky and not a watery purée. Conversely, apples like Gala, Fuji, or Red Delicious, while delicious for snacking, tend to break down too much in the oven due to their higher water content and softer texture, resulting in a less desirable, mushy consistency in your baked pie. A good rule of thumb is to look for firm, crisp apples with a good balance of sweetness and acidity.
Crafting Your Salted Caramel Apple Pie: A Step-by-Step Guide
Baking this pie is an enjoyable process that yields delicious rewards. Follow these steps for a perfect outcome:
Step 1: Prepare the Crust Foundation. Begin by ensuring your pie dough (homemade or store-bought) is ready and chilled. Similarly, have your caramel sauce prepared or at room temperature for easy drizzling. For homemade crusts, an extra step can greatly improve your pie’s base: in a small pinch bowl, combine 1 teaspoon of all-purpose flour with 1 teaspoon of granulated sugar. Mix these thoroughly, then sprinkle this fine mixture evenly over the bottom pie crust. This simple trick helps absorb any excess apple juices that might escape during baking, preventing a soggy bottom and ensuring a perfectly crisp crust.
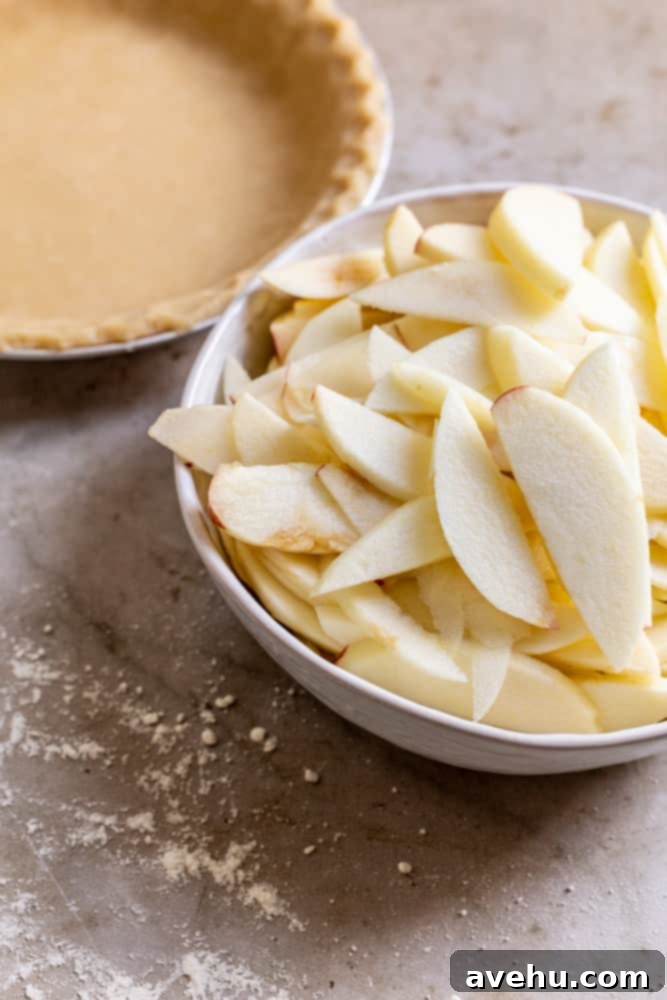
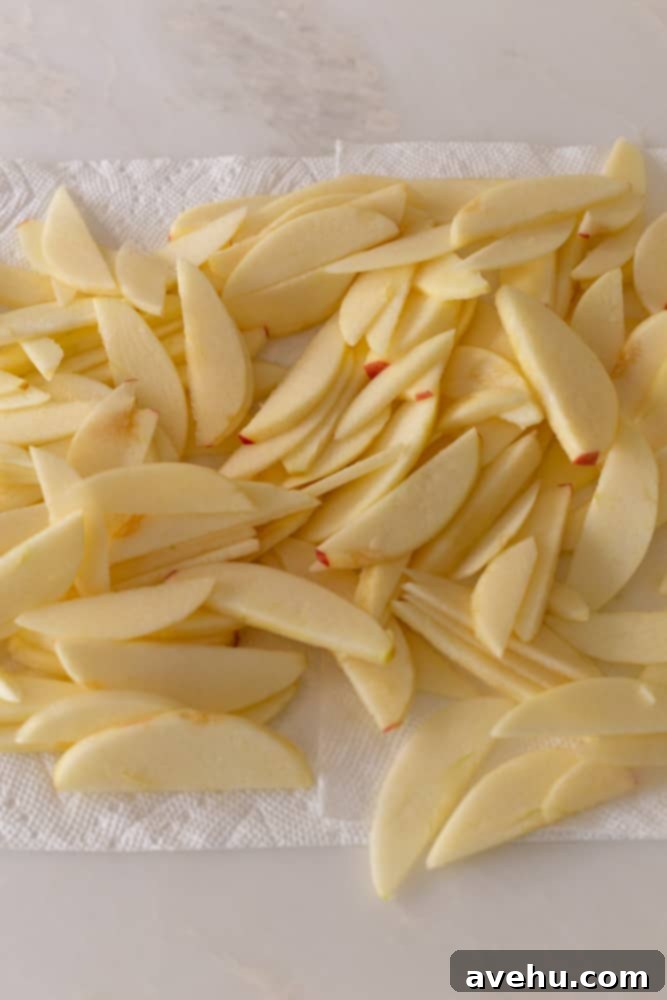
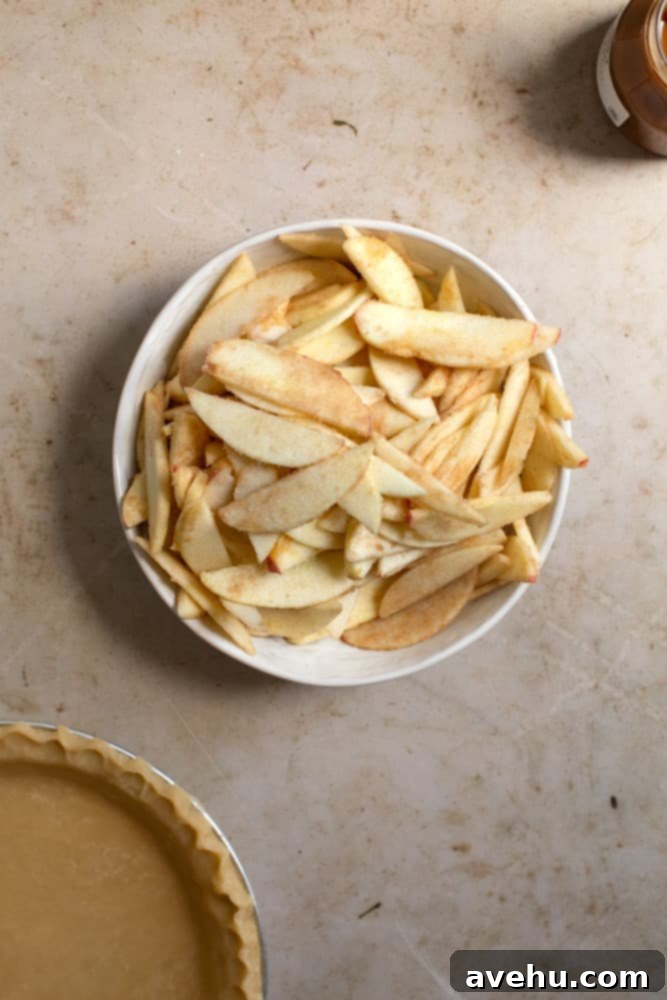
Step 2: Prepare Your Apples with Care. Peel and core your chosen apples, then slice them evenly to about 1/4 inch thick. While 1/4 inch is ideal for consistent cooking, feel free to make them slightly chunkier if you prefer a more substantial bite in your pie. Place the sliced apples in a medium-sized bowl. Pour 1/3 cup of lemon juice over them and gently toss to coat. Let the apples sit in the lemon juice for about 5 minutes; this prevents browning and adds a subtle tang. After 5 minutes, thoroughly drain the apples and spread them out on a few layers of paper towels. Pat them dry very well – removing excess moisture is key to a non-watery pie filling.
Step 3: Create the Flavorful Apple Pie Filling. Transfer the well-dried apple slices to a large mixing bowl. Add the remaining 2 tablespoons of all-purpose flour, 1/4 cup of granulated sugar, and 1/2 teaspoon of ground cinnamon. Toss everything together gently but thoroughly, ensuring each apple slice is evenly coated with the dry ingredients. This coating will not only season the apples but also contribute to the delicious, slightly thickened pie filling.
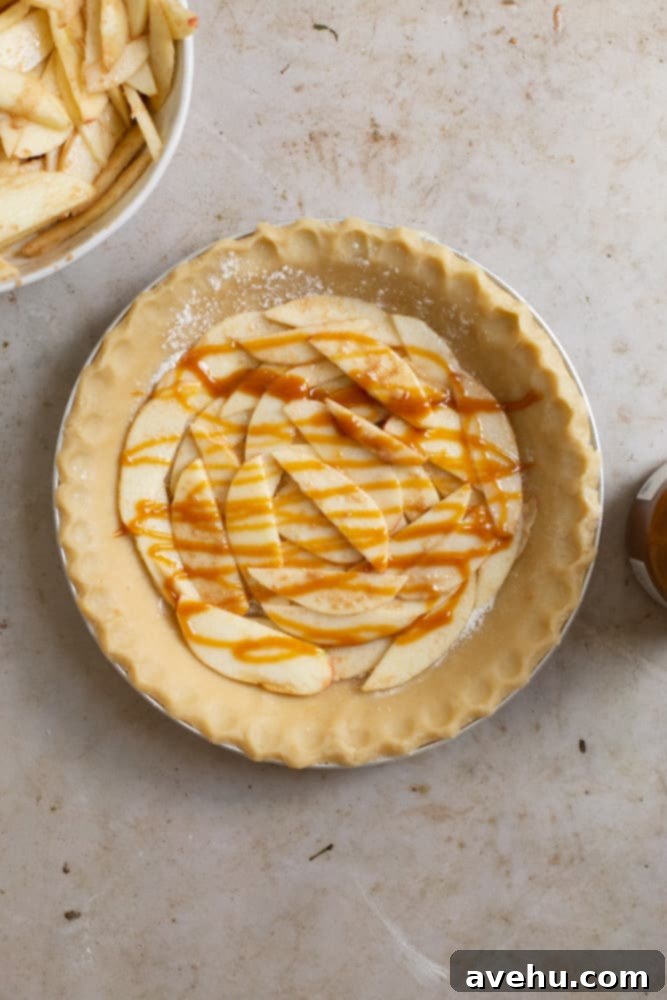
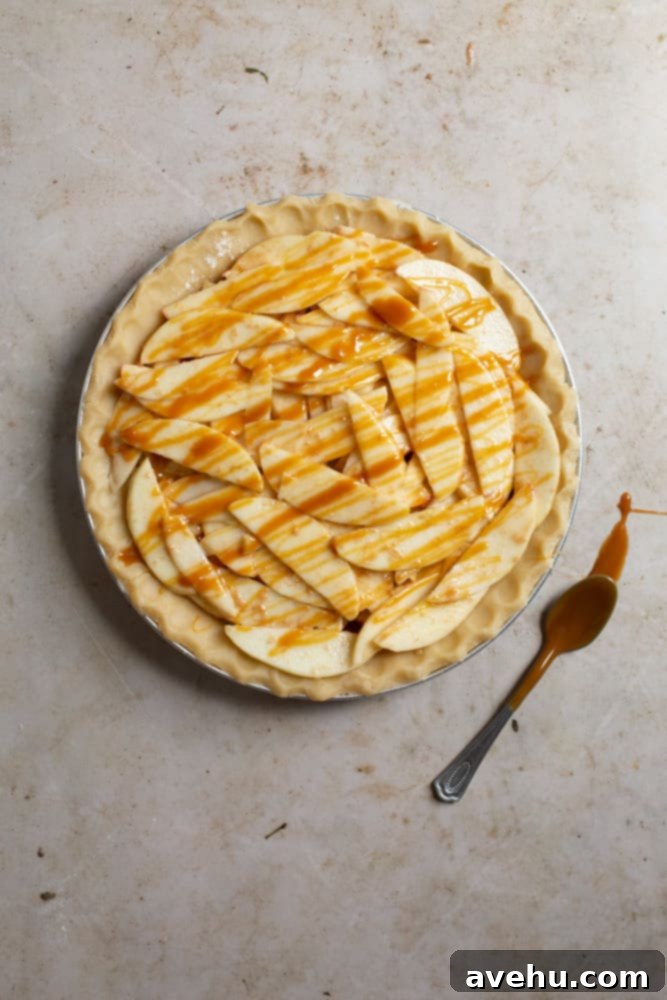
Step 4: Assemble the Pie Layers. Carefully arrange a single layer of the coated apple slices across the bottom of your prepared pie shell. Over this apple layer, drizzle approximately 1-2 tablespoons of your salted caramel sauce. Repeat this layering process – apples, then caramel – until all the apple slices have been used, and your pie shell is generously filled. Make sure to end with a final, delightful drizzle of caramel sauce over the very top layer of apples.
Step 5: Finish and Bake to Golden Perfection. Now for the artistic touch: cover your pie with the second pie crust. You can choose any design, but for an elegant finish, refer to my detailed lattice tutorial below! Once the top crust is in place, gently brush it all over with a beaten egg (the egg wash). This will give your pie a beautiful golden-brown color and a lovely shine. For an added textural element and sparkle, sprinkle the top generously with turbinado sugar (Sugar in the Raw). Preheat your oven to 375°F (190°C) and bake the pie for 30-35 minutes, or until the crust is beautifully golden and the filling is bubbly and aromatic. Keep an eye on the edges; if they brown too quickly, you can cover them with foil (see tips below).
Mastering the Art of a Lattice Pie Crust
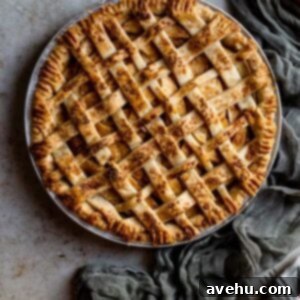
Creating a beautiful lattice crust might seem like a daunting task, but I promise it’s far less complicated than it looks! Once you grasp the basic technique, you’ll be amazed at how easily you can achieve this elegant finish. It’s a simple weaving process that adds both visual appeal and allows steam to escape, ensuring a perfectly baked pie.
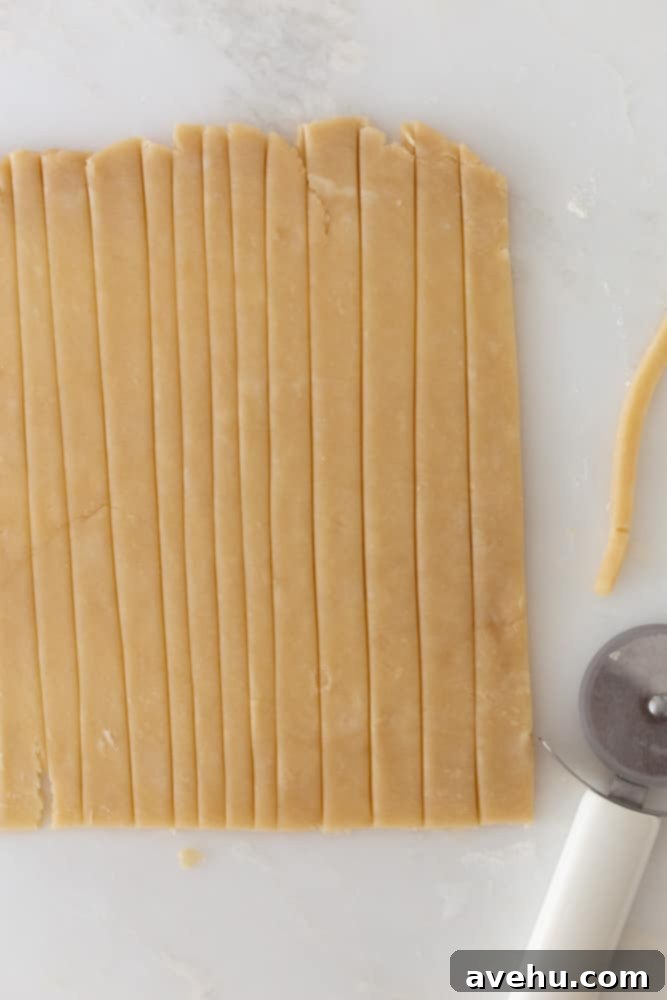
To begin, you will need to cut your second pie crust into 10-12 even strips. For best results and ease of weaving, I recommend making half of your strips slightly wider than the other half (e.g., 6 strips at 1 inch wide and 6 strips at 3/4 inch wide). This makes it easier to keep track of which strips are horizontal and which are vertical during the weaving process. Essentially, you will lay down your horizontal strips first, then alternate lifting and laying your vertical strips to create the classic woven pattern.
Here are detailed step-by-step instructions with accompanying visuals to guide you in making a perfect lattice pie crust:
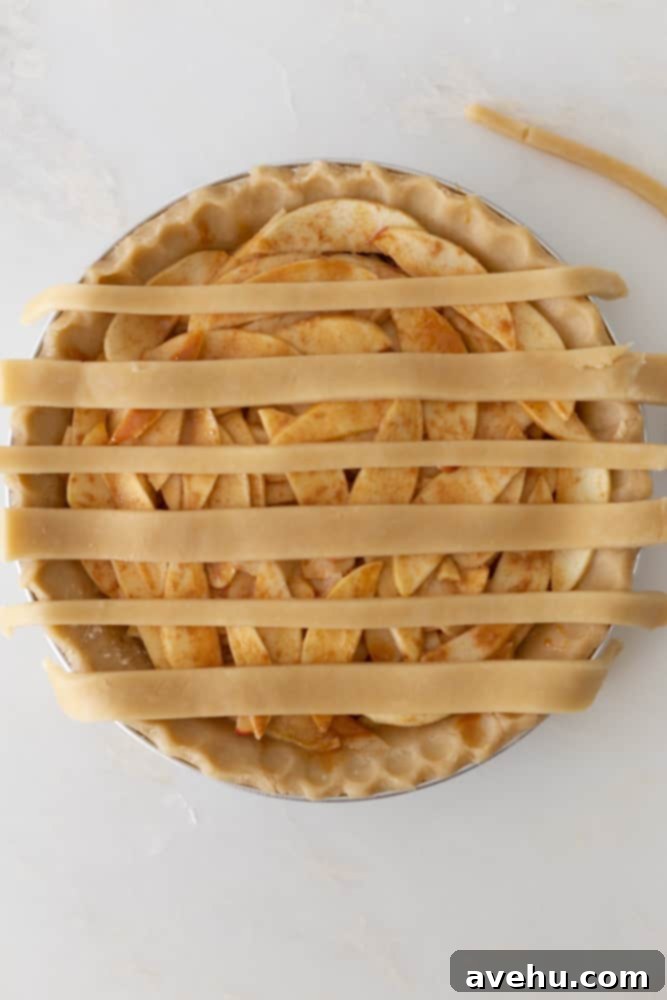
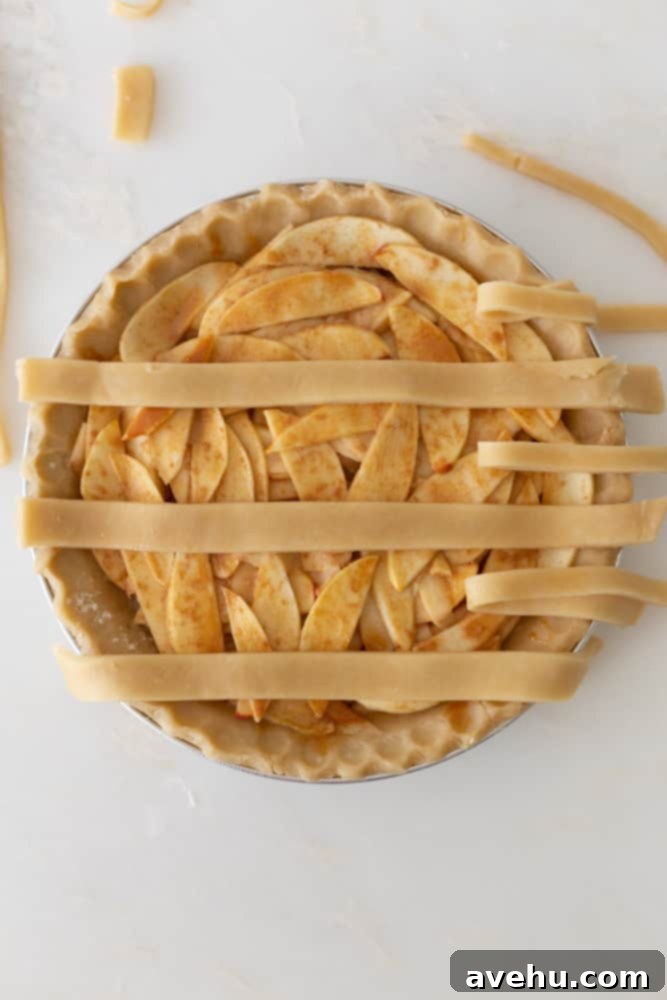
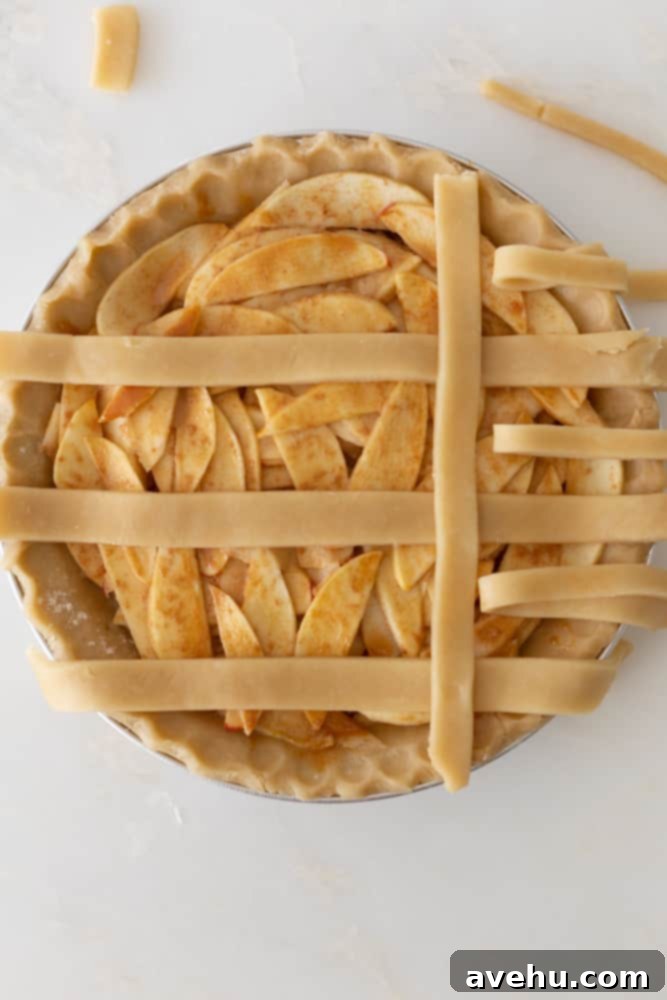
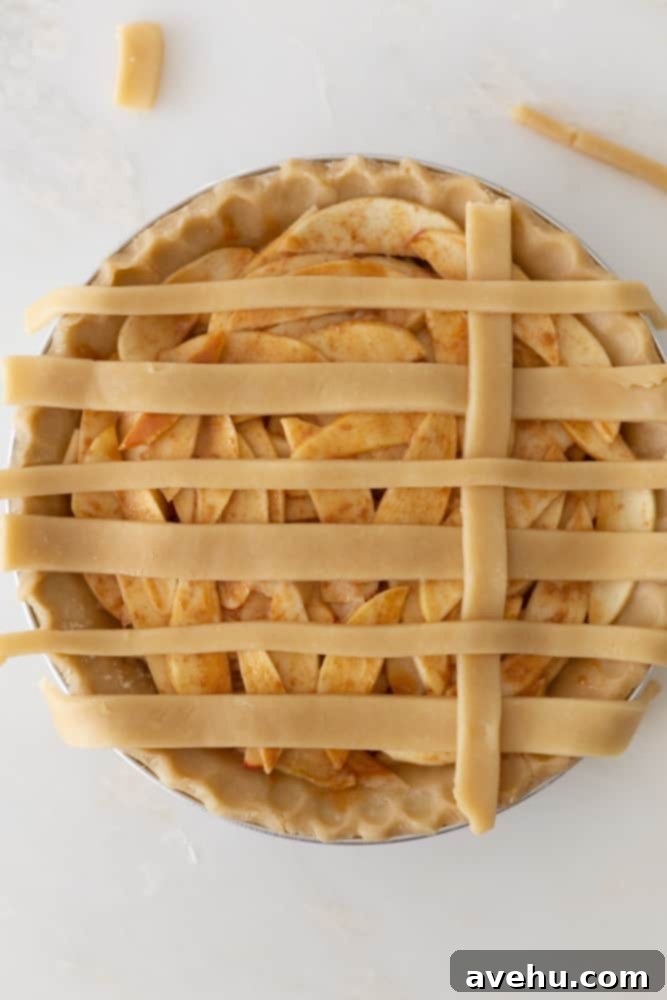
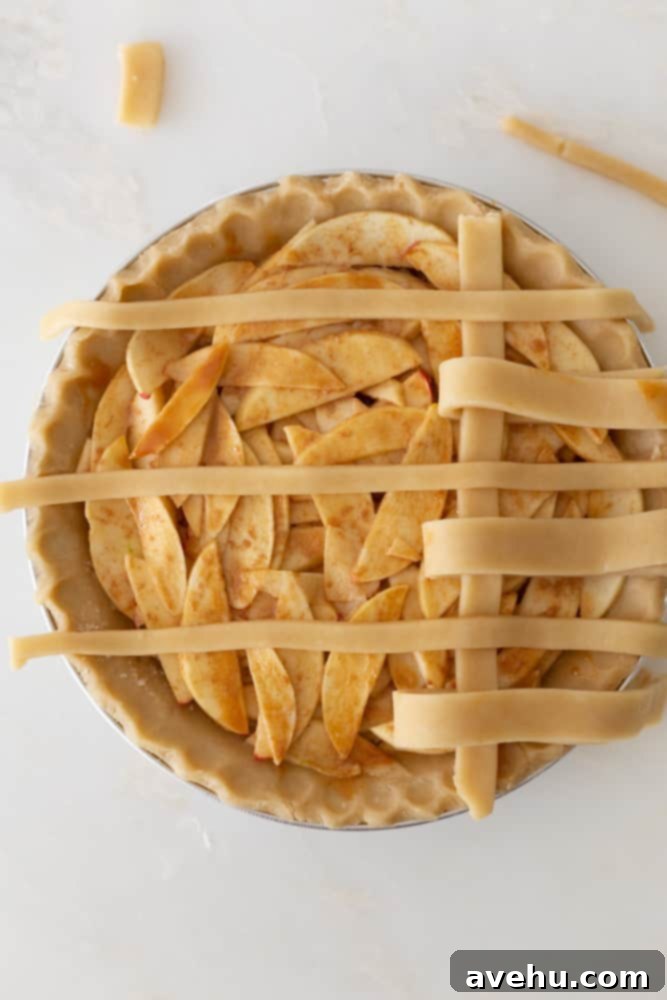
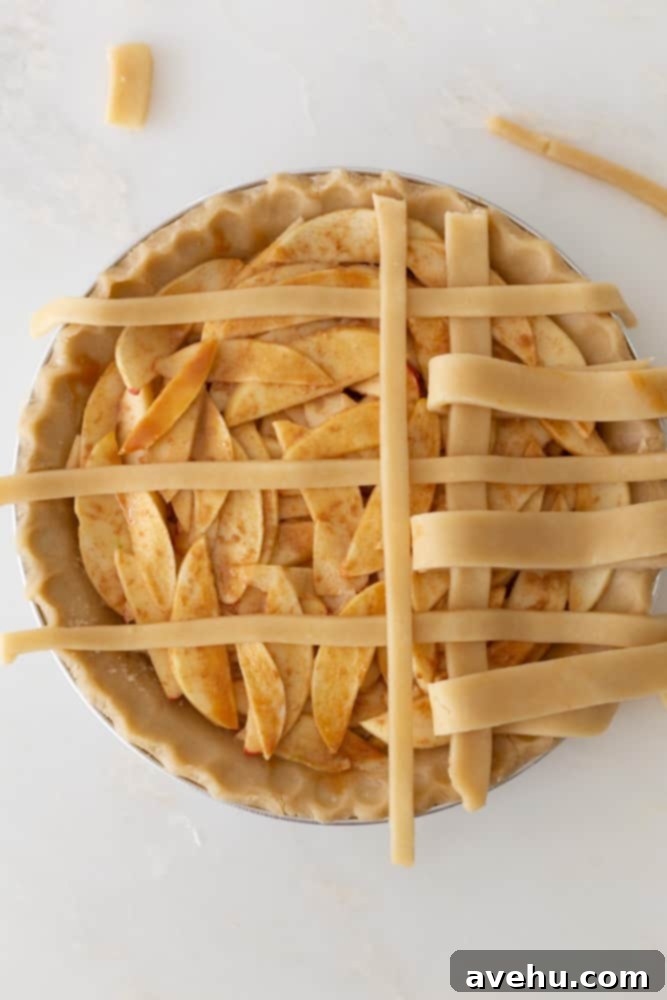
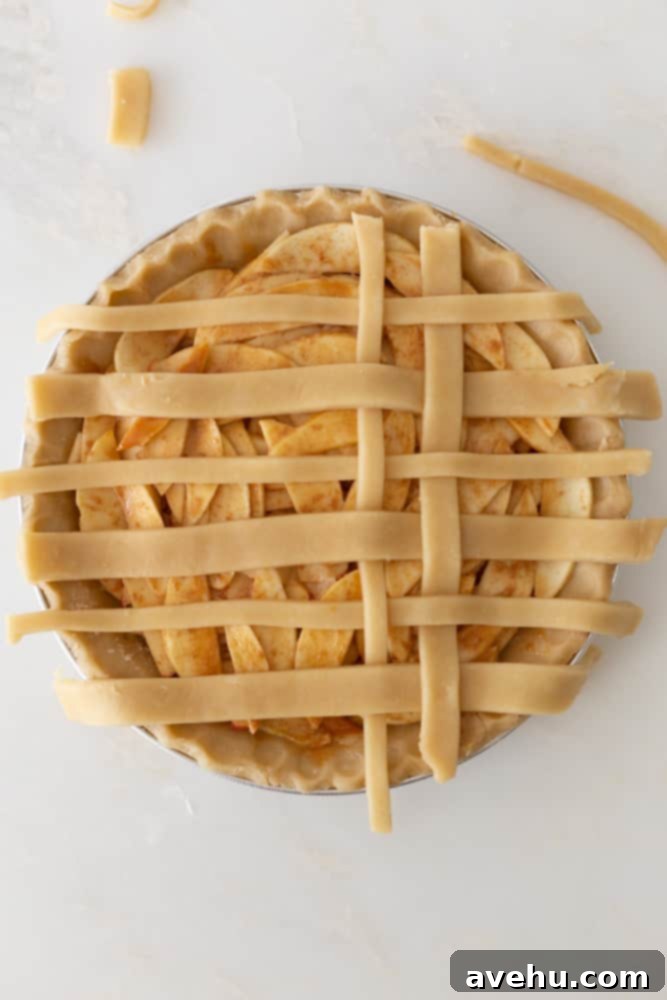
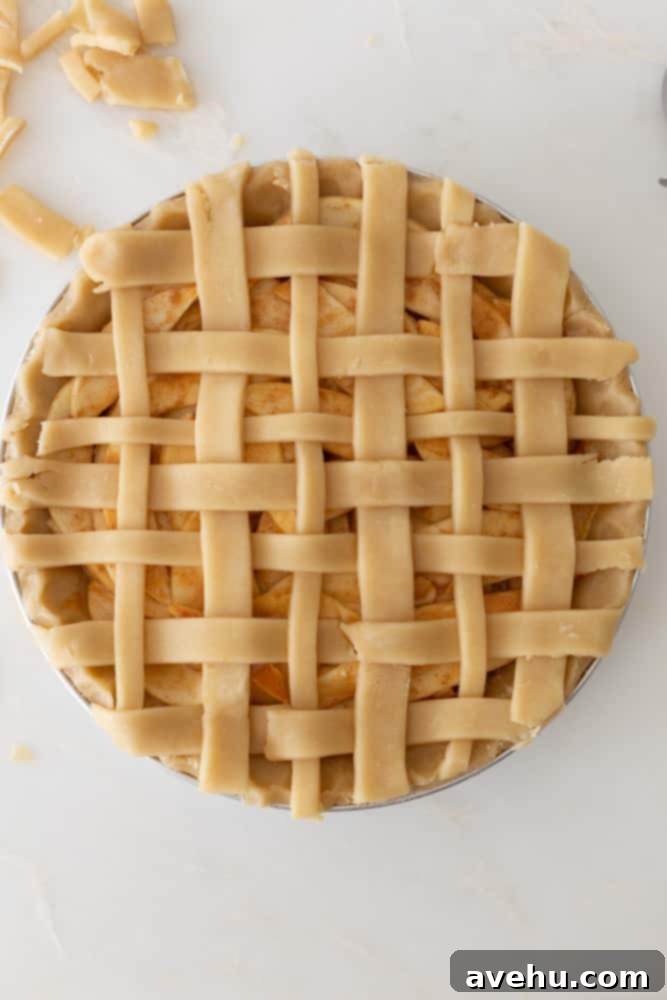
Once your beautiful lattice pattern is complete, the final touch is to secure the edges. Trim any excess dough around the circumference of the pie plate. Then, using the tines of a fork or your fingers, firmly crimp the edges of the top and bottom crusts together. This creates a seal, preventing the filling from bubbling out during baking and giving your pie a professional, finished appearance.
Creative Pie Crust Alternatives for Your Caramel Apple Pie
While a lattice crust is beautiful, there are many other ways to top your delicious caramel apple pie:
- Simple Full Crust: The easiest alternative is to simply roll out the second pie dough into a full circle that covers the entire pie. Place it over the apple filling, trim any excess dough, and then crimp the edges with a fork or your fingers to seal. Don’t forget to cut three small slits in the center of the crust to allow steam to escape during baking, preventing a soggy or bursting top.
- Crumb Streusel Topping: For a different texture and added sweetness, consider a streusel crumb topping. This buttery, crumbly mixture adds a wonderful textural contrast to the soft apple filling. It’s a fantastic option if you’re short on time or prefer a less traditional look. Simply prepare your favorite streusel recipe and sprinkle it generously over the apple filling before baking.
- Decorative Cut-Outs: Unleash your creativity by using cookie cutters to cut out fun shapes from your pie dough – think leaves, apples, or even stars. Arrange these cut-outs artfully over the apple filling, slightly overlapping them to create a charming and unique design. This method offers a lovely balance of visual appeal and ease, especially for seasonal pies.
Serving Your Perfect Caramel Apple Pie
Patience is key when it comes to serving pie! It is absolutely crucial to allow your freshly baked caramel apple pie to rest at room temperature for at least 25-30 minutes (or even longer) before slicing and serving. This resting period gives the filling time to cool down and firm up. If you cut into the pie too soon, the hot, gooey juices from the apples will run out, making for a messy slice and a less appealing presentation. Once rested, the filling will be perfectly set, creating beautiful, clean slices.
For an extra touch of indulgence, serve your warm slices of pie with a generous scoop of vanilla ice cream. The cold, creamy ice cream melting into the warm, spiced apple and caramel filling is an absolute dream. And for the ultimate caramel lover, a little extra drizzle of salted caramel sauce on top never hurts! While this pie is a fall favorite, this combination makes it delightful any time of year – just another excuse to bake this incredible dessert!
Storing & Freezing Your Caramel Apple Pie for Later Enjoyment
Proper storage ensures your delicious pie remains fresh and enjoyable for longer:
Storing: Once the pie has cooled completely, you can store it covered with foil on your kitchen counter for up to 2 days. For extended freshness, especially in warmer climates, transfer the covered pie to the refrigerator, where it will stay fresh for up to 5 days. Ensure it’s tightly wrapped to prevent it from absorbing refrigerator odors.
Freezing: If you’re planning to enjoy your pie later, freezing is an excellent option. After the pie has completely cooled down to room temperature, wrap it tightly first in tin foil, and then ideally in an additional layer of plastic wrap to prevent freezer burn. It can be frozen for up to 3 months. When you’re ready to enjoy it, defrost the pie overnight in the refrigerator. Reheat instructions are provided below.
The Best Way to Reheat Your Apple Pie
To bring your pie back to its warm, comforting best, reheating it in the oven is highly recommended. Preheat your oven to 325°F (160°C) and warm the entire pie for about 10 minutes. Keep a close eye on it to prevent the crust from burning. If you only want to reheat a single slice, a toaster oven is a fantastic tool; place the slice in the toaster oven at 350°F (175°C) for just 2 minutes. While convenient, I generally do not recommend microwaving pie, as it can make the crust soggy and the filling unevenly hot.
Expert Recipe Tips for Baking Success
- Preventing Burnt Edges: To ensure your pie crust edges don’t get too dark or burn during baking, create a simple foil shield. Take a large piece of tin foil, place the pie on top, and crimp the foil up over the edges of the pie. Bake with the shield on, removing it only for the last 5-10 minutes if you want the edges to brown slightly.
- Keep Your Dough Chilled: The key to a flaky pie crust is keeping the dough cold. If you’re working with homemade dough, or even store-bought, and notice it becoming too warm, sticky, or difficult to handle (especially when re-working scraps for the lattice), immediately place it back in the refrigerator for at least 30 minutes. This allows the butter to firm up again, making the dough much more manageable.
- Spoon, Don’t Pour, Apples: When transferring the apple filling to the pie crust, use a slotted spoon or your hands to scoop the apples. This allows any residual juice that might have accumulated at the bottom of the mixing bowl to be left behind. Minimizing excess liquid is crucial for a perfectly set, non-runny pie.
- Bake on a Cookie Sheet: Pies can sometimes bubble over, especially if generously filled. To protect your oven from messy spills and sticky burnt sugar, always bake your pie on a large rimmed cookie sheet. This simple precaution makes cleanup a breeze!
Recipe FAQ: Your Baking Questions Answered
Here are answers to some common questions you might have about this caramel apple pie recipe:
Can I make this recipe ahead of time? Absolutely! To prepare ahead, I recommend making the pie dough and the caramel sauce separately and storing them in the refrigerator. You can also prepare the apple filling (peel, slice, and coat with dry ingredients) and store it in an airtight container in the fridge for up to a day. Assemble and bake the pie on the day you plan to serve it for the freshest and best results.
Can I leave out the caramel sauce? Yes, of course! While the salted caramel is what makes this recipe special, if you prefer a classic apple pie, you can certainly omit the caramel sauce. The apple filling with cinnamon and sugar will still be delicious on its own.
Why is my apple pie runny? A runny apple pie is a common concern, but usually easily preventable! The most critical step to avoid a runny pie is to allow it to cool down and firm up for at least 30 minutes after baking, preferably longer. During this cooling period, the starches in the flour continue to thicken the juices released by the apples. If you slice into it right away, the filling will still be very hot and liquid, resulting in a runny mess. Patience is a virtue here!
Craving More Delicious Pie Recipes? Explore These Favorites:
- Easy Cranberry Pie: A vibrant, tart, and sweet pie perfect for holiday gatherings or any time you want a burst of berry flavor.
- How to Make Flaky Pie Crust: Master the foundation of any great pie with this essential, detailed guide to creating the perfect flaky crust from scratch.
- Apple Pie Bars: All the comforting flavors of apple pie in a convenient, shareable bar format, complete with a delightful crumb topping.
- Peach Slab Pie: A fantastic option for feeding a crowd, this large-format pie delivers juicy, sweet peach goodness with ease.
- Easy Key Lime Pie: A bright, tangy, and refreshing dessert perfect for warmer weather, offering a delightful citrusy contrast.
Easy Salted Caramel Apple Pie (with Lattice Tutorial)
30 minutes
35 minutes
30 minutes
1 hour
25 minutes
8
people
Pin
Review
Save
Saved!
Prevent your screen from going dark
Ingredients
-
2
9″
Homemade Pie Crust
,
store-bought -
4
Apples,
medium size, e.g., Honeycrisp, Braeburn, or Granny Smith -
1/3
cup
lemon juice,
freshly squeezed or bottled -
2
tbsp
all-purpose flour,
plus 1 teaspoon, divided (for filling and crust prep) -
1/4
cup
granulated sugar,
plus 1 teaspoon, divided (for filling and crust prep) -
1/2
tsp
ground cinnamon -
3-6
tbsp
salted caramel sauce
,
homemade or high-quality store-bought -
1
egg,
beaten, for egg wash -
Sugar in the Raw,
turbinado sugar, for garnish (optional)
Instructions
Prepare the Apple Filling
-
Ensure your pie crusts (chilled) and caramel sauce (at room temperature) are ready for use.
-
Preheat your oven to 375°F (190°C). Peel and slice 4 medium apples (like Honeycrisp or Braeburn) into even 1/4-inch slices. Place the slices in a medium-sized bowl and pour 1/3 cup lemon juice over them. Toss lightly to coat and let sit for 5 minutes. Set aside while you prepare the dry ingredients for the filling.
-
In a large bowl, combine 2 tablespoons all-purpose flour, 1/4 cup granulated sugar, and 1/2 teaspoon ground cinnamon. Mix lightly to ensure everything is well combined.
-
In a small pinch bowl, combine the remaining 1 teaspoon all-purpose flour and 1 teaspoon granulated sugar. Mix these together thoroughly and then sprinkle this mixture evenly over the bottom of your first pie crust. This helps prevent a soggy bottom crust.
-
Drain the apple slices well from the lemon juice and spread them out onto several paper towels. Pat them as dry as possible to remove any excess moisture. Once dried, add them to the large bowl with the dry filling ingredients. Toss the apples thoroughly to ensure they are evenly coated.
Assemble the Pie
-
Arrange the first layer of coated apples evenly on the bottom of the prepared pie shell. Drizzle 1-2 tablespoons of the salted caramel sauce over this apple layer. Repeat this process, layering apples and caramel, until all the apple slices are used. Finish with a final generous drizzle of caramel sauce over the very top layer.
Prepare the Top Pie Crust & Bake
-
Choose your desired top crust design. If opting for a lattice, follow the detailed tutorial provided in the article above. If you prefer a simpler full crust, roll out the second pie crust on a lightly floured surface into a 10-inch round, about 1/8-inch thick. Carefully fold the crust onto your rolling pin, then lift and gently place it over the filled pie. Trim any excess dough around the edges and crimp them securely with the tines of a fork or your fingers to seal. For a full top crust, remember to cut 3 small, 1-inch slits in the center to allow steam to escape during baking.
-
In a small bowl, whisk one egg to create an egg wash. Brush this evenly over the entire top pie crust. For an extra crunch and shine, sprinkle generously with Sugar in the Raw (turbinado sugar). Place the pie on a baking sheet (to catch any potential drips) and bake in the preheated oven for 30-35 minutes. The pie is done when the crust is golden brown and the filling is bubbly.
-
Allow the pie to cool completely on a wire rack for at least 30 minutes before attempting to cut into it. This crucial resting period allows the filling to set properly, preventing it from running when sliced.
Notes
To prevent the edges of your pie crust from burning, create a foil shield. Take a large piece of tin foil, place the pie on top, and crimp the foil tightly over the edges. Remove the foil during the last 5-10 minutes of baking if you want the edges to brown further.
You can certainly bake this pie without the Sugar in the Raw sprinkle or even the caramel sauce for a more classic apple pie. The egg wash is also optional but recommended for a golden crust.
For maximum freshness, store any leftover pie covered in the fridge. To enjoy a warm slice, reheat it in a toaster oven for about 2 minutes at 350°F (175°C).
Allow the pie to cool for at least 30 minutes before serving. This is vital for the filling to firm up; cutting it too early will result in the juices flowing out.
Serving:
1
slice
,
Calories:
109
kcal
,
Carbohydrates:
26
g
,
Protein:
1
g
,
Fat:
1
g
,
Saturated Fat:
1
g
,
Cholesterol:
21
mg
,
Sodium:
36
mg
,
Potassium:
122
mg
,
Fiber:
2
g
,
Sugar:
16
g
,
Vitamin A:
86
IU
,
Vitamin C:
8
mg
,
Calcium:
14
mg
,
Iron:
1
mg
Dessert, Pie
Sam Adler
American
Did you make this recipe?
Please leave a star rating and review in the form below. I read them all!
If you successfully bake this wonderful Salted Caramel Apple Pie, I would absolutely love to hear from you! Please share your experience by leaving a comment and a star rating below. Your feedback means the world to me and helps fellow bakers. Thank you so much for visiting and supporting my blog! Happy baking!
