The Ultimate Easy Streusel Crumb Topping Recipe: Perfect for Any Bake (No Nuts, No Oats!)
Are you searching for that perfect golden, crunchy, and irresistibly sweet topping to elevate your homemade baked goods? Look no further! This easy streusel crumb topping recipe is your ultimate secret weapon for transforming any cake, muffin, pie, or quick bread into a bakery-quality masterpiece. Crafted with just a few simple pantry staples, prepared in one bowl, and requiring only a couple of minutes of hands-on time, you’ll create pure magic that adds unparalleled texture and flavor. The best part? This versatile streusel can be sprinkled on before baking, or even baked separately to be enjoyed as a gourmet granola, a delightful topping for yogurt, or a crunchy addition to various desserts.
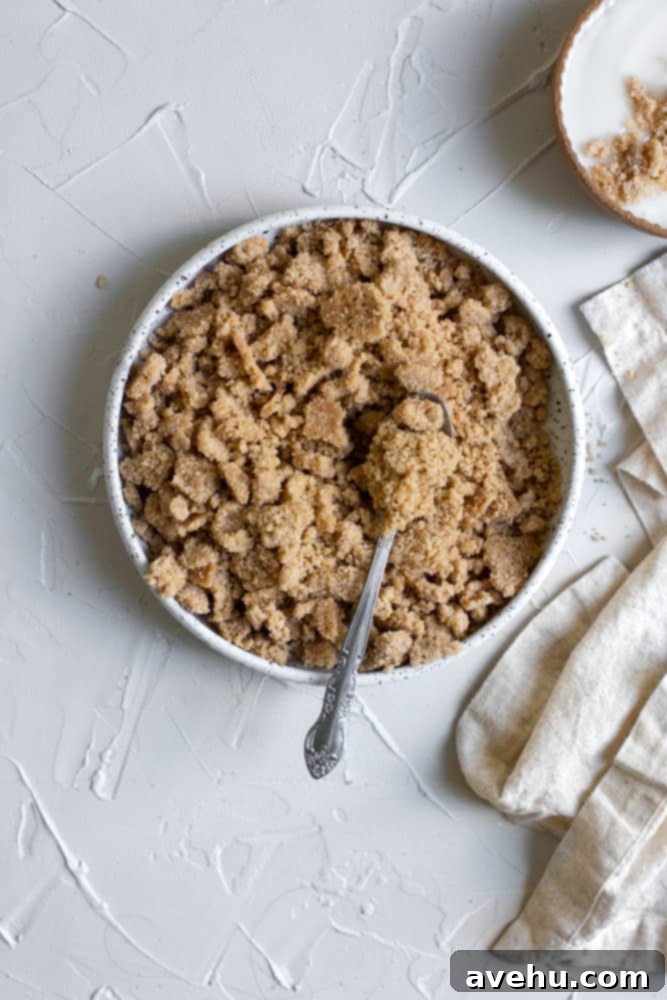
The origin of this particular streusel recipe was a stroke of pure culinary experimentation. While baking a batch of my delightful mini berry coffee cakes, I found myself with some leftover streusel – arguably the best part of any coffee cake, in my opinion! Rather than letting it go to waste, a thought sparked: “What would happen if I just baked this leftover streusel on its own?” As a trained pastry chef, my kitchen is a constant playground for culinary exploration. Some experiments are triumphs, others learning experiences, but this time, it was an absolute triumph!
The result was a revelation: perfectly golden, incredibly crunchy, and utterly delicious streusel crumbs that were delightful even on their own. This serendipitous discovery quickly transformed into a staple in my baking repertoire, becoming the go-to recipe for an easy crumb topping.
My personal preference for streusel leans towards the classic: no oats, no nuts, just pure, buttery, sugary crumbs that bake up flawlessly golden and crunchy. This allows the simple yet rich flavors to truly shine. The magic happens with a carefully balanced combination of all-purpose flour for structure, both brown and granulated sugars for complex sweetness and varied texture, a touch of warm cinnamon for aromatic depth, a pinch of salt to enhance all the flavors, and critically, very cold butter. This specific blend ensures maximum crispiness and that delightful crumble in every bite.
This versatile and delicious streusel topping has since become my favorite addition to a wide array of baked goods. I use it to give high-domed lemon muffins an exquisite bakery-style flourish, or to transform a simple carrot bundt cake into an elegant dessert. It provides that irresistible sweet, buttery, and crunchy finish without any fuss, making every bake feel a little more special and professional.
The most exciting part of this discovery, however, was realizing its potential beyond just dessert toppings. The next day, I found myself spooning the pre-baked streusel into my morning yogurt, treating it like the most bougiest, homemade granola imaginable. This meant no more wasting any precious leftover streusel, truly making it a zero-waste (and utterly delicious) addition to my kitchen!
Essential Ingredients for Your Perfect Streusel Crumb Topping
Creating this spectacular streusel topping is surprisingly straightforward, relying on a few fundamental ingredients you likely already have on hand. The secret to its success lies not only in the ingredients themselves but also in their quality and preparation. Here’s a detailed look at what you’ll need to make this easy, homemade streusel recipe:
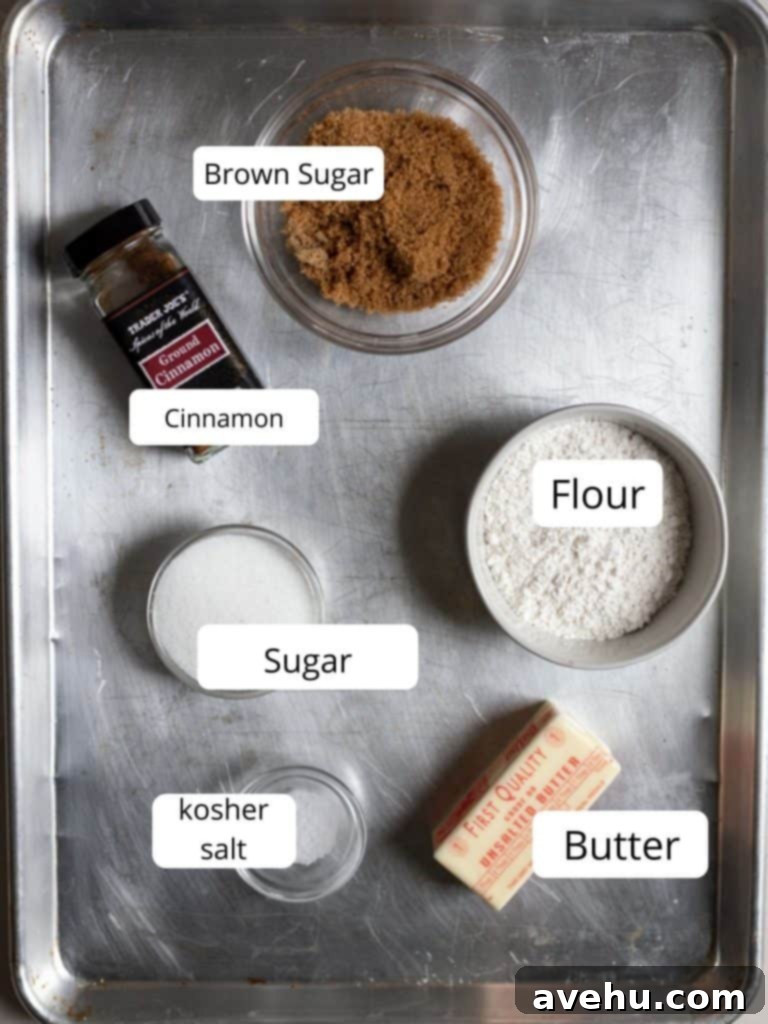
Cold Butter: The Cornerstone of a Crumbly Streusel
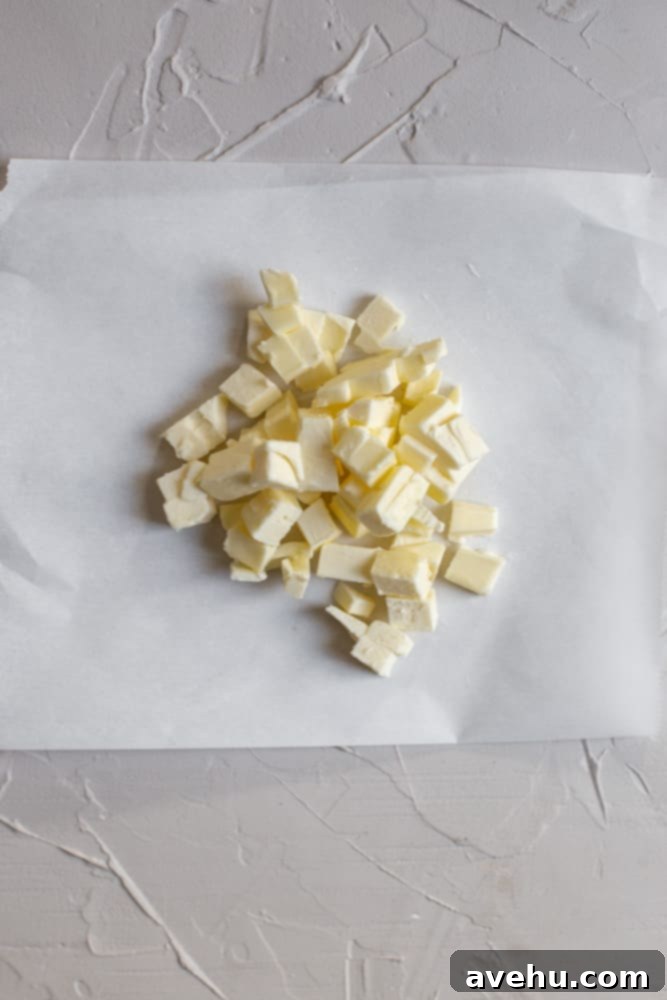
The absolute most critical ingredient in this easy streusel recipe is **cold butter**. Seriously, take it straight from the fridge and keep it cold until the very moment you start mixing. Why is cold butter so essential for a perfect crumb topping? When small pieces of cold butter are worked into the dry ingredients, they remain as distinct, solid pieces. As the streusel bakes, the moisture within these cold butter pieces quickly turns into steam, creating tiny pockets of air that separate the flour and sugar mixture. This process is what yields those wonderfully crunchy, flaky, and distinct streusel crumbs. If the butter is at room temperature or even slightly softened, it will melt too quickly and combine too readily with the dry ingredients, resulting in a greasy, cake-like texture rather than the desired crumbly topping. So, resist the urge to soften your butter for this recipe!
The Perfect Sugar Blend for Sweetness and Texture
- All-Purpose Flour: This is the structural backbone of your streusel. It binds with the butter and sugars to form the foundational crumbs. Ensure it’s fresh for optimal results.
- Brown Sugar: This provides a beautiful depth of flavor with its inherent molasses notes, contributing to a slightly chewier and richer texture. It also helps the streusel achieve a lovely golden-brown hue as it bakes.
- Granulated Sugar: Offering a pure, clean sweetness, granulated sugar contributes to the crispness of the streusel. The combination of both brown and granulated sugars ensures a balanced flavor profile and a satisfying crunch.
Aromatic Spices and Flavor Balancers
- Cinnamon: A timeless addition to streusel, cinnamon imparts a comforting warmth and an inviting aroma. It pairs beautifully with virtually any fruit or dessert. You can adjust the quantity from 1/4 to 1/2 teaspoon based on your personal preference for a stronger cinnamon kick.
- Kosher Salt: Often underestimated, salt is a powerhouse flavor enhancer. In sweet recipes like this streusel, it plays a crucial role in balancing the sweetness of the sugars and making all the other flavors pop. Don’t leave it out!
The “Pinching” Method: Achieving Perfect Crumbs Without a Pastry Cutter
Many traditional crumb topping recipes instruct you to “cut in the butter” using a specialized tool like a pastry cutter or pastry blender. While these tools are effective for incorporating cold butter into dry ingredients until a crumbly mixture forms, they aren’t a necessity. The good news is, you don’t need fancy equipment to make fantastic streusel – I don’t even own a pastry cutter myself!
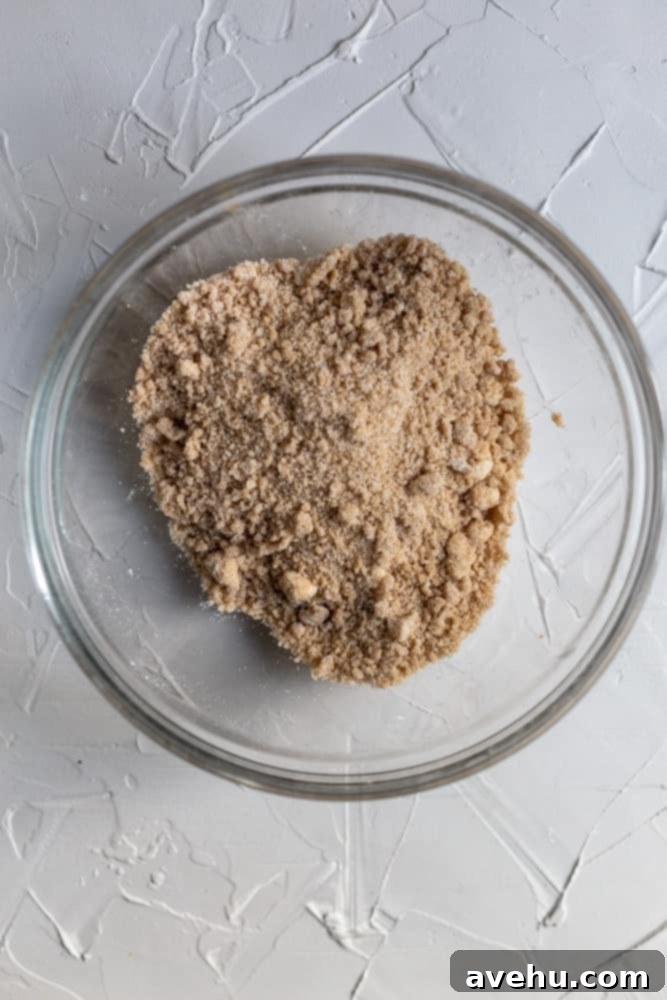
My preferred method is the “pinching” technique, which uses only your fingertips. This hands-on approach is incredibly intuitive and effective. Here’s how it works: after combining your dry ingredients and adding the diced cold butter, you simply use your thumb and forefingers to gently pinch and rub the butter pieces into the flour mixture. The goal is to break down the butter into small, pea-sized clumps, ensuring each tiny piece of butter is coated with the flour. This method gives you excellent control, allowing you to feel the texture evolve and ensuring the butter remains cold, which is vital for that signature crunchy streusel. It’s also a wonderfully sensory experience and a perfect task for little helpers in the kitchen, making it a great kid-friendly recipe!
How to Make the Best Homemade Streusel: Step-by-Step Guide
Ready to create this incredibly versatile and delicious streusel? Follow these detailed instructions to achieve perfect, golden, and crunchy results every single time. Whether you plan to sprinkle it directly onto your next bake or prepare it ahead of time for later use, these steps will guide you through the process.
Recipe Tips for Perfect Streusel Every Time
While this streusel recipe is wonderfully simple, a few expert tips can guarantee consistently fantastic results. Mastering these nuances will ensure your crumb topping is always bakery-worthy and never disappoints.
- Achieving the Ideal Crumb: If your streusel mixture doesn’t form distinct crumbs and instead turns into a sticky, uniform dough, it’s likely that your butter wasn’t cold enough, or you might have used a little too much butter. Ensure your butter is ice-cold and cut into small pieces to prevent it from melting prematurely and blending into the flour. If this happens, you can try adding a tablespoon or two more flour and gently mixing it in.
- Preventing Greasiness: A streusel that feels overly greasy or oily often indicates that the butter wasn’t evenly distributed throughout the dry ingredients, or the ratio of butter to flour is slightly off. If you notice greasiness, incorporate an additional tablespoon or two of flour, pinching it in lightly until the mixture achieves a more crumbly and less oily texture.
- Customizing with Add-ins: This recipe focuses on a classic, pure streusel, intentionally free of nuts and oats to let the buttery flavor shine. However, if you love those additions, feel free to customize! You can fold in about ½ cup of finely chopped nuts (such as pecans, walnuts, or sliced almonds) or ¼ cup of rolled oats into the dry ingredients before you add the butter, for an added layer of flavor and texture.
- Layering in Baked Goods: Don’t limit this streusel to just topping! It’s fantastic for layering inside cakes, especially coffee cakes or bundt cakes. Simply sprinkle a portion of the unbaked streusel over a layer of batter, then add the remaining batter on top. This creates a delightful surprise texture within the cake itself.
- A Fun Activity for All Ages: The “pinching” method used in this recipe makes it an excellent choice for a family baking project. Kids love getting their hands involved, and the tactile nature of mixing the butter with their fingers is both engaging and educational. They’ll be proud to help create such a delicious topping!
- The Importance of Chilling: The chilling step in the freezer is not just a suggestion; it’s a crucial step for achieving the crispiest streusel. Re-solidifying the butter ensures it melts slowly and creates maximum steam pockets during baking, resulting in that coveted airy and crunchy texture.
Serving Suggestions: Beyond Muffins and Cakes
This easy streusel crumb topping is incredibly versatile and can enhance a multitude of dishes beyond your typical muffins and cakes. Here are some creative and delicious ways to enjoy your homemade streusel:
- Coffee Cakes and Quick Breads: This is its natural home! A generous sprinkle before baking is a classic pairing.
- Fruit Crisps and Crumbles: Substitute this buttery streusel for a traditional oat-based topping in your favorite fruit crisp or crumble recipes. It adds a rich, cinnamon-spiced crust that’s perfect over baked apples, berries, peaches, or plums.
- Yogurt Parfaits: As discovered through happy accident, baked streusel makes a truly gourmet “granola.” Layer it with creamy yogurt and fresh seasonal fruits for an indulgent breakfast or a satisfying, healthy-ish snack.
- Pancakes and Waffles: Elevate your breakfast or brunch by sprinkling freshly baked streusel over warm pancakes or waffles, perhaps with a drizzle of maple syrup or a dollop of whipped cream.
- French Toast: Add a delightful textural contrast to your French toast by scattering pre-baked streusel on top just before serving.
- Ice Cream Topping: A spoonful of warm, baked streusel over a scoop of vanilla bean, salted caramel, or even chocolate ice cream is an absolute dream dessert. The contrast of warm and cold, crunchy and creamy, is simply irresistible.
- Glazed Donuts and Sweet Rolls: Take store-bought or homemade glazed donuts and cinnamon rolls to the next level with a scattering of this homemade crumb topping for an extra layer of sweetness and crunch.
- Baked Pears or Apples: Core and bake half-pears or apples with a dollop of streusel in the center for a simple yet elegant dessert.
Storage and Make-Ahead Tips for Your Streusel
One of the many benefits of this easy streusel recipe is its excellent make-ahead and storage capabilities. Having a batch ready means you’re always just moments away from elevating your next bake.
- Storing Unbaked Streusel: You can prepare the streusel mixture up to 3-4 days in advance. Simply transfer the unbaked streusel into an airtight container or a zip-top bag and store it in the refrigerator. When you’re ready to use it, just pull it out and sprinkle it over your baked goods as directed in your recipe. For even longer storage, unbaked streusel freezes beautifully for up to 2-3 months. Thaw it slightly in the refrigerator before using for best results.
- Storing Baked Streusel: If you’ve baked the streusel on its own (for use as granola or a post-bake topping), allow it to cool completely on the baking sheet before storing. Once fully cooled, transfer the crunchy crumbs to an airtight container. It will keep well at room temperature for up to 1 week. For extended freshness, baked streusel can also be frozen for up to 3 months. Simply thaw it at room temperature, and it will retain its wonderful crunch.
Frequently Asked Questions about Streusel Crumb Topping
Curious about certain aspects of making or using this delicious streusel? Here are answers to some common questions that often arise:
- Can I add nuts or oats to this streusel recipe? While this particular recipe is designed for a classic, pure buttery crumb (without nuts or oats), you can absolutely customize it if you prefer! Simply stir in about ½ cup of finely chopped nuts (such as pecans, walnuts, or almonds) or ¼ cup of old-fashioned rolled oats along with the dry ingredients before you incorporate the cold butter. This will create a different, but equally delicious, texture and flavor profile.
- What if my streusel turns out greasy instead of crumbly? Greasy streusel is typically a sign that the butter was not cold enough when mixed, or it was over-mixed, causing the butter to melt and blend too much. Ensure your butter is ice-cold, diced small, and work quickly with your fingertips. If it happens, you can sometimes salvage it by adding an extra tablespoon or two of flour and gently mixing it in until it becomes more crumbly.
- Can I make this streusel gluten-free? I have not personally tested this specific recipe with gluten-free flour. However, generally, a 1:1 gluten-free baking flour blend (one that already contains xanthan gum) should work as a substitute for all-purpose flour. The final texture might vary slightly, but it should still yield a delicious crumb topping.
- How do I prevent the streusel from sinking into the batter? For denser batters like those in most coffee cakes or quick breads, sinking isn’t usually an issue. For lighter batters (like some muffin recipes), chilling the streusel thoroughly before topping can help. You can also try filling your muffin tins or cake pans halfway, sprinkling some streusel, then adding the remaining batter, and finally topping with more streusel just before baking.
- Can I double or triple this streusel recipe? Absolutely! This recipe scales up very easily. Just ensure you maintain the correct ratios of all ingredients. If you’re making a very large batch, you might want to work in smaller portions to ensure the butter stays cold throughout the mixing process.
Easy Streusel Crumb Topping (No Nuts or Oats)
Pin
Review
SaveSaved!
Ingredients
- 1 cup all-purpose flour
- 1/2 cup brown sugar
- 1/4 cup granulated sugar
- 1/4-1/2 tsp cinnamon, depending on preference
- 1/4 tsp kosher salt
- 6 tbsp cold butter, diced small
Instructions
-
Preheat your oven to 350°F (175°C). If you plan to bake the streusel on its own (not on top of another dessert), line a rimmed baking sheet with parchment paper. If you’re using it as a topping for another dessert, you will follow that recipe’s specific baking instructions.
-
In a medium mixing bowl, combine the 1 cup all-purpose flour, 1/2 cup brown sugar, 1/4 cup granulated sugar, your preferred amount of cinnamon (1/4 -1/2 tsp), and 1/4 tsp kosher salt. Whisk these dry ingredients together thoroughly to ensure they are well combined.
-
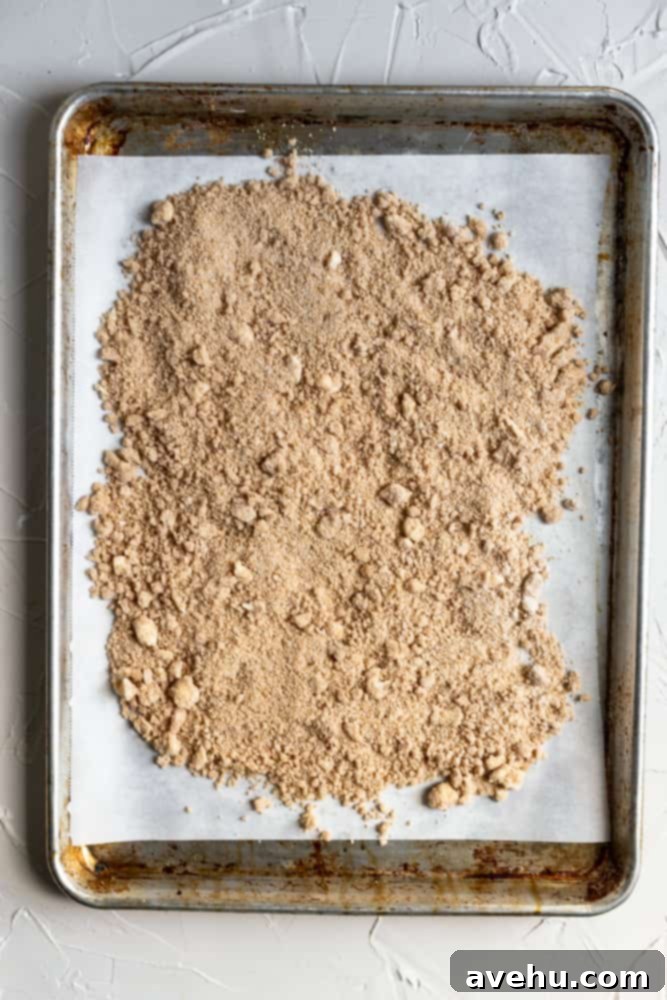
Add the 6 tablespoons of diced, cold butter to the dry mixture. Using your fingertips, gently pinch and rub the butter into the dry ingredients. Continue this motion until small, distinct clumps are formed, ideally no larger than the size of a pea. The overall texture should resemble coarse, wet sand with these small butter clumps distributed throughout. Be careful not to overmix, as the warmth from your hands can melt the butter too much.
-
For the best possible texture and maximum crunch, place the prepared streusel mixture in the freezer for 20 minutes to chill thoroughly. This step is crucial as it helps re-solidify the butter, preventing it from melting too quickly in the oven and ensuring crispier results.
-
To use as a topping for other baked goods (e.g., muffins, coffee cakes, pies): Evenly sprinkle the chilled streusel over your desired unbaked dessert. Then, follow the specific recipe directions for baking time and temperature that apply to that particular baked good.
-
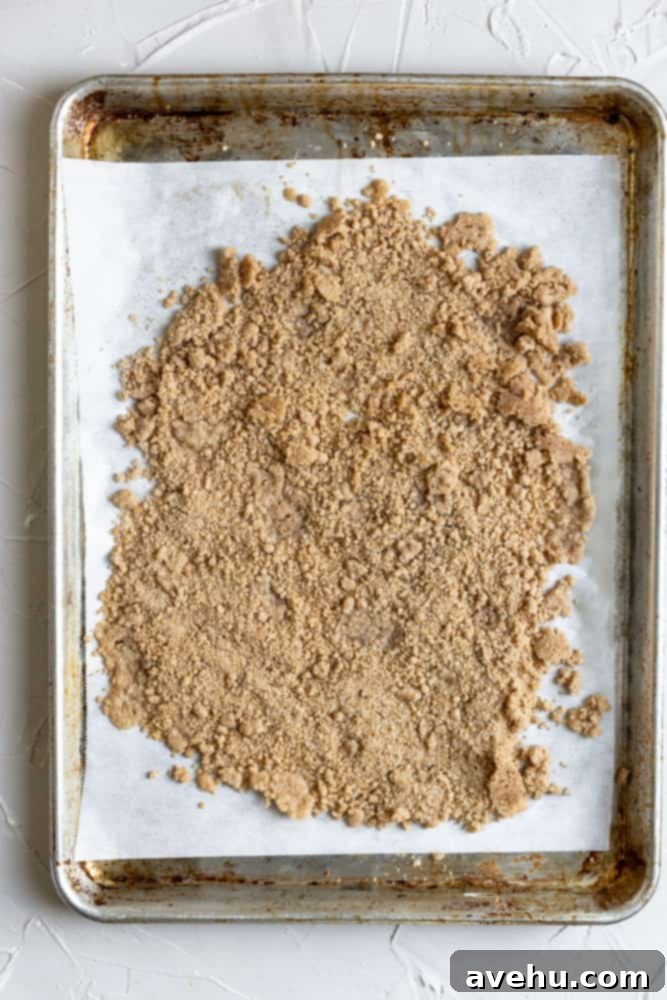
To bake ahead (for use as granola or a post-bake topping): Spread the chilled streusel evenly onto your prepared baking sheet (lined with parchment paper). Bake for 10-12 minutes, or until the streusel is beautifully golden brown and fragrant. Keep a close eye on it, as oven temperatures and baking times can vary. If some larger chunks of butter melted and spread, don’t worry, as you will break it up after cooling.
-
Once the streusel (whether baked on its own or on top of another dessert) has cooled completely, gently break up any larger clumps with your fingers or a fork to create uniform, smaller crumbs. Sprinkle generously over desserts, yogurt, or enjoy simply as a delicious, crunchy snack.
Notes
If you choose to bake the streusel by itself, make sure to keep a close watch on the oven to ensure it doesn’t burn. Baking times can vary depending on your oven; in my experience, it’s typically done after about 10-12 minutes, or once beautifully golden brown.
Store any leftover baked streusel in an airtight container at room temperature for up to a week, or freeze for longer storage. Unbaked streusel can be stored in the refrigerator for a few days or frozen for up to 2-3 months.
