Easy Southern Caramel Cake: Layers of Moist Vanilla with Dreamy Caramel Buttercream
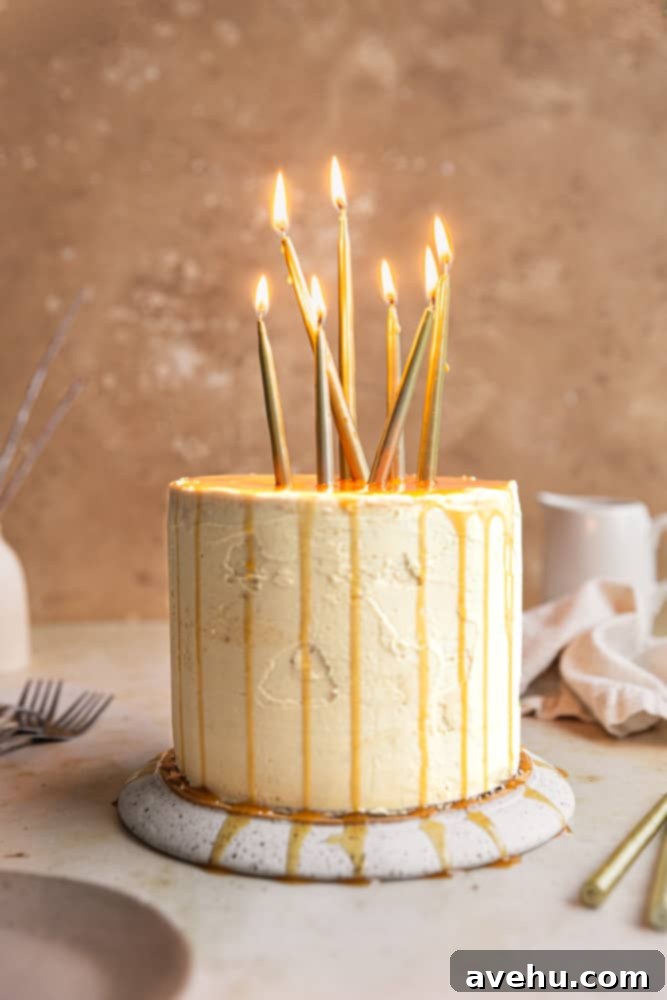
Calling all caramel enthusiasts! This simplified Southern Caramel Cake recipe offers luscious layers of rich vanilla cake generously enrobed in a truly heavenly caramel buttercream frosting. It’s the perfect dessert for any occasion, whether you’re bringing it to a potluck, celebrating birthdays throughout the year, or simply enjoying a slice with a warm cup of coffee on a lazy afternoon. This approachable recipe ensures that even novice bakers can achieve a show-stopping dessert that tastes like it came from a professional bakery.
Southern Caramel Cake is a beloved classic, cherished for its deep, comforting flavors and often associated with intricate, time-consuming preparation. Traditional recipes typically involve making a boiled caramel frosting that requires precise temperature control with a candy thermometer – a step that can intimidate many home bakers. However, this delightful cake draws inspiration from that rich tradition but reimagines it with a focus on simplicity and accessibility. It delivers all the nostalgic flavors of a classic Southern caramel cake but with significantly less fuss, making it a “labor of love” in the most enjoyable sense.
Our easy caramel cake features multiple layers of incredibly moist, tender, and buttery yellow cake. Each layer is generously slathered with the FLUFFIEST caramel buttercream frosting you’ll ever taste, and the best part? Absolutely no candy thermometer is needed for the frosting! As a trained pastry chef, I understand the desire for impressive results without overly complex steps. This recipe truly simplifies the process without compromising on flavor or texture, making sophisticated baking achievable for everyone.
To crown this masterpiece, an optional yet highly recommended decorative caramel glaze adds the perfect finishing touch. This ensures there’s no shortage of rich, buttery caramel flavor throughout every bite of this exquisite cake. If your craving for caramel runs deep, don’t stop here! You might also love our irresistible caramel cupcakes or the decadent salted caramel cheesecake, complete with homemade bourbon caramel sauce. But for now, let’s dive into baking this incredible caramel cake!
New to baking? Don’t worry, I’ve got you covered. For anyone who’s ever had a cake sink in the middle, I have a dedicated post on why cakes sink in the middle to equip you with the knowledge and confidence needed for successful cake baking. With these tips, you’ll be baking like a pro in no time!
Why You’ll Love Baking This Easy Caramel Cake
This caramel cake recipe is designed to be both rewarding and incredibly delicious. Here’s why it deserves a spot in your baking repertoire:
- Perfect for Beginners: Unlike many traditional recipes, this cake is surprisingly easy to make from scratch, guiding you through each step for a flawless result. We’ve streamlined the process to eliminate common baking anxieties, making it accessible even if you’re just starting your baking journey.
- Simplified Southern Charm: This is a beautifully streamlined version of the traditional Southern caramel cake. The most significant simplification? NO candy thermometer is needed for the rich, flavorful caramel buttercream, removing a major hurdle that often deters bakers from trying classic caramel cake recipes.
- The Frosting is Truly AMAZING: Prepare for a caramel buttercream that is light, fluffy, and bursting with genuine caramel flavor. It’s the star of the show, perfectly complementing the moist vanilla cake layers and making every bite an unforgettable experience. This frosting is so good, you’ll want to put it on everything!
Essential Ingredients for Your Caramel Cake
Crafting the perfect caramel cake starts with selecting the right ingredients. Here’s a breakdown of what you’ll need and why each component is crucial for achieving that irresistible moist texture and rich flavor profile:
- All-purpose flour: This is the structural backbone of your cake. Flour absorbs the wet ingredients to form a stable batter that bakes into a soft, yet sturdy cake. For best results, measure it precisely by spooning it into the measuring cup and leveling off, rather than scooping directly, to avoid over-measuring.
- Baking powder & baking soda: This powerful duo of leavening agents creates a chemical reaction when combined with the wet ingredients, producing carbon dioxide bubbles. These bubbles expand during baking, causing the batter to rise into a wonderfully light and fluffy cake with a tender crumb.
- Kosher salt: A pinch of salt is crucial for enhancing all the other flavors in the cake. It balances the sweetness and brings out the nuanced notes of vanilla and caramel, making the overall taste more complex and satisfying.
- Unsalted butter: Butter is key for a moist, tender crumb and imparts a rich, luxurious flavor. Using unsalted butter allows you to control the exact amount of salt in the recipe. Ensure it’s at room temperature for proper creaming with the sugars.
- Granulated sugar & brown sugar: This recipe utilizes two types of sugar, each playing an essential role. Granulated sugar contributes to the cake’s fluffy texture and structure, while brown sugar adds moisture, depth of flavor, and a subtle molasses note that complements the caramel perfectly.
- Whole eggs & egg whites: Eggs act as binders, creating a cohesive cake batter that sets beautifully as it bakes. Including both whole eggs (for richness and color) and additional egg whites (for a lighter, airier texture and a classic yellow cake hue) contributes to the cake’s delightful structure and moistness. Ensure they are at room temperature for optimal incorporation.
- Vanilla extract: A generous amount of good quality vanilla extract significantly enhances the cake’s overall flavor profile, adding warmth and depth that pairs wonderfully with caramel.
- Buttermilk: This acidic ingredient is a secret weapon for moist cakes. Buttermilk reacts with the baking soda to promote a tender crumb, while its slight tang adds a subtle complexity to the flavor. If you don’t have buttermilk, you can make a substitute by adding 1 tablespoon of lemon juice or white vinegar to a measuring cup, then filling the rest with whole milk to make 1 cup. Let it sit for 5-10 minutes before using.
- Caramel buttercream: The star frosting! You will need softened butter, powdered sugar, either homemade or quality store-bought caramel sauce, milk (or cream), and a pinch of salt to balance the sweetness. This frosting is designed for maximum flavor and an incredibly smooth, spreadable consistency.
- Caramel drizzle: For an extra layer of caramel decadence, a drizzle is highly recommended. You have two convenient options: you can melt down caramel bits (ensure they are bits, not squares, for easier melting) with a splash of water or cream in the microwave for about 2 minutes. Alternatively, you can prepare your own easy caramel glaze for a homemade touch.
Choosing the Right Cake Pans
The type and size of your cake pans can significantly impact baking time and the final appearance of your cake. This recipe is quite versatile and can be adapted to different pan sizes. I personally tested this recipe using three 6-inch cake pans, each filled with approximately 575 grams of batter. While these pans resulted in fairly tall cake layers, they baked up perfectly, creating beautiful, lofty tiers.
You have the flexibility to bake this cake in either three 6-inch pans, as I did, or three 8-inch cake pans. When using 8-inch pans, the batter will spread more thinly, resulting in shorter layers and a reduced baking time of approximately 30-35 minutes. If you opt for 6-inch pans, which yield taller layers, the baking time will extend to around 45 minutes to ensure the cakes are fully cooked through to the center. Always use the toothpick test to confirm doneness.
For a more casual presentation or to feed a larger crowd, this recipe can also be transformed into a delicious sheet cake. If baking as a sheet cake (e.g., in a 9×13-inch pan), begin checking for doneness after 35-40 minutes, as baking times will vary depending on the pan’s dimensions and depth.
How to Bake Your Perfect Caramel Cake
Follow these detailed steps to create a moist and delicious caramel cake, from preparing your pans to cooling your perfectly baked layers.
Step 1: Prepare for Baking. Begin by preheating your oven to 350°F (175°C). This ensures your oven is at the correct temperature before the batter goes in, promoting even baking. Generously spray three 6-inch or three 8-inch baking pans with a non-stick baking spray, ensuring every crevice is covered to prevent sticking. You can also line the bottoms with parchment paper for extra insurance.
Step 2: Whisk Dry Ingredients. In a medium-sized bowl, combine the all-purpose flour, baking powder, baking soda, and kosher salt. Use a whisk to thoroughly combine these ingredients for about 30 seconds. Whisking helps to evenly distribute the leavening agents and salt throughout the flour, preventing pockets of unmixed ingredients and ensuring a consistent rise and flavor in your cake.
Step 3: Mix Wet Ingredients. In a large mixing bowl, using either a hand mixer or a stand mixer fitted with the paddle attachment, cream together the softened unsalted butter with both the granulated sugar and brown sugar. Beat on medium speed for about 2 minutes, until the mixture is light in color and fluffy. This “creaming” process incorporates air into the butter and sugar, which contributes to the cake’s light texture. Scrape down the sides of the bowl with a spatula to ensure everything is well combined. Then, add the whole eggs, egg whites, and vanilla extract. Mix for another minute on medium speed until fully incorporated and smooth.
Step 4: Combine Dry and Wet Batters. This step requires a gentle hand to avoid overmixing. Add one-third of the dry flour mixture into the wet batter, mixing on low speed until just combined. Follow this with half of the buttermilk, mixing until smooth. Repeat the process: add another one-third of the dry mixture, then the remaining buttermilk. Finally, add the rest of the dry mixture and mix only until no streaks of flour remain. Overmixing at this stage can develop the gluten in the flour too much, leading to a tough, dense cake. Mix just enough to combine.
Step 5: Pour Batter and Bake. Evenly divide the prepared cake batter among your three baking pans (either 6-inch or 8-inch, depending on your choice). For perfectly even layers, you can use a kitchen scale to measure the batter in each pan. Place the pans in the preheated oven. If you are baking in 8-inch pans, they will typically bake for 30-35 minutes. If you’re using 6-inch pans, which create taller cakes, the baking time will be closer to 45 minutes. The cakes are done when a wooden skewer or toothpick inserted into the center comes out clean or with a few moist crumbs attached.
Step 6: Cool. Once baked, remove the cakes from the oven and allow them to cool in their pans on a wire rack for precisely 10 minutes. This crucial resting period allows the cakes to firm up slightly, preventing them from breaking when removed. After 10 minutes, carefully invert the cakes onto the wire rack to finish cooling completely. Cooling on a wire rack allows air to circulate around all sides, preventing condensation and soggy bottoms. Ensure they are fully cooled to room temperature before attempting to frost, as warm cake will melt your buttercream.
Crafting the Perfect Caramel Frosting
The star of this cake, beyond the moist layers, is undoubtedly the caramel frosting. My caramel buttercream recipe was such a runaway hit that it simply demanded a cake to complement its rich flavor and fluffy texture! This frosting is wonderfully adaptable; you can make it with your favorite homemade caramel sauce (like our popular bourbon caramel sauce for an extra kick) or opt for a high-quality store-bought caramel sauce for convenience. Either choice will yield an incredibly delicious, smooth, and easily spreadable buttercream that perfectly embodies the essence of a classic Southern caramel cake without the fuss of a candy thermometer.
Decorating Your Caramel Masterpiece
Once your cake layers are completely cooled to room temperature (this is crucial to prevent the frosting from melting!), it’s time to bring your caramel cake to life. You can simply use an offset spatula to spread generous amounts of the rich caramel buttercream frosting between each cake layer, stacking them as you go to build an impressive tower of deliciousness. Then, apply a smooth, even layer over the top and sides of the cake for a rustic yet elegant finish.
For a more polished and professional look, consider piping the caramel icing. Transfer the buttercream to a piping bag fitted with your favorite star tip or a large round tip. Pipe decorative borders, swirls, or rosettes for an extra touch of elegance that will surely impress your guests.
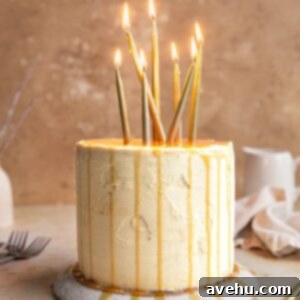
To complete your caramel cake and add an irresistible visual appeal, finish with an optional but highly recommended caramel glaze or a quick caramel drizzle. If using caramel bits, simply melt 6 ounces of caramel bits with 1 tablespoon of water or cream in the microwave for about two minutes, stirring until smooth. This creates a luscious, glossy sauce perfect for drizzling. Once cooled slightly, artfully drizzle the caramel over the top of your frosted cake, letting it cascade down the sides for a truly stunning presentation. This final touch not only looks beautiful but also adds another layer of intense caramel flavor.
Yield
This magnificent caramel cake is designed to feed a crowd, comfortably serving approximately 12 to 15 people. The exact number of servings will depend on how generously you cut your slices, but rest assured, there will be plenty to share (or to secretly keep for yourself!).
Expert Tips for Caramel Cake Success
Achieving a bakery-quality caramel cake at home is entirely possible with a few key techniques. These tips will help ensure your cake turns out perfectly moist, tender, and delicious every time:
- Measure Dry Ingredients Precisely: Accuracy in measuring dry ingredients, especially flour, is paramount. If you don’t have a kitchen scale (which is highly recommended for baking accuracy), always spoon your flour from the container into your measuring cup. Then, level it off with the back of a knife or a straight edge. Never scoop flour directly from the container with your measuring cup, as this compacts the flour and can result in using significantly more than needed, leading to a dry, dense cake.
- Ensure Room Temperature Ingredients: This is a non-negotiable step for moist cakes! Cold ingredients, like butter, eggs, and buttermilk, will not emulsify or incorporate evenly into the batter. This can lead to a lumpy batter and a dense, less tender final cake. Plan ahead and allow all perishable ingredients to sit out at room temperature for at least 30-60 minutes before you begin mixing. This allows them to blend seamlessly, creating a smooth, homogenous batter.
- Know When Your Cake is Done: The ideal doneness for this cake is when a wooden skewer or toothpick inserted into the very center comes out mostly clean, with perhaps a few moist crumbs clinging to it. If it comes out wet with batter, it needs more time. If it comes out completely dry, it might be slightly overbaked, though still delicious. Avoid opening the oven door too frequently during baking, especially in the first 20 minutes, as this can cause the cake to sink.
- Be Patient with Cooling: Resist the urge to rush the cooling process. Immediately after baking, allow the cakes to cool in their pans on a wire rack for exactly 10 minutes. This initial cooling in the pan allows the cake’s structure to set and prevents it from crumbling when inverted. After 10 minutes, carefully invert the cakes onto the wire rack to finish cooling completely to room temperature. This full cooling prevents residual heat from melting your buttercream and ensures a stable structure for frosting.
Storage and Freezing Guidelines
Proper storage is essential to keep your caramel cake fresh and delicious for as long as possible. Whether you’re enjoying it immediately or planning ahead, here’s how to store and freeze your cake:
Storage: Once frosted, this delectable caramel cake keeps wonderfully in an airtight container at room temperature for 2-3 days. If you prefer a slightly firmer frosting or need to extend its freshness, you can store it in the refrigerator for up to 5-7 days. Simply bring refrigerated slices to room temperature for about 15-20 minutes before serving to enjoy the best texture and flavor. If the cake layers are not yet frosted, they can be kept well-wrapped in plastic wrap at room temperature for up to 5 days, making it ideal for baking ahead.
Freezing: If you plan to freeze your cake, it’s best to do so before frosting. Wrap each cooled cake layer individually and tightly in several layers of plastic wrap, then an additional layer of aluminum foil. This double-layer protection prevents freezer burn and helps maintain moisture. Frozen cake layers will keep beautifully in the freezer for up to three months. When you’re ready to enjoy, transfer the wrapped cake rounds to the refrigerator and allow them to thaw overnight. Before frosting, unwrap them and let them come to room temperature on a wire rack for optimal frosting results.
Frequently Asked Questions (FAQ) About Caramel Cake
Here are answers to some common questions you might have about making and enjoying this delightful caramel cake:
Q: Can I prepare this cake ahead of an event?
A: Absolutely! This recipe is perfect for make-ahead convenience. You can bake the moist vanilla cake layers up to two days in advance. Once fully cooled, wrap each layer tightly in plastic wrap to prevent them from drying out, and store them at room temperature. On the day of your event, simply prepare the irresistible caramel buttercream, assemble, frost the cake, and decorate. This method significantly reduces stress on the day of serving, allowing you more time to enjoy the celebration.
Q: Can I transform this recipe into caramel cupcakes?
A: Yes, you certainly can! This versatile cake batter is perfect for making cupcakes. To do so, preheat your oven to 350°F (175°C). Prepare the vanilla cake batter and the luscious caramel frosting exactly as instructed in the main recipe. Line a muffin tin with cupcake liners, then fill each liner approximately two-thirds full with the cake batter. Bake the cupcakes for 18-20 minutes, or until a toothpick inserted into the center comes out clean. Allow them to cool in the muffin tin for 5 minutes before transferring them to a wire rack to cool completely. Once fully cooled, you can pipe or spread the caramel buttercream generously on top for delicious caramel cupcakes!
Q: What’s the best way to ensure my cake layers are perfectly flat?
A: To achieve flat cake layers ideal for stacking, you can try a few techniques. One popular method is using cake strips (wet strips of fabric wrapped around the outside of the pans before baking) which help the cakes bake more evenly. Alternatively, you can level any domed tops with a serrated knife once the cakes are completely cooled. This creates a neat, even surface for easy stacking and frosting.
Delicious Ways to Enjoy and Customize Your Caramel Cake
While the caramel buttercream is truly divine, the beauty of this vanilla cake base is its versatility! You can reinvent the flavor profile of this cake by simply pairing it with a different buttercream frosting. This opens up a world of possibilities for customizing your dessert to suit any preference or occasion. Here are a few irresistible alternatives:
- Classic Vanilla Buttercream: For a timeless and universally loved flavor, a smooth and creamy vanilla buttercream is always a winner. It provides a sweet, comforting contrast to the rich caramel cake layers.
- White Chocolate Buttercream: Elevate your cake with the luxurious sweetness of white chocolate. This frosting adds a delicate richness and a silky texture that pairs beautifully with the moist cake.
- Brown Sugar Buttercream: For an even deeper, warmer flavor profile that leans into the caramel notes, a brown sugar buttercream is an excellent choice. Its subtle molasses undertones complement the caramel perfectly.
- Coconut Buttercream: Bring a touch of tropical flair to your Southern classic. Coconut buttercream adds a delicate sweetness and exotic aroma that creates a delightful flavor combination.
- Marshmallow Frosting: For a whimsical and incredibly fluffy topping, a marshmallow frosting offers a light, airy sweetness that provides a delightful texture contrast to the dense cake.
No matter how you choose to frost it, this vanilla cake base is guaranteed to be a hit. Enjoy experimenting and making this cake uniquely yours!
Moist 3 Layer Easy Caramel Cake
Pin
Review
SaveSaved!
Ingredients
- 3.5 cups all-purpose flour, (420g), spooned and leveled
- 2 tsp baking powder
- 1 tsp baking soda
- 1 tsp kosher salt
- 1 cup unsalted butter, (227g), softened to room temperature
- 1 cup granulated sugar, (200g)
- 1 cup light brown sugar, (190g), packed
- 2 large eggs, at room temperature
- 3 large egg whites, at room temperature (yolks discarded)
- 1 tbsp vanilla extract
- 1 cup buttermilk, at room temperature
- 6 oz caramel bits, (for optional drizzle, ensure they are bits, not squares)
- 1 Tbsp water, or heavy cream (for optional caramel drizzle)
- For Caramel Buttercream: Refer to my Caramel Buttercream Frosting recipe linked above for exact ingredients.
Instructions
-
Preheat your oven to 350°F (175°C). Generously spray three 6-inch or three 8-inch baking pans with non-stick baking spray. This prepares your pans for easy cake removal.
-
In a medium-sized bowl, combine the 3 1/2 cups of all-purpose flour, 2 tsp baking powder, 1 tsp baking soda, and 1 tsp kosher salt. Whisk these dry ingredients together thoroughly for about 30 seconds until well combined, ensuring even distribution.
-
 In the bowl of a hand mixer or stand mixer fitted with the paddle attachment, cream the 1 cup unsalted butter with the 1 cup granulated sugar and the 1 cup packed brown sugar. Beat until the mixture is light, fluffy, and creamy, which should take about 2 minutes on medium speed.
 -
Scrape down the sides of the bowl to ensure all ingredients are incorporated. Then, add the 2 large eggs, 3 large egg whites, and 1 tbsp vanilla extract. Mix for 1 minute on medium speed until the mixture is smooth and fully combined.
-
 Begin incorporating the dry ingredients and buttermilk in alternating additions. Add 1/3rd of the dry mixture to the wet batter and mix on low speed until just combined. Next, add half of the buttermilk and mix until smooth. Repeat with another 1/3rd of the dry mixture, then the remaining buttermilk. Finally, add the last 1/3rd of the dry mixture. Mix only until no streaks of flour remain; do not overmix, as this can result in a dense cake.
 -
 Divide the batter evenly into your prepared baking pans. Bake for 30-35 minutes if using 8-inch pans. If you are using 6-inch cake pans, the cakes will be taller and require a longer baking time, typically around 45 minutes. The cakes are done when a toothpick inserted into the center comes out with minimal moist crumbs.
 -
Once the cakes have cooled in their pans for 10 minutes and then completely on a wire rack, prepare the caramel buttercream frosting according to the recipe linked. Once made, fill and frost your cooled cake layers.
-
 For an optional caramel drizzle, microwave 6 oz of caramel bits with 1 tbsp of water or cream for two minutes, stirring until smooth. Drizzle generously over the frosted cake. Alternatively, you can make your own easy caramel glaze to achieve a similar beautiful and delicious finish.
Notes
Did you make this recipe?Please leave a star rating and review in the form below. I read them all!
