Decadent Chocolate Cherry Cheesecake: Your Ultimate No-Crack Recipe Guide
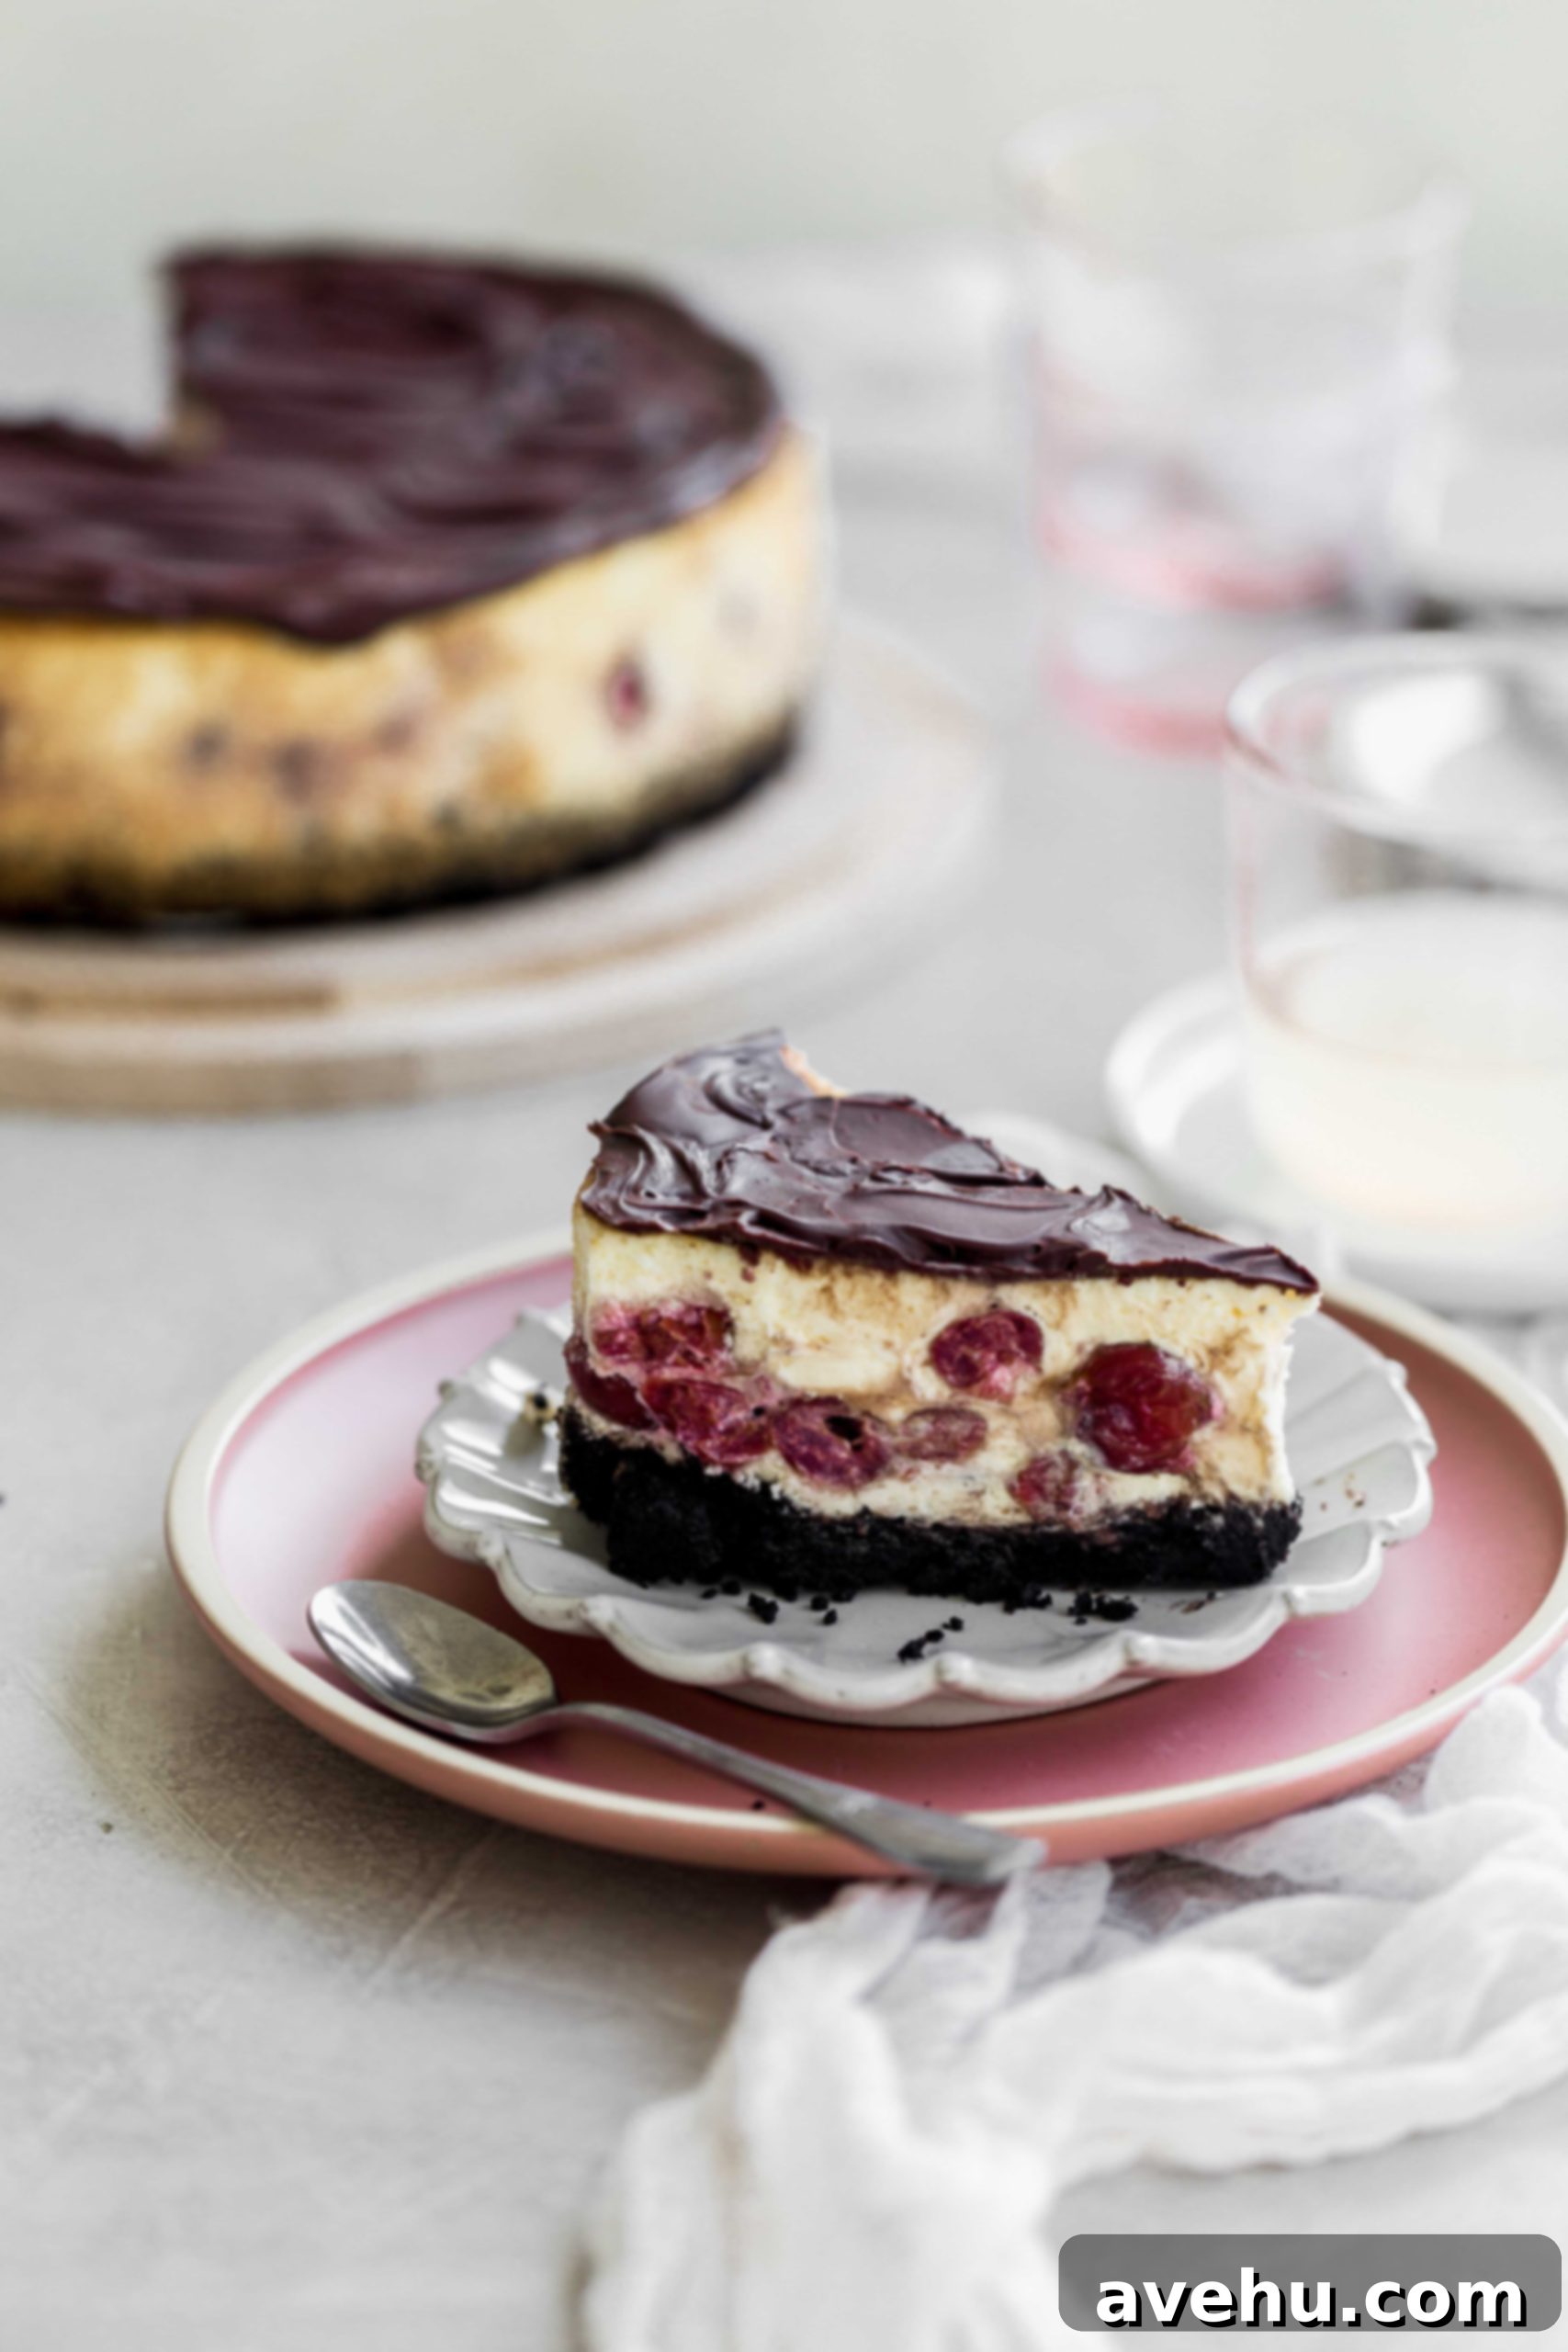
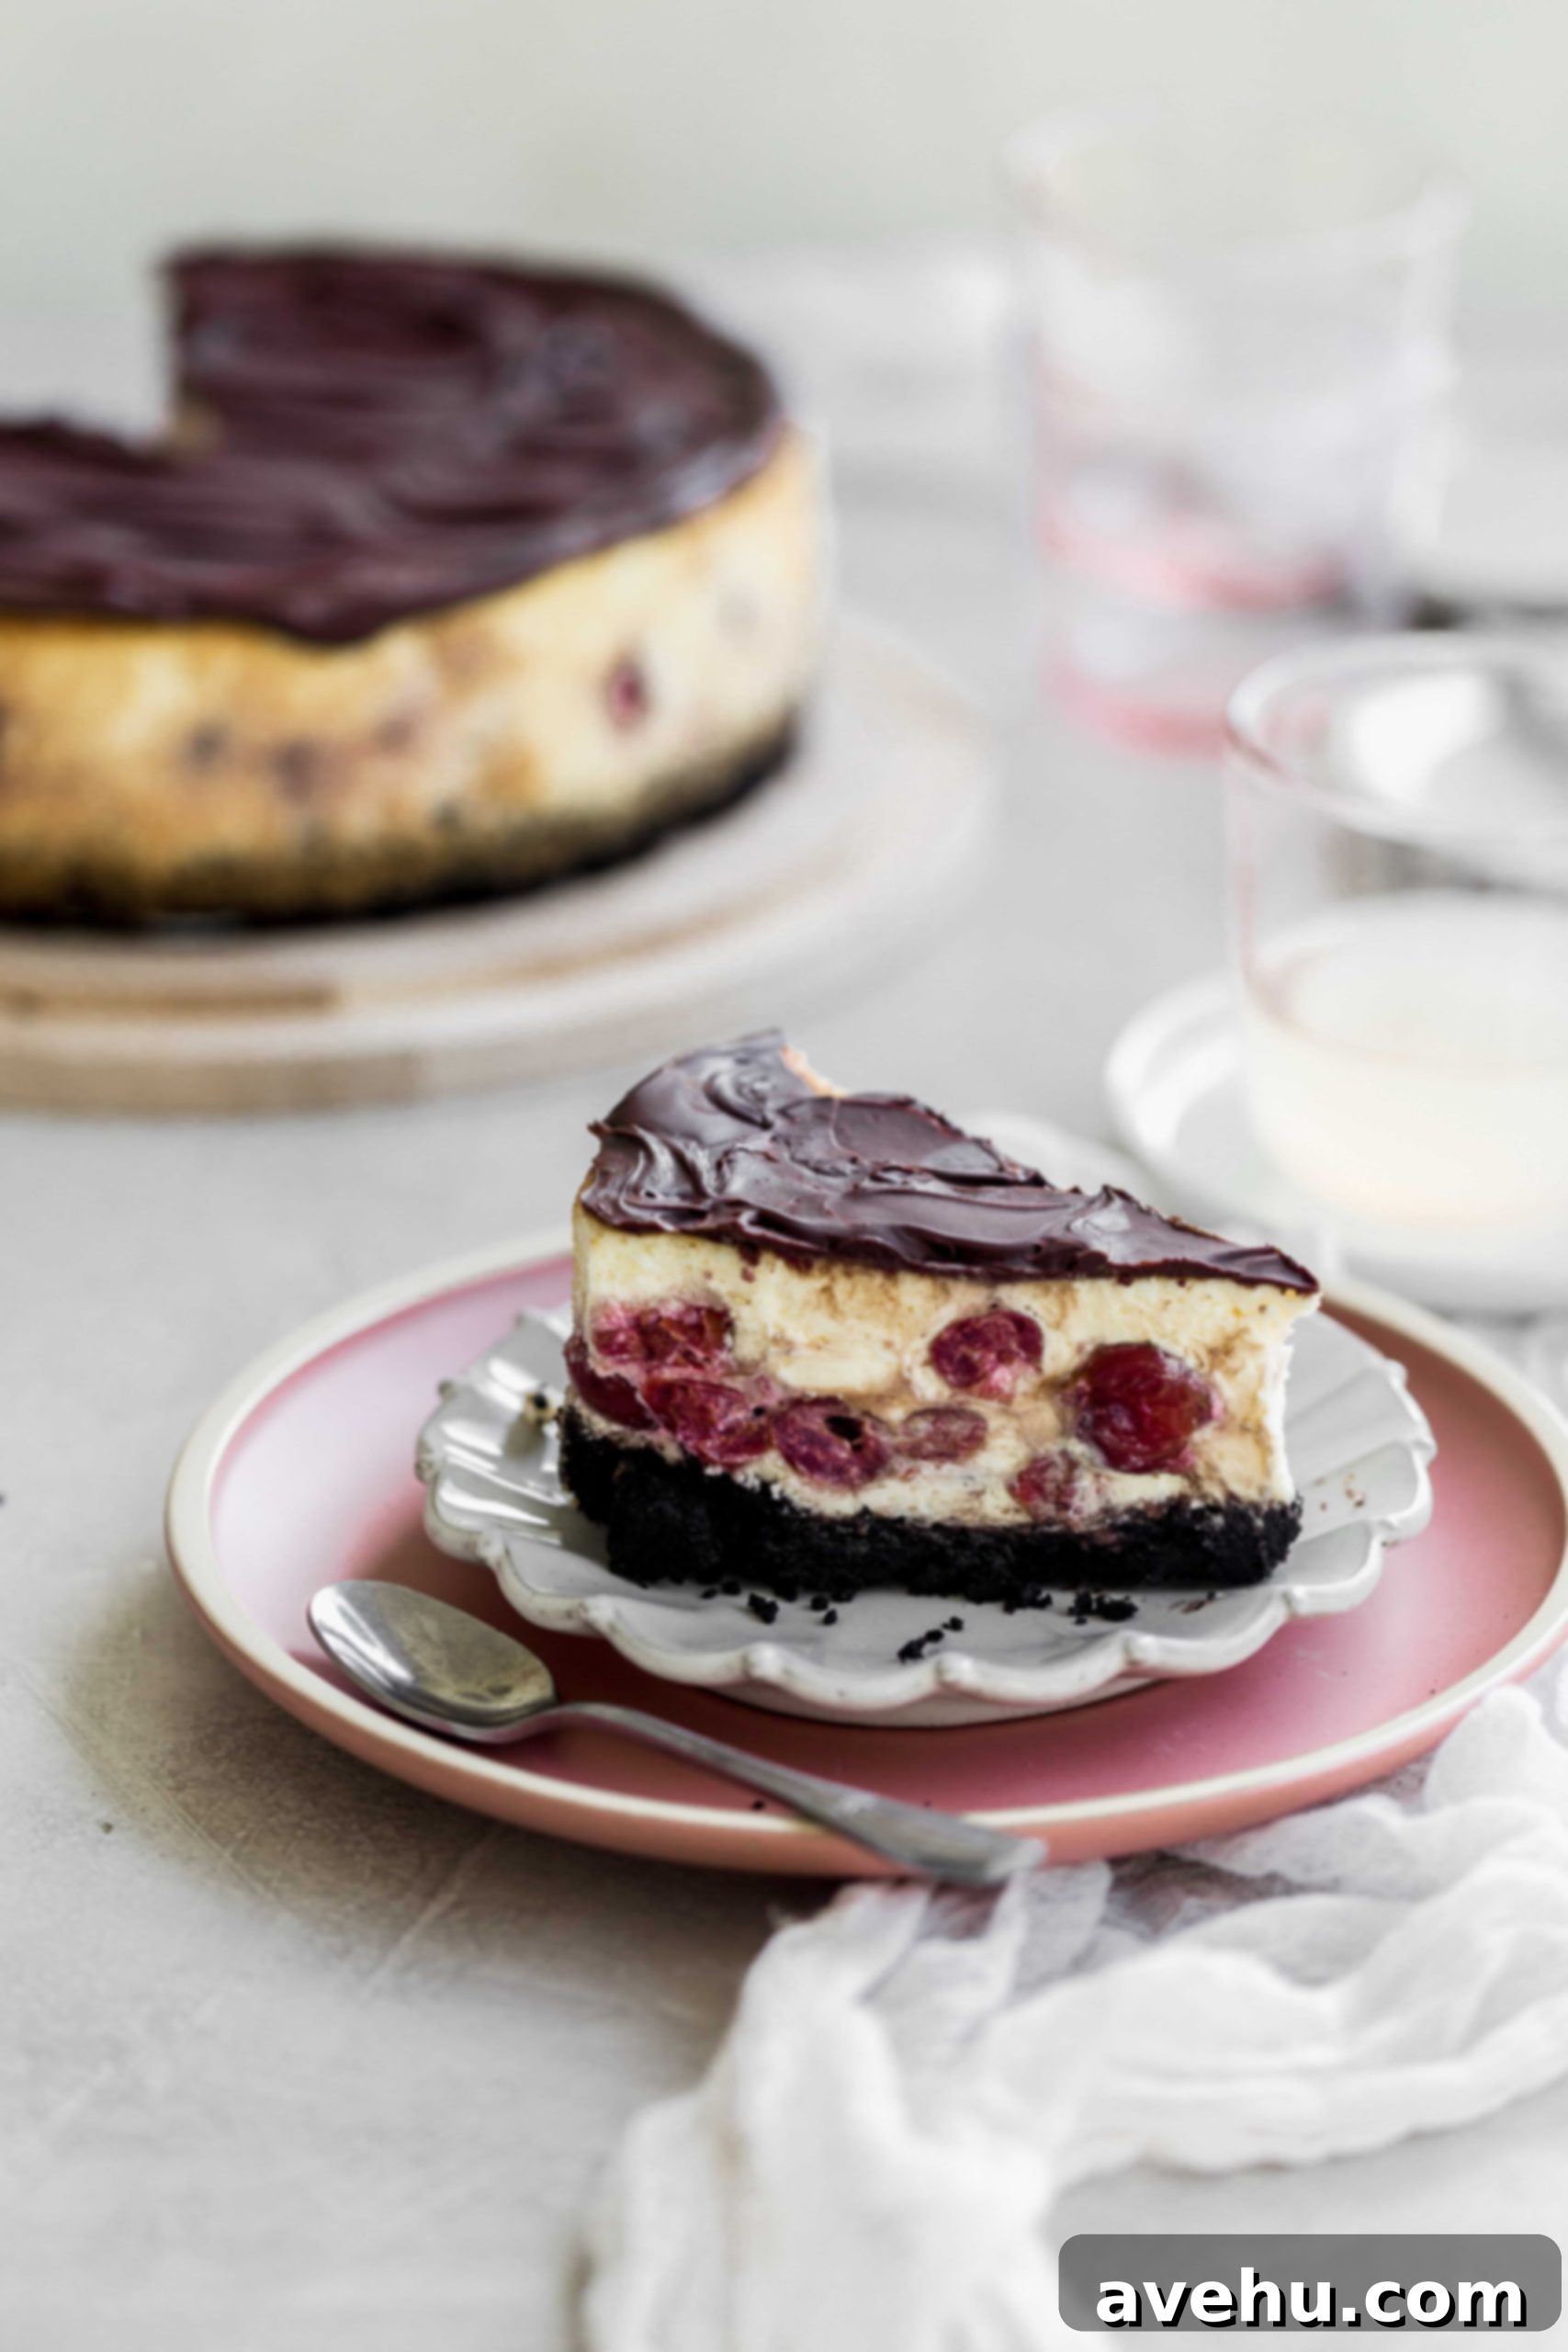
Prepare to be enchanted by this utterly decadent chocolate cherry cheesecake recipe. It’s a symphony of textures and flavors, starting with a deeply satisfying chocolate cookie crust that provides a delightful crunch. This foundation cradles a lusciously creamy cheesecake filling, generously studded with vibrant, tart red cherries. And just when you think it couldn’t get any better, the entire masterpiece is crowned with a smooth, rich layer of melted chocolate. This isn’t just any baked cheesecake; it’s a swoon-worthy dessert designed to impress, and with my simple cheesecake water bath hack, you’ll achieve a perfectly smooth, crack-free top every single time.

Creating an exceptional cheesecake doesn’t have to be daunting. As a trained pastry chef, I can attest that cheesecake is one of my favorite desserts to craft, offering endless possibilities for creative flavor combinations. This particular recipe takes a classic to new heights by featuring a rich chocolate cookie crust and an additional layer of melted chocolate on top, making this an extra special treat perfect for any celebration or simply a luxurious indulgence.
If the thought of baking a cheesecake fills you with dread, fear not! I’ve developed a foolproof method and crucial 5 tips for making perfect homemade cheesecake that will banish any worries about cracks or uneven textures. Once you master this delightful dessert, you might find yourself exploring more cheesecake creations like my rich coffee cheesecake, adorable mini cheesecake bites, or convenient cheesecake bar recipe!
A key to achieving that signature silky-smooth cheesecake texture is using softened cream cheese. If you’re short on time and need to bring your cream cheese to room temperature quickly, my guide on how to soften cream cheese fast will be incredibly helpful.
Why You’ll Adore This Chocolate Cherry Cheesecake
This recipe is more than just a dessert; it’s a celebration of flavor, especially fitting for occasions like National Cherry Month! What better way to honor the magnificent cherry than by baking it into a show-stopping dessert that everyone will rave about?
But have you truly experienced the magic of cherries and chocolate together? This classic pairing creates a deeply rich and complex flavor profile that is simply irresistible. The bright, juicy tartness of the red cherries cuts through the opulent sweetness of decadent chocolate, creating a perfect balance that tantalizes the taste buds. To maximize this incredible combination, I’ve strategically layered the tangy cherry cheesecake filling between two distinct chocolate elements: a crunchy, robust chocolate cookie crust and a velvety smooth semi-sweet chocolate topping. Every single bite delivers that harmonious blend of fruit and chocolate, making this cheesecake a truly unforgettable experience.
Essential Ingredients for Your Cherry Cheesecake
Gathering your ingredients is the first step to creating this masterpiece. Here’s what you’ll need, along with a brief note on why each element is crucial for the perfect chocolate cherry cheesecake:
- Chocolate sandwich cookies: These form the crunchy, flavorful base of your crust, offering a delightful contrast to the creamy filling.
- Butter: Melted butter binds the cookie crumbs together, creating a sturdy and rich crust.
- Oregon Fruit Red Tart Cherries: These are the star of the filling! Their bright, tangy flavor is essential for balancing the richness of the chocolate and cream cheese. Choosing high-quality canned cherries, like Oregon Fruit, ensures consistent flavor and texture, perfect for baking.
- Cream Cheese: The foundation of any great cheesecake. Always opt for full-fat block cream cheese at room temperature for the creamiest, silkiest filling.
- Granulated Sugar: Provides the necessary sweetness to balance the tartness of the cherries and the tang of the cream cheese.
- Sour Cream: This ingredient adds a crucial tangy depth and helps achieve that characteristic smooth, velvety texture in the cheesecake filling.
- Half & Half: Used to slightly thin out the batter, ensuring a smooth consistency without compromising richness. Whole milk or heavy cream can also be substituted.
- Eggs: Essential binders for the cheesecake, helping it set properly and maintain its structure as it bakes. Ensure they are at room temperature.
- All-Purpose Flour: A small amount of flour acts as a stabilizer, binding the ingredients further and significantly helping to prevent dreaded cracks in your cheesecake.
- Chocolate Chips: These are melted down to create the luscious chocolate topping, adding another layer of rich chocolatey goodness.
Crafting Your Perfect Chocolate Cherry Cheesecake: Step-by-Step Guide
Crafting the Perfect Chocolate Cookie Crust:
- Begin by meticulously preparing your chocolate cookie crust. For the best flavor and texture, separate the chocolate sandwich cookies and discard the cream filling. Crush the cookies thoroughly into fine crumbs using either a rolling pin within a sturdy plastic bag or by pulsing them in your food processor. The finer the crumbs, the more cohesive your crust will be.
- Once your crumbs are ready, pour melted butter over them and mix until every crumb is moistened, resembling wet sand. This butter acts as the binding agent, ensuring your crust holds together beautifully. Press this mixture firmly and evenly into the bottom and slightly up the sides of a greased springform pan. A flat-bottomed measuring cup can be incredibly useful for achieving a compact and uniform crust. Bake this crust for about 8-10 minutes. You’ll know it’s perfectly baked when a wonderfully rich chocolate aroma fills your kitchen and the crust appears firm.
- Allow the baked crust to cool completely on the counter while you prepare the decadent cheesecake filling. This step is crucial to prevent the warm crust from prematurely melting the filling.
Preparing the Silky Cream Cheese and Cherry Filling:
- In the bowl of a stand mixer fitted with the paddle attachment (or using a hand mixer), combine your room temperature cream cheese, sour cream, granulated sugar, and half & half. Mix on low-medium speed until the mixture is incredibly smooth and free of large lumps. The key here is not to overmix, as too much air can lead to cracks.
- Once smooth, add the eggs one at a time, mixing gently for just a few seconds after each addition until incorporated. Overmixing eggs can also introduce too much air.
- Finally, add the vanilla extract for a hint of warmth and the all-purpose flour, which acts as a stabilizer to help prevent cracks during baking. Continue mixing on low speed until the batter is mostly smooth, about 1 minute. It’s perfectly normal and acceptable to have a few tiny lumps; you simply want to avoid any large, unmixed clumps of cream cheese.
Infusing the Cherries into Your Cheesecake:
- You’ll need two 14.5 oz cans of high-quality Oregon Fruit Red Tart Cherries for this recipe. Carefully open the cans, drain the cherries thoroughly, and then dry them as best as you can with paper towels. Removing excess moisture is important to prevent a watery cheesecake.
- Pour half of your prepared cheesecake batter into the springform pan, spreading it evenly over the cooled chocolate crust.
- Artfully arrange half of the drained and dried cherries over this first layer of batter. Then, gently pour the remaining cheesecake batter over the cherries, ensuring they are mostly covered.
- For an even distribution of cherries in every slice, carefully drop the remaining cherries onto the top layer of batter. Using your finger, gently poke them down slightly so they are just submerged beneath the surface. This ensures you get a burst of tart cherry flavor in every delicious mouthful!
Baking the Cheesecake to Perfection: My No-Crack Water Bath Hack!
This is the step that often intimidates home bakers, primarily due to the traditional water bath method. While effective, a full water bath can be cumbersome and messy.
I am here to tell you right now: if you embrace my simple cheesecake water bath hack, you will be making crack-free cheesecakes with confidence time and time again! This method provides the benefits of a humid baking environment without the fuss of wrapping your pan.
To execute this incredibly easy hack, simply place a 9×13-inch baking pan filled with about one inch of hot water on the bottom rack of your preheated oven. Then, place your cheesecake, nestled in its springform pan, directly on the top rack. Bake at 350°F (175°C) for 45-55 minutes. The cheesecake is perfectly done when the edges appear slightly golden and set, but there is still a slight, gentle jiggle in the very center when you lightly tap the pan. This slight jiggle is key; it indicates the cheesecake is cooked through but not overbaked. The center will continue to firm up beautifully as it chills in the refrigerator.
Cooling for a Flawless Finish:
Proper cooling is just as vital as proper baking when it comes to preventing cracks. Once your cheesecake is baked to perfection with that desirable slight jiggle, turn off your oven. Crucially, open the oven door just a crack (about 2-3 inches). Leave the cheesecake inside the gradually cooling oven for at least one hour. This slow, controlled cooling prevents a drastic temperature change, which is a common culprit for cheesecake cracks. After this initial cooling period, remove the cheesecake from the oven and let it finish cooling completely on your kitchen counter at room temperature. Finally, for optimal setting and flavor development, transfer the cheesecake to the fridge and allow it to chill overnight, or for a minimum of 4 hours.
Combining the water bath hack with this gradual cooling technique is your ultimate secret weapon against cheesecake cracks, guaranteeing a beautifully smooth surface every time.
Decorating Your Masterpiece: The Chocolate Topping
Once your cheesecake has thoroughly chilled and set in the refrigerator, it’s time for the crowning glory: the chocolate topping. Carefully remove the cheesecake from the fridge and gently wipe away any condensation that may have formed on the top surface. Melt 1 cup of chocolate chips using your preferred method (microwave in short bursts or a double boiler). Allow the melted chocolate to cool for about 5 minutes. This slight cooling period is important, as very hot chocolate can melt the surface of the cheesecake.
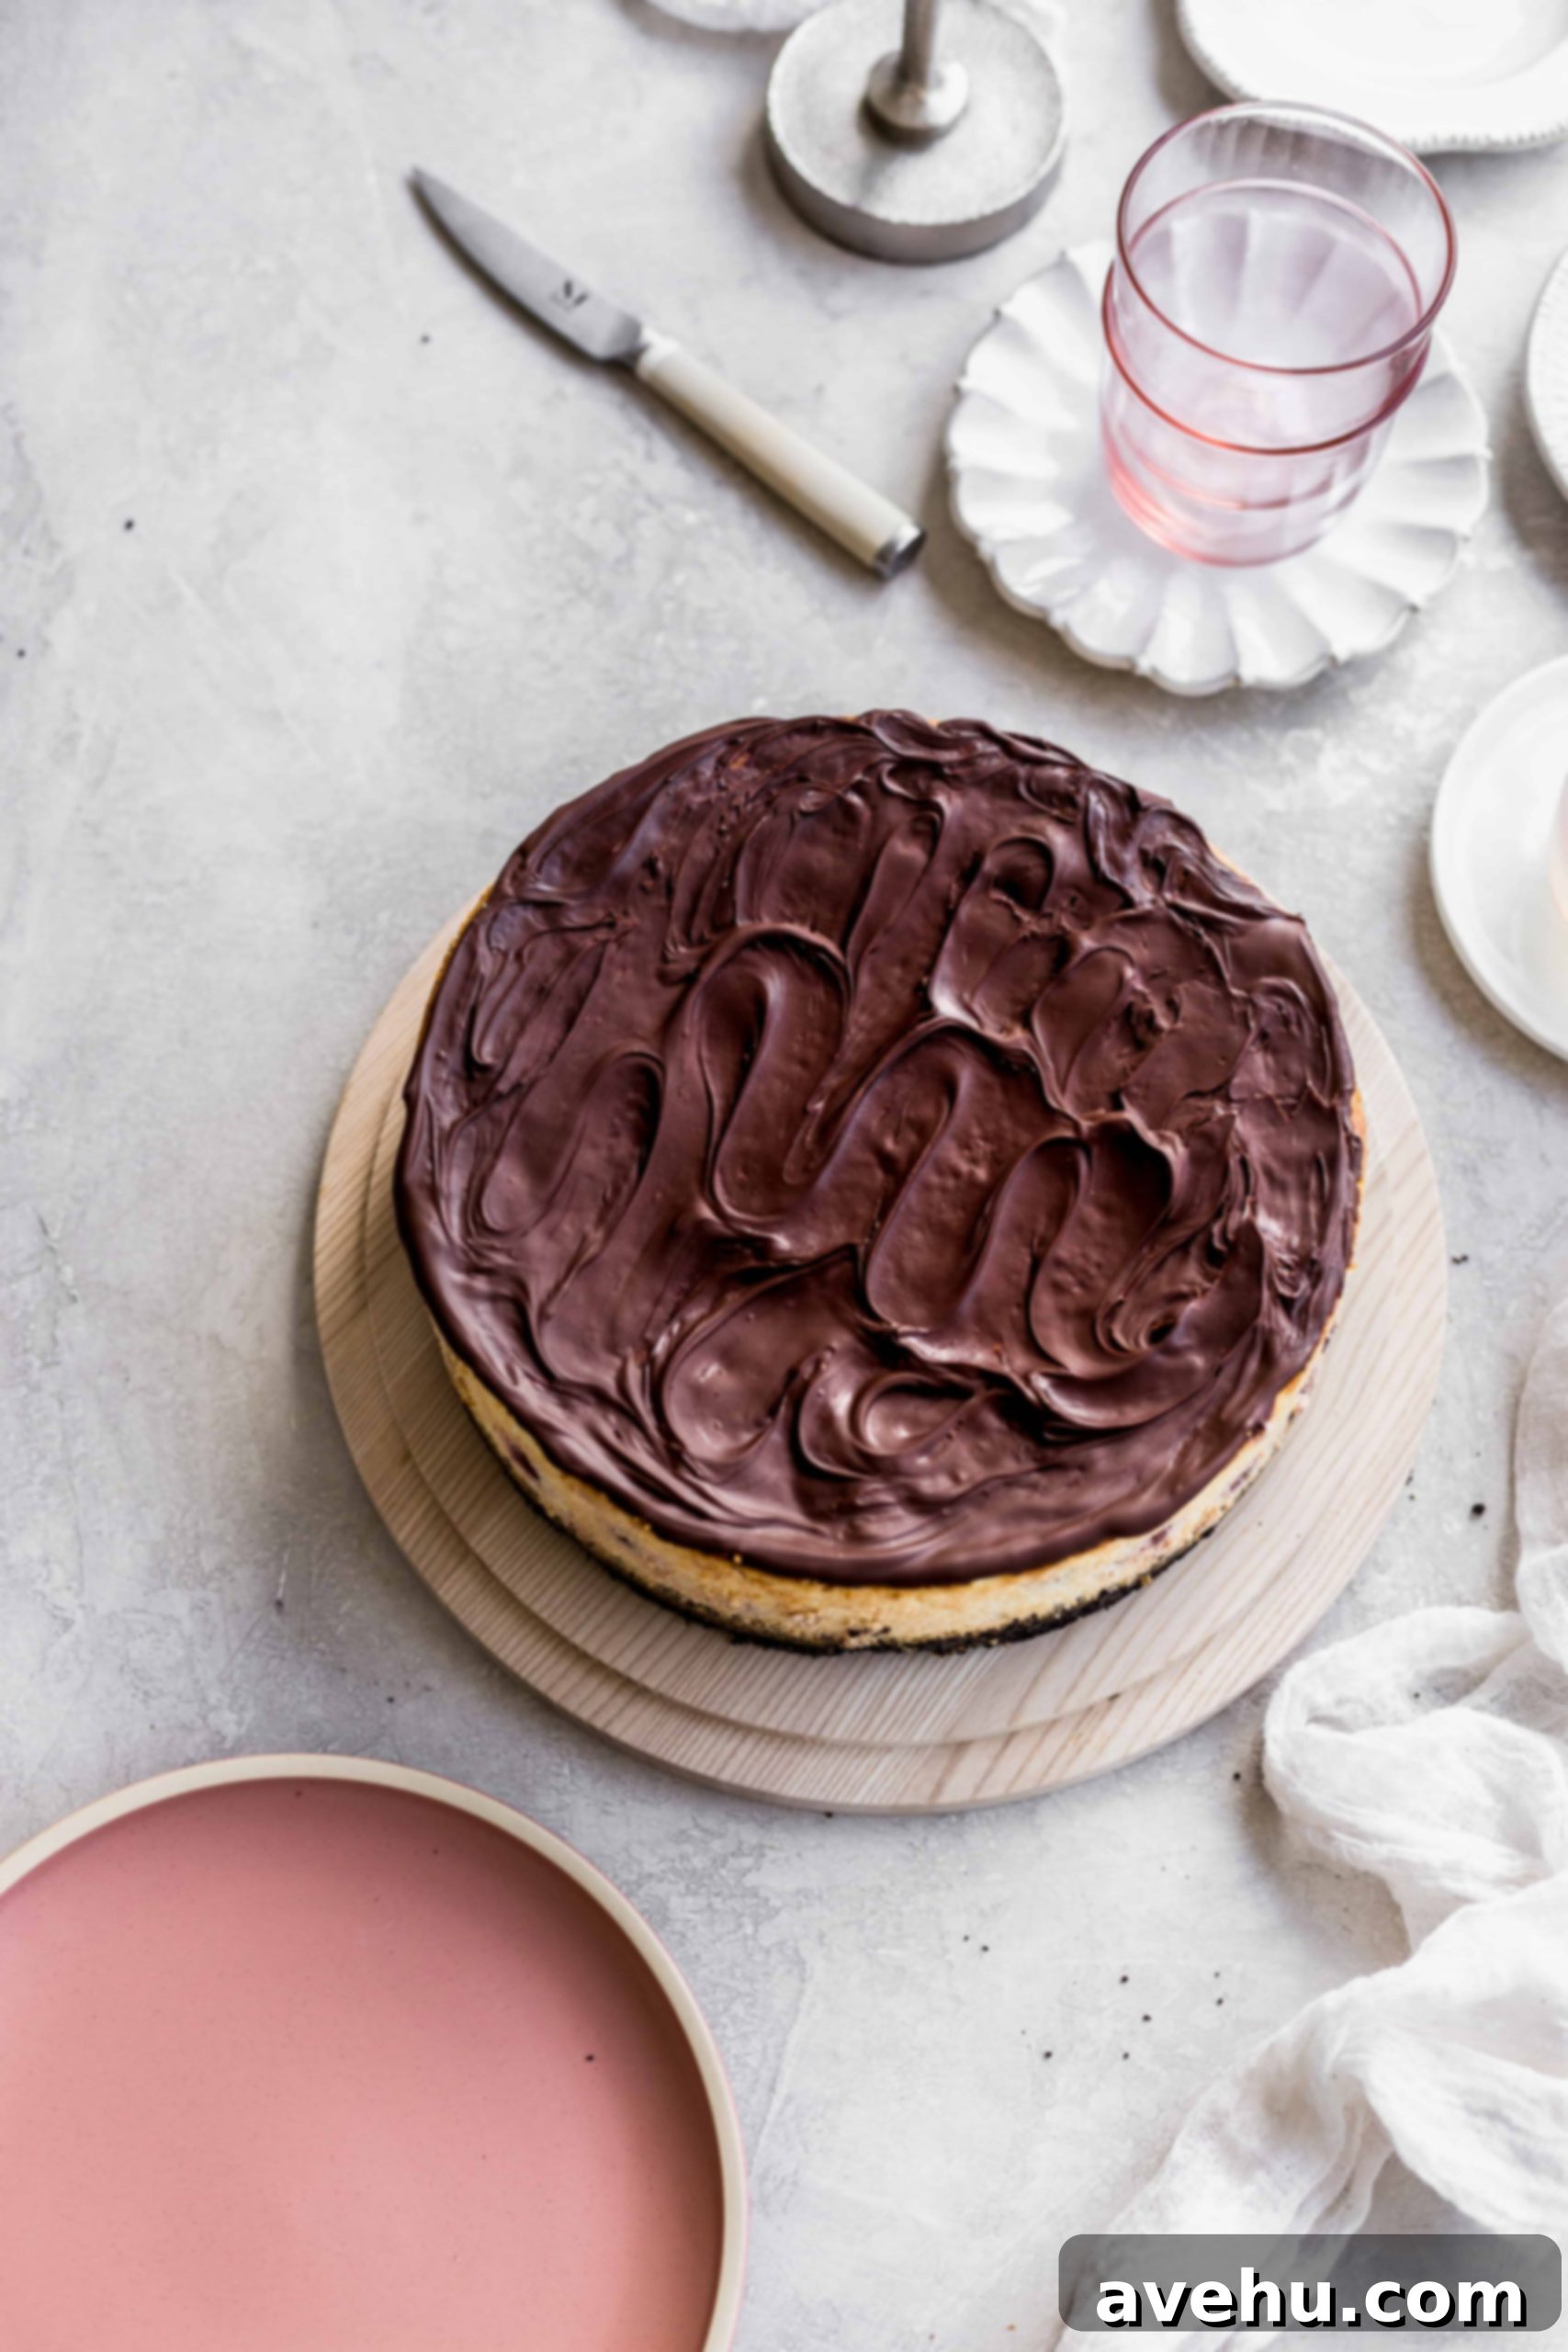
Then, pour the slightly cooled, melted chocolate directly onto the top of the cheesecake. Work quickly and efficiently to smooth it out evenly across the surface. You must act fast, as the warm chocolate will begin to firm up very rapidly when it comes into contact with the cold cheesecake! You can create beautiful swirls or leave it perfectly smooth, depending on your aesthetic preference. For an extra touch, consider sprinkling some reserved chocolate cookie crumbs or fresh cherries on top before the chocolate fully sets.

Storage Guidelines for Freshness
This chocolate cherry cheesecake stores wonderfully. Keep it covered tightly in the refrigerator for up to 7 days. Ensure it’s well-wrapped to prevent it from absorbing odors from other foods. For longer storage, this cheesecake freezes beautifully! You can freeze it either before applying the chocolate topping or after. If freezing with the topping, ensure the chocolate is completely set before wrapping. To freeze, wrap the entire cheesecake (or individual slices) tightly in plastic wrap, then an additional layer of aluminum foil. It can be stored in the freezer for up to 2-3 months. Thaw frozen cheesecake overnight in the refrigerator before serving for the best texture.
Generous Yield
This impressive recipe makes a substantial 9-10-inch large cheesecake, designed to feed a crowd. Depending on how generously you slice it, it can comfortably serve anywhere from 12 to 18 people. It’s the perfect dessert for parties, family gatherings, or holiday feasts!
The Best Cherries for an Unforgettable Cheesecake
The quality of your cherries significantly impacts the overall flavor of your cheesecake. What I particularly appreciate about Oregon Fruit’s red tart cherries is their unwavering commitment to quality and consistency. They are packed fresh, ensuring that every can delivers an amazing, vibrant flavor that truly shines through in your baking.
Beyond their exceptional taste, Oregon Fruit cherries are a fantastic choice for their wholesome qualities. They contain just two ingredients: cherries and water, with no added sugars or artificial preservatives. This means you’re getting pure fruit goodness. Furthermore, they are verified NON-GMO products, and their cans feature a Non-BPA lining, reflecting a dedication to health and environmental consciousness. With so much goodness packed into one can, they are consistently my top choice for canned fruit in all my baking endeavors.
Pro Recipe Tips for Cheesecake Success:
- Room Temperature Ingredients are Non-Negotiable: This is arguably the most important tip. Ensure all your refrigerated ingredients (cream cheese, sour cream, eggs, half & half) are at true room temperature. Cold ingredients don’t emulsify well, leading to a lumpy batter and the need for excessive mixing, which introduces too much air and can cause cracks. Plan ahead by taking them out 1-2 hours before you start baking.
- Achieve Clean Slices with a Hot Knife: For perfectly neat slices that look professional, dip a large, sharp knife into hot water, wipe it clean and dry, and then make your cut. Wipe the knife clean again and repeat this process before each subsequent slice. This prevents the cheesecake from sticking to the knife and creating messy edges.
- Transform into Cheesecake Bars: This versatile recipe can easily be adapted into cheesecake bars. Instead of a springform pan, simply press the chocolate cookie crust into a 9×13-inch baking pan and follow the remaining steps. Adjust baking time slightly if needed, then cool, chill, and slice into convenient squares.
- Ingredient Substitutions: While half & half is recommended for its balanced richness, you can substitute it with an equal amount of heavy cream for an even richer cheesecake, or whole milk for a slightly lighter texture, without significantly impacting the final result.
Choosing the Best Cream Cheese for Your Cheesecake
The type of cream cheese you use can make a noticeable difference in the texture and flavor of your cheesecake. I personally recommend using high-quality full-fat block cream cheese brands such as Philadelphia Cream Cheese or Trader Joe’s Cream Cheese. While I don’t have a strong preference between these two, the critical advice is to always buy cream cheese in block form, not in a tub. Block cream cheese typically has a firmer consistency and less added water or stabilizers, which is ideal for baking and ensures a denser, creamier, and more consistent cheesecake. It’s also significantly easier and more accurate to measure for baking recipes.
More Irresistible Cheesecake Recipes:
- Red Velvet Cheesecake Cupcakes
- Salted Caramel Cheesecake

Creamy Cherry Cheesecake with Chocolate Crust
Prep Time: 15 mins
Cook Time: 55 mins
Chill Time: 4 hrs
Total Time: 5 hrs 10 mins
Servings: 12 people
This chocolate cherry cheesecake recipe is oh-so delicious. It starts with a chocolate cookie crust, then is filled with a creamy cheesecake filling with plenty of tart red cherries. Then, the whole thing is topped with another layer of chocolate! Talk about a swoon-worthy baked cheesecake. I also divulge my cheesecake water bath hack to avoid cracking!
Pin Recipe
Review Recipe
Save Recipe
Ingredients
For the chocolate crust:
- 1 14 oz package chocolate sandwich cookies, (or 3 cups, separated and filling discarded, pulsed or smashed into crumbs)
- 1/2 cup butter, (melted)
For the cherry cheesecake filling:
- 4 8 oz. cream cheese, (room temperature)
- 1 cup granulated sugar
- 1 cup sour cream, (room temperature)
- 1/2 cup half & half, (room temperature)
- 4 large eggs, (room temperature)
- 2 teaspoons vanilla extract
- 1/3 cups all-purpose flour
- 2 14 oz cans Oregon Fruit Red Tart Cherries, (drained and dried well)
For the chocolate topping:
- 1 cup chocolate chips, (melted)
Instructions
For the crust:
- Preheat your oven to 375°F (190°C) and place the cookie crumbs in a medium-sized bowl.
- Add the melted butter and stir to combine thoroughly. The mixture should resemble wet sand and hold its shape when squeezed. If not, add a little more melted butter.
- Spray a 9-inch springform pan with baking spray and firmly press the cookie crumbs into the bottom and slightly up the sides. Use the bottom of a measuring cup to help press it down hard and evenly for a compact crust.
- Bake for 8-10 minutes until a delightful aroma fills your kitchen and the crust feels firm. Let it cool completely on the counter.
For the filling:
- Lower your oven temperature to 350°F (175°C).
- In the bowl of a stand mixer fitted with the paddle attachment (or using a hand mixer), add the room temperature cream cheese, sour cream, and granulated sugar. Mix on low-medium speed until smooth. Then, add 1 egg at a time, mixing for a few seconds in between additions until just combined.
- Stop the mixer and scrape down the sides and bottom of the bowl to ensure everything is well-incorporated. Restart the mixer on low speed and add in the half & half and vanilla extract. Slowly add in the all-purpose flour, then increase your speed to medium and mix for 2-3 minutes until the batter is mostly smooth. Scrape down the sides and bottom again if needed.
- Pour half of the cheesecake batter into the cooled springform pan over the chocolate crust. Evenly distribute half of the drained and dried cherries on top of this layer. Then, carefully pour the remaining batter into the pan. Sprinkle the top with the rest of the cherries and gently press them down with your finger so they are just submerged under the top layer of batter, ensuring cherries in every bite!
- For the crack-free water bath hack, fill a 9×13-inch baking pan with about 1 inch of hot water and place it on the bottom rack of your oven.
- Place the cheesecake on the upper rack of the oven.
- Bake for 45-55 minutes. The cheesecake is done when the edges are slightly golden and have started to pull away from the sides of the pan, but the center still has a slight, delicate jiggle. This jiggly center will set as it cools.
- Turn the oven off and prop the oven door open a little bit (about 2-3 inches). Leave the cheesecake inside the cooling oven for one hour to cool gradually, then remove it to finish cooling completely on the counter at room temperature.
- Chill the cheesecake in the refrigerator for at least 4 hours, or ideally overnight, to allow it to fully set. Once chilled, gently pour and smooth the melted chocolate topping over the surface.
Notes
Make sure you dry the cherries well after draining them to prevent any excess moisture from affecting the cheesecake’s texture.
You can reserve some of the chocolate cookie crumbs to sprinkle on top as a garnish once the chocolate topping is set, adding extra visual appeal and crunch.
For the richest flavor and creamiest texture, I always use full-fat dairy products. However, you can substitute lower-fat cream cheese and sour cream if preferred, though the texture might be slightly different. Whole fat milk can also be used in place of half & half.
Nutrition Information
Serving: 1 slice, Calories: 580kcal, Carbohydrates: 63g, Protein: 8g, Fat: 34g, Saturated Fat: 18g, Cholesterol: 122mg, Sodium: 372mg, Potassium: 263mg, Fiber: 2g, Sugar: 47g, Vitamin A: 909IU, Vitamin C: 3mg, Calcium: 100mg, Iron: 4mg
Course: Dessert
Author: Sam Adler
Cuisine: American
Did you make this recipe? Please leave a star rating and review in the form below. I read them all and appreciate your feedback!
