Irresistible Apricot Bars with Buttery Oatmeal Crumble: Your Go-To Easy Dessert Recipe
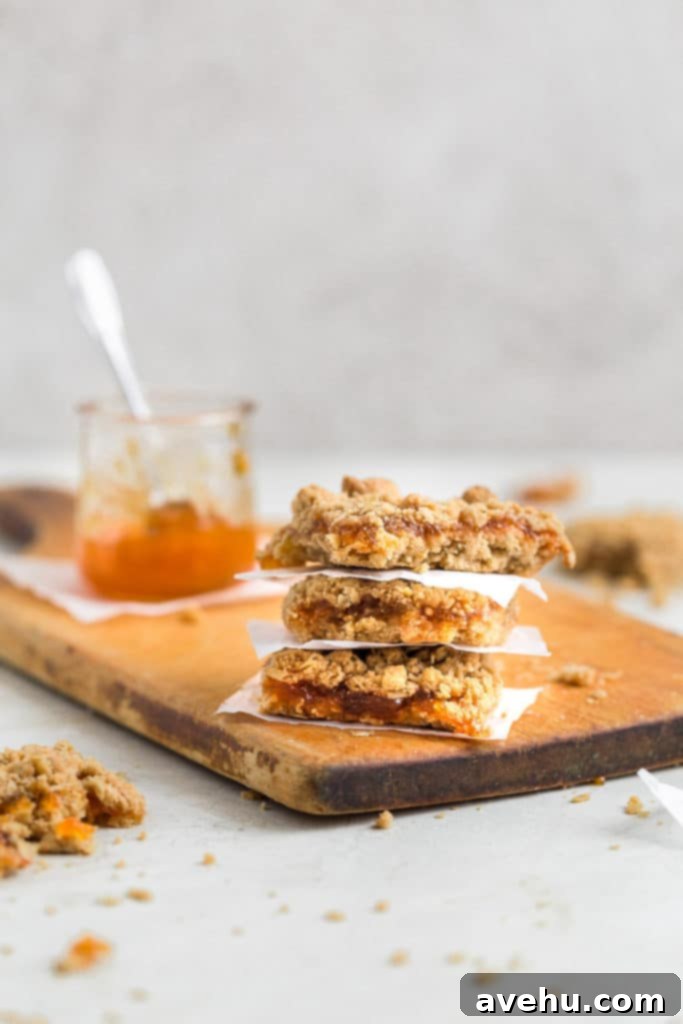
Imagine a dessert that comes together in mere minutes, uses staple ingredients you likely already have on hand, and delivers a burst of buttery, sweet, and tangy flavor in every bite. That’s exactly what these incredible apricot bars offer! They’re delightfully simple to prepare, unbelievably delicious, and have earned the stamp of approval from even the pickiest eaters. Whether you’re a seasoned baker or just starting out, this recipe promises a rewarding experience with minimal fuss, making it the perfect treat for any occasion, or simply a delightful snack for yourself.

Let’s be honest, who doesn’t have that forgotten jar of apricot jam or preserves tucked away at the back of their fridge or pantry? It’s a common occurrence – you buy it with the best intentions, perhaps for toast or a specific recipe, and then it simply… lingers. Well, consider that lingering jar a blessing in disguise! This recipe transforms that unassuming jar of fruity goodness into a star ingredient, saving it from obscurity and turning it into a vibrant, sweet filling for these spectacular bars. It’s the ultimate solution for utilizing those forgotten ingredients and preventing food waste, all while creating something truly memorable.
What truly elevates this recipe is its unparalleled convenience. In today’s fast-paced world, finding time for elaborate baking projects can be a challenge. These apricot bars are designed for the time-strapped individual who craves a homemade dessert without the lengthy process. Forget about waiting for butter to soften to room temperature; this recipe embraces cold butter, streamlining your prep time significantly. Furthermore, the dough comes together effortlessly in just one bowl, minimizing cleanup and maximizing your enjoyment. It’s a simple, straightforward approach to baking that yields impressive results every time.
While the dough preparation is a breeze in a single bowl, you will need a separate small bowl to combine the apricot jam and a touch of vanilla extract. Trust us, this extra step is entirely worth it. The addition of vanilla isn’t just a minor detail; it’s a game-changer. Vanilla extract imparts a subtle yet profound warmth and depth to the bright, fruity jam, elevating its natural sweetness and adding a sophisticated layer of flavor that will have everyone asking for your secret ingredient. This small adjustment ensures your apricot filling is anything but ordinary, complementing the buttery oatmeal crust beautifully.
Crafting Your Delicious Apricot Bars: A Step-by-Step Guide
Creating these delightful apricot bars is a straightforward process, designed for efficiency and deliciousness. Follow these simple steps to bring your buttery, fruity vision to life:
- Prepare the Dough Base: Begin by combining the dry ingredients – flour, sugar, baking powder, and cinnamon – in a spacious mixing bowl. Give them a light whisk to ensure they’re well integrated.
- Incorporate the Butter: This is where the magic happens for that perfect crumbly texture. You’ll need to “cut in” cold butter until the mixture resembles coarse cornmeal.
- Add the Oats and Form the Crust: Stir in the old-fashioned oats and salt until a cohesive dough forms. Then, press half of this versatile dough evenly into your prepared baking pan to create the luscious base.
- Layer the Apricot Filling: In a separate small bowl, gently mix your apricot jam or preserves with vanilla extract. Spread this flavorful mixture over the pressed dough layer, ensuring an even coating.
- Create the Crumble Topping: Take the remaining half of your dough and crumble it loosely over the apricot layer. There’s no need to press it down; simply sprinkle it for that signature crumbly topping.
- Bake to Golden Perfection: Place your assembled bars in the preheated oven and bake until the top is beautifully golden brown.
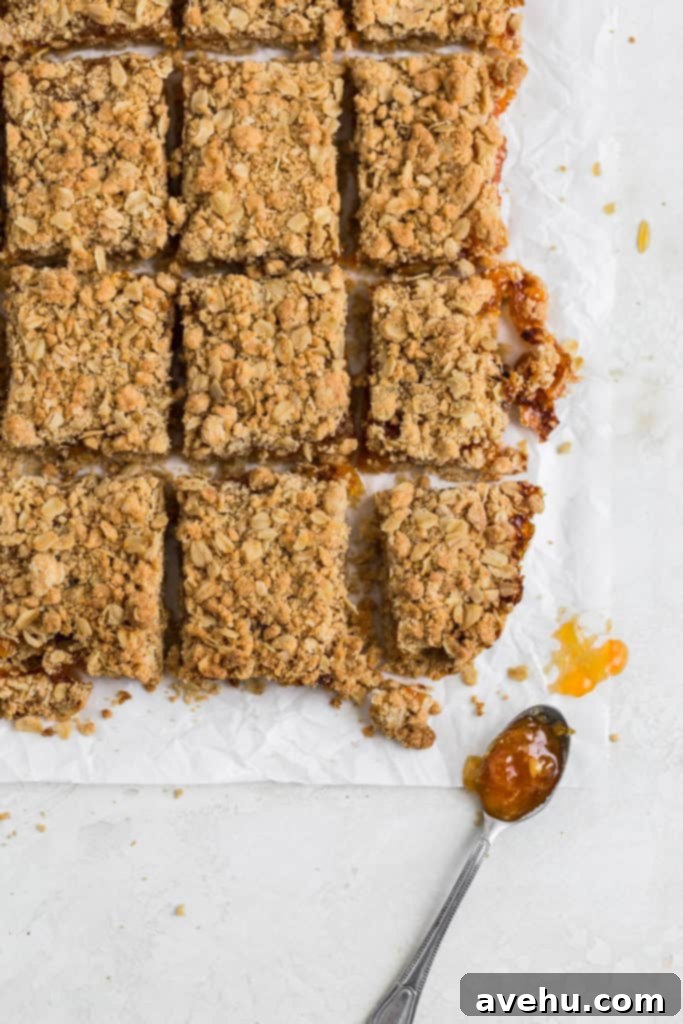
- Cool Completely for Best Results: Patience is key here! Allow the bars to cool fully before attempting to slice them. This crucial step ensures they firm up properly, preventing a messy outcome and delivering perfectly structured, ready-to-enjoy squares.
Unpacking the “Cutting in Butter” Technique
The term “cutting in butter” might sound intimidating to new bakers, but it’s a fundamental technique used in many recipes, particularly those requiring a tender, flaky, or crumbly texture – like pie crusts, biscuits, and, of course, these fantastic apricot bars. Essentially, it means incorporating small, cold pieces of solid butter into a dry flour mixture without melting the butter. The goal is to break the butter into tiny, pea-sized or cornmeal-like bits, distributing them throughout the flour. As these tiny butter pieces melt during baking, they release steam, which creates pockets of air, resulting in that wonderfully flaky and tender texture we all crave.
The easiest way to achieve this is with a pastry cutter, a specialized tool designed to slice through butter and mix it into flour efficiently. However, if you don’t own one, don’t fret! You can absolutely achieve the same results using two knives, a fork, or even your own hands. When using your hands, speed is of the essence to prevent the butter from melting due to your body heat. A helpful tip is to coat the cold butter pieces generously in the flour mixture first. This creates a barrier, allowing you to pinch and rub the butter into smaller bits with your fingertips more effectively without it becoming too warm or greasy. Continue this process until the mixture has a consistency similar to coarse cornmeal, but still feels slightly soft and not pasty. This careful incorporation of cold butter is what gives our apricot bars their delightful melt-in-your-mouth base and crumbly topping.

Beyond Apricot: Creative Filling Ideas and Variations
While these apricot bars are undeniably delicious as they are, one of their most wonderful qualities is their incredible versatility. The buttery oatmeal crust and crumb topping provide a perfect canvas for a multitude of fillings, allowing you to customize them to your taste or whatever you have available in your pantry. Don’t limit yourself to just apricot; let your imagination lead the way! Here are some fantastic suggestions to inspire your next batch:
- Any Kind of Jelly or Jam: This is the most direct swap! Experiment with your favorite fruit spreads – raspberry, strawberry, blueberry, cherry, or even fig jam would be spectacular. Each will bring its unique flavor profile to the bars.
- Berry Compote: For a fresher, more homemade touch, prepare a quick berry compote. Simply simmer fresh or frozen berries with a little sugar and lemon juice until thickened. Blackberry, mixed berry, or even a tart cranberry compote could offer a delightful contrast to the sweet crust.
- Nut Butters: For a richer, more substantial bar, consider using your favorite nut butter. Peanut butter, almond butter, or cashew butter spread thinly on the crust before adding the crumble would create a wonderfully nutty and satisfying treat. You might even swirl in a bit of jelly for a classic PB&J bar!
- Cookie Butter: For a truly decadent and unique experience, a layer of cookie butter (like Biscoff) would be an absolute dream. Its spiced, caramelized flavor pairs beautifully with the oatmeal crust.
- Lemon Curd: Craving something bright and tangy? A layer of homemade or store-bought lemon curd would transform these into refreshing lemon-oatmeal bars, perfect for spring or summer.
- Apple Butter or Pear Butter: These spiced fruit spreads offer a comforting, autumnal twist. Their thick consistency works perfectly as a filling, reminiscent of apple pie.
- Chocolate Spreads: For the chocolate lovers, a layer of Nutella or another chocolate-hazelnut spread could make these bars an instant hit, especially when paired with a hint of raspberry jam.
Seriously, these apricot bars are so good that after making them twice, I reluctantly shared some with friends. But next time, I’m seriously considering keeping every single one to myself. They’re that addictive! The combination of the rich, buttery crumb, the sweet and tangy apricot filling, and the ease of preparation makes them an absolute winner in every sense.
Tips for Perfect Apricot Bars Every Time
While this recipe is incredibly forgiving, a few expert tips can ensure your apricot bars turn out perfectly golden, firm, and utterly delicious every single time:
- Keep Your Butter Cold: As discussed with the “cutting in” technique, cold butter is non-negotiable for achieving that desirable tender and crumbly crust. If your kitchen is warm, you can even chill your flour mixture for a few minutes before adding the butter.
- Don’t Overmix the Dough: Once the oats are added, mix just until a dough forms. Overmixing can develop the gluten in the flour too much, leading to tough bars instead of tender ones.
- Evenly Press the Base: Ensure the bottom layer of dough is pressed evenly into the pan. This provides a consistent foundation and prevents parts from being too thin or thick, which could affect baking and structure.
- Spread Filling Carefully: When spreading the jam, do so gently to avoid disturbing the bottom crust. A small offset spatula or the back of a spoon works well.
- Crumble, Don’t Press the Topping: The top layer is meant to be a crumble, so resist the urge to press it down. This allows for delightful textural contrast and better browning.
- Baking Time Varies: Ovens can differ, so keep an eye on your bars during the last few minutes of baking. They are done when the edges are golden brown and the filling is bubbly.
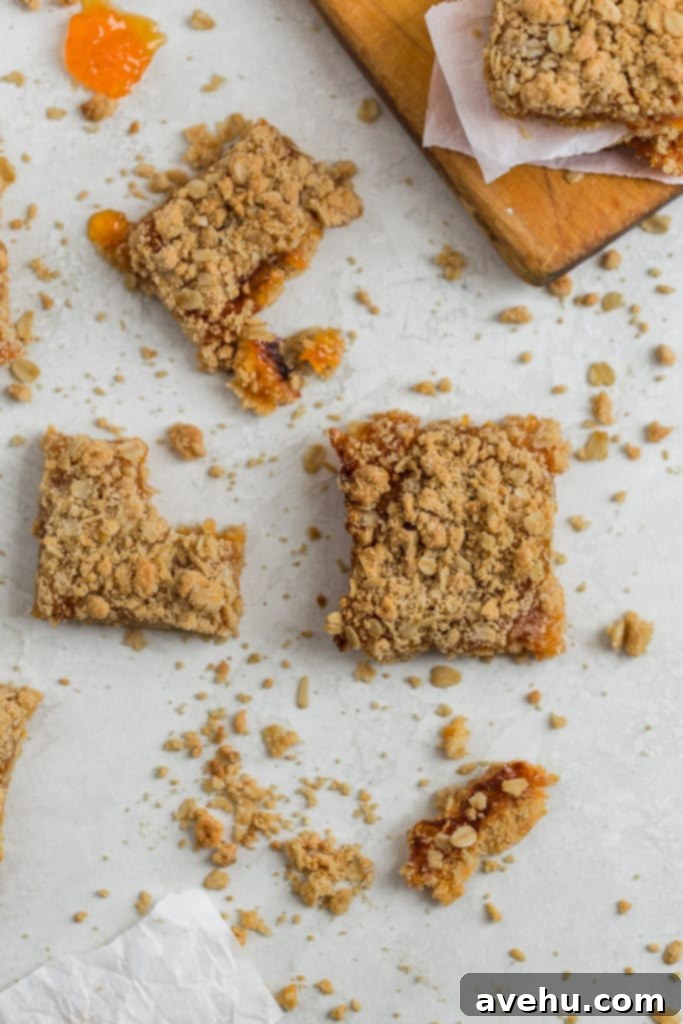
- The Golden Rule of Cooling: This cannot be stressed enough – let the bars cool completely before cutting! This allows the butter to re-solidify and the filling to set, ensuring clean, firm slices. If you cut them while warm, they will be very messy and crumbly. Patience will be rewarded with perfectly structured bars.
Storing Your Delightful Apricot Bars
Proper storage ensures your apricot bars remain fresh and delicious for as long as possible. The good news is, they’re quite robust and don’t require any special treatment!
Once completely cooled, store these bars in an airtight container. They can be kept at room temperature for up to 5 days. For slightly extended freshness, or if your kitchen runs particularly warm, you can also store them in the fridge. However, refrigeration isn’t a necessity for these specific bars, so feel free to keep them on the counter for easy access!
If you’re looking to prepare a batch well in advance or have leftovers you wish to save for later, these bars also freeze beautifully. To freeze, first ensure the bars are completely cooled. Cut them into individual servings, then place them in a single layer on a baking sheet and freeze for about an hour until solid. Once firm, transfer the frozen bars to a freezer-safe airtight container or a heavy-duty freezer bag, separating layers with parchment paper to prevent sticking. They can be stored in the freezer for up to 2-3 months. When ready to enjoy, simply thaw them at room temperature or warm them slightly in the microwave for a few seconds.

Serving Suggestions for Your Apricot Oatmeal Bars
These apricot bars are fantastic on their own, but a few simple additions can elevate them into an even more indulgent dessert. Consider these serving ideas to make them extra special:
- Plain Perfection: Sometimes, simplicity is best. Enjoy them as a quick snack, a delightful breakfast treat, or alongside your morning coffee or afternoon tea.
- With a Dollop of Cream: A generous dollop of freshly whipped cream or a scoop of vanilla bean ice cream adds a creamy, cool contrast to the warm, fruity bars.
- Dusting of Powdered Sugar: For an elegant touch and an extra hint of sweetness, lightly dust the cooled bars with powdered sugar before serving.
- Pair with Hot Beverages: These bars are the perfect accompaniment to a steaming cup of coffee, a comforting mug of tea, or even a glass of cold milk.
Why You’ll Fall in Love with This Apricot Bar Recipe
There are countless reasons why these apricot bars are destined to become a beloved staple in your baking repertoire:
- Effortless to Make: With a one-bowl dough and no need for softened butter, this recipe is designed for maximum flavor with minimal effort. It’s perfect for busy weekdays or impromptu gatherings.
- Utterly Delicious: The combination of the rich, buttery oatmeal crust, the sweet and tangy apricot filling, and the delicate hint of cinnamon creates a truly irresistible flavor profile that appeals to everyone.
- Kid-Friendly & Approved: The simple, sweet flavors and comforting texture make these bars a hit with children, offering a homemade alternative to store-bought snacks.
- Versatile & Adaptable: As explored earlier, the filling can be easily swapped out for almost any jam, preserve, or spread, allowing for endless customization and new flavor adventures.
- Perfect for Any Occasion: Whether you need a quick dessert for a potluck, a delightful gift for friends, a lunchbox treat, or simply a comforting snack for yourself, these bars fit the bill perfectly.
- Uses Pantry Staples: Most of the ingredients are common pantry items, making it easy to whip up a batch whenever a craving strikes without a special trip to the grocery store.
Don’t just take our word for it; give these easy apricot bars a try today. You’ll be amazed at how quickly they come together and how utterly delightful they are to eat. It’s a recipe that delivers on taste, convenience, and pure baking joy!
For some more bar inspirations, check out these delicious recipes:
- Sweet and Tangy Cranberry Cheesecake Bars
- Easy Lemon Bars (3 Ways)
- Comforting Apple Pie Bars
This post contains affiliate links which means if you purchase something, I make a small commission (at no extra cost to you) and that helps me do what I do, so thank you!!


Apricot Bars with Oatmeal Crumble
Pin
Review
SaveSaved!
Ingredients
- 2 cups all purpose flour
- 1/2 cup brown sugar
- 1 tsp baking powder
- 1/ 2 tsp cinnamon
- 1 cup butter, cold and cut into small pieces
- 1.5 cup old fashioned oats
- 1 teaspoon salt
- 1 18 oz jar Apricot preserves
- 1 teaspoon vanilla extract
Instructions
-
Preheat your oven to 350° F and spray a 9×13 inch pan with baking spray.
-
In a medium sized bowl combine the flour, sugar, baking powder, and cinnamon and mix lightly.
-
Now it’s time to cut in the butter which means to break up the butter into tiny pieces and mix it into the dough until the dough resembles a cornmeal like texture. Moving quickly, pinch the butter into the dough trying not to melt it with the heat of your hands. Next, add in the oats and mix until a dough forms.
-
Take half the dough and press it into the bottom of the pan. In a small bowl combine the preserves and vanilla and mix well till combined. Layer the preserve mixture evenly on top of the oat mixture then crumble the rest of the oats on top. You don’t have to press it in, just crumble it on top.
-
Bake for 20- 22 minutes or until golden brown. Let it cool before you slice or it will be a mess!
Notes
You can use any kind of jelly or preserves you want!
